Navigating Events
The Events feature in Outcomes allows you to create, review, and manage events related to your recruitment, admissions, enrollment, or other processes. You can access the Events view by clicking Calendar from the Navigation Menu.
Working with the Events Page
Review the legend below to learn to navigate the Events Page.
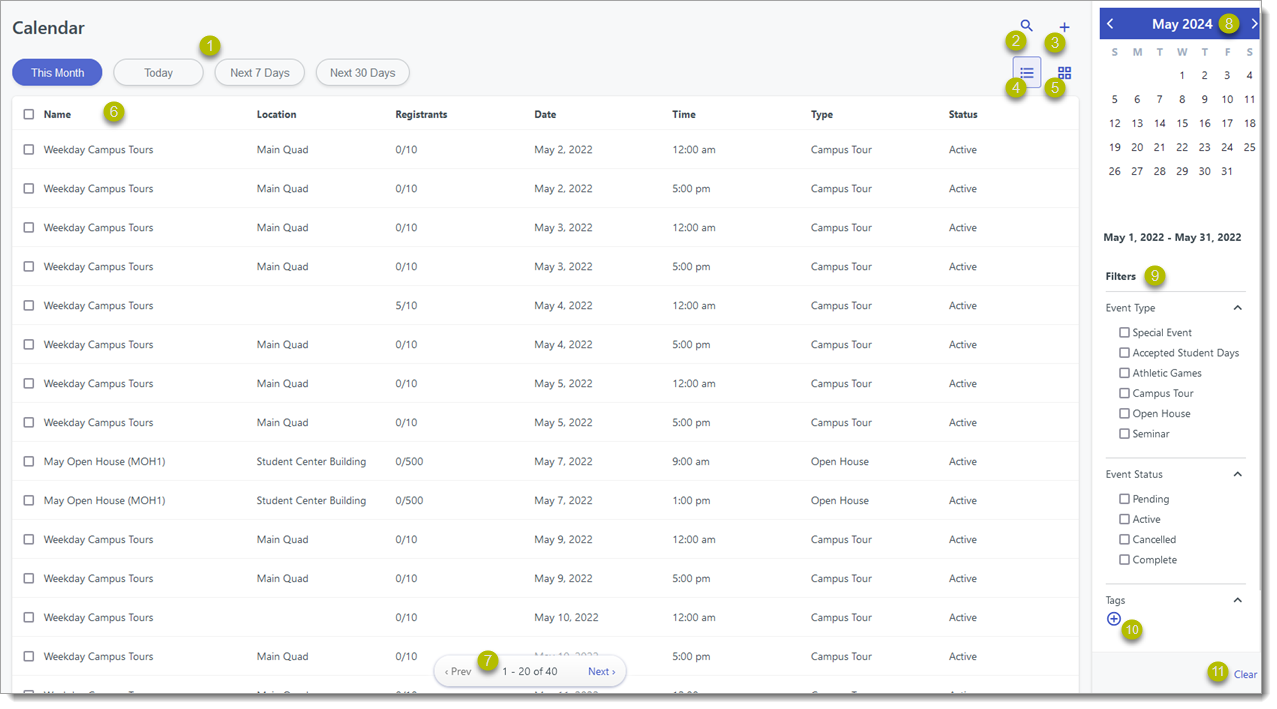
- Use the filters at the top of the page to isolate events from the current month, day, the next seven days, or next 30 days.
- Use the search button to search for events by their name.
- Use the plus sign to create a new event.
- Use the list button to view your events in list view, as seen in the screenshot.
- Use the icons button to view your events as icons. This view displays an icon for each event, rather than a detailed list.
- In the Events Grid, the column headings help to identify details of each event. Click an event to access its details. Use the checkboxes to perform batch actions (i.e., to Copy or Delete events).
- Use the navigation options to view other events in your list.
- The calendar defaults to the current month, and can be used to isolate specific dates. Click on the opening date of your date range, then click on the closing date. The grid reloads, presenting you with the events within your specified timeframe. The calendar also uses a dot to indicate the dates that have existing events.
- Use the filters to isolate events by Event Type, Event Status, or Tags that you have added to them.
- Click the add tag button to include a Tag in your filters.
- Click Clear to remove the filters you've added.
Working with the Event Details Page
Review the legend below to learn how to navigate the Event Details page.
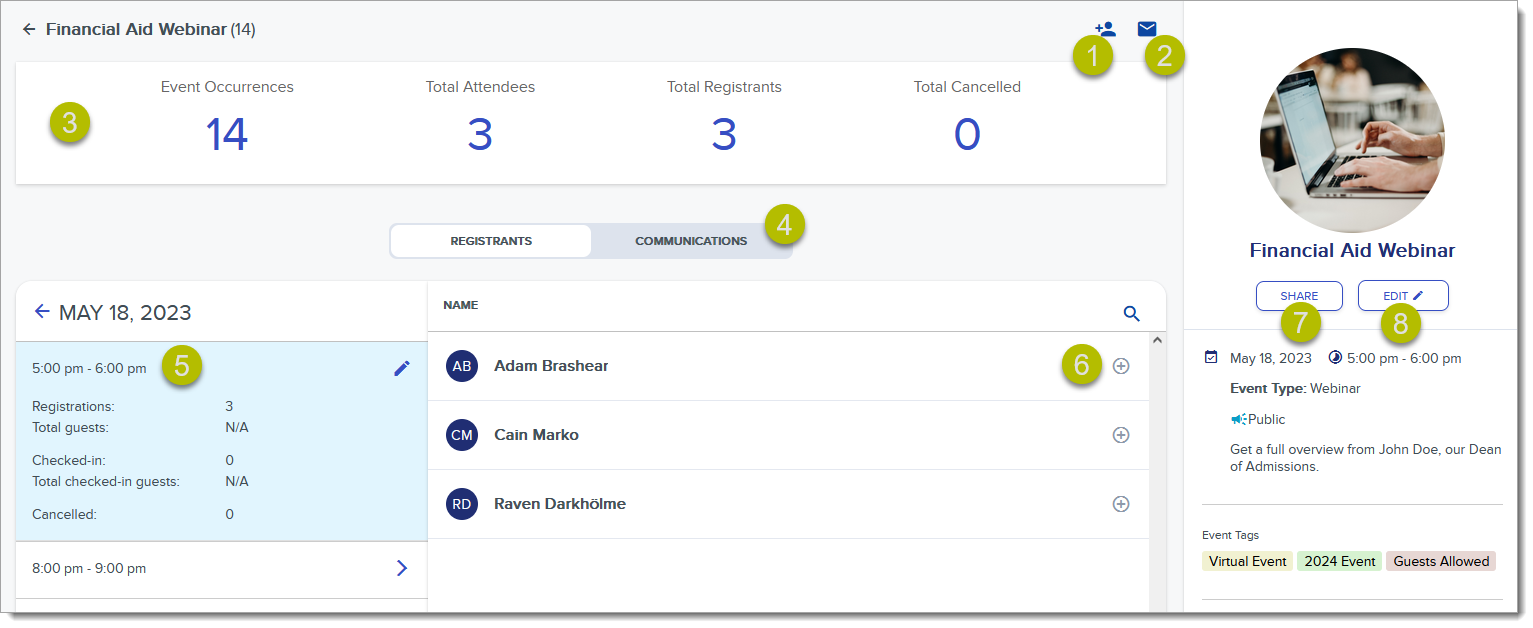
- Click the Add Registrant icon to manually add registrants.
- Click the Email icon to send communications related to this event, including invitations, reminders, and follow-ups.
- Use the registration information to review key information about who will be attending your event.
- Use this slider to switch from the registrants view to the communications view, where you can see all communications related to this event.
- Review registration information related to the selected occurrence of this event.
- Click the plus sign to review the registration, check a registrant in, or unregister them.
- Use the SHARE button to get an event link and QR code that you can use in your event promotion.
- Click EDIT to change any of the event's settings.