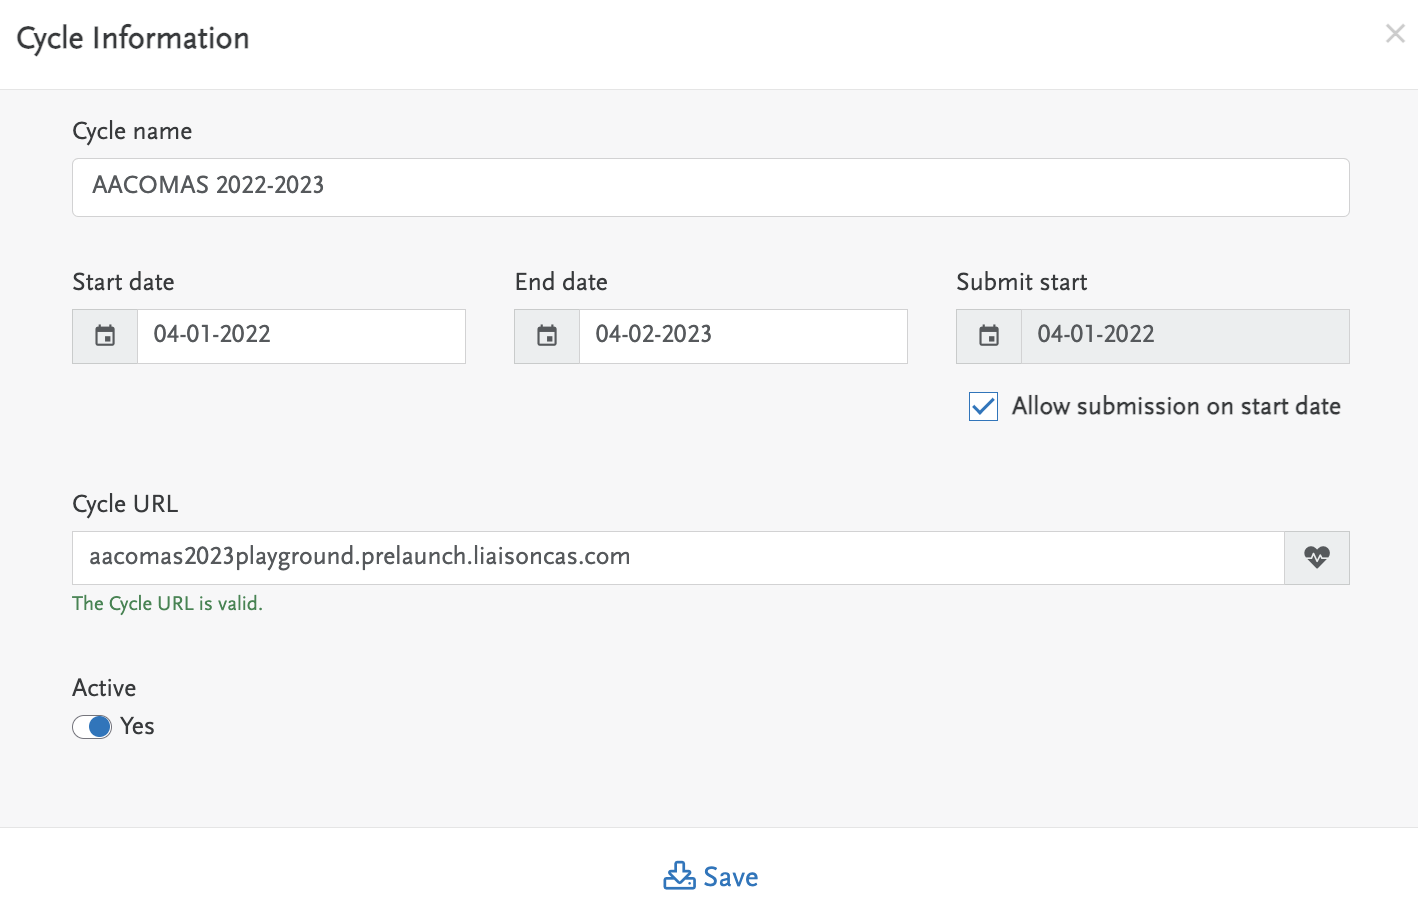
On the AppBuilder Home page, you can edit CAS metadata including:
- Cycle Name
- Cycle Status
- Start Date
- End Date
- Submit Start Date
- Cycle URL
- Make the cycle active or inactive (see active flag rules in Confluence)

To edit the CAS metadata:
- Click the 'edit' pencil shown in the above screen shot
- Edit any of the fields shwon in the below screen shot per the CAS project plan/milestones
- Click 'Save'
Cycle Sections
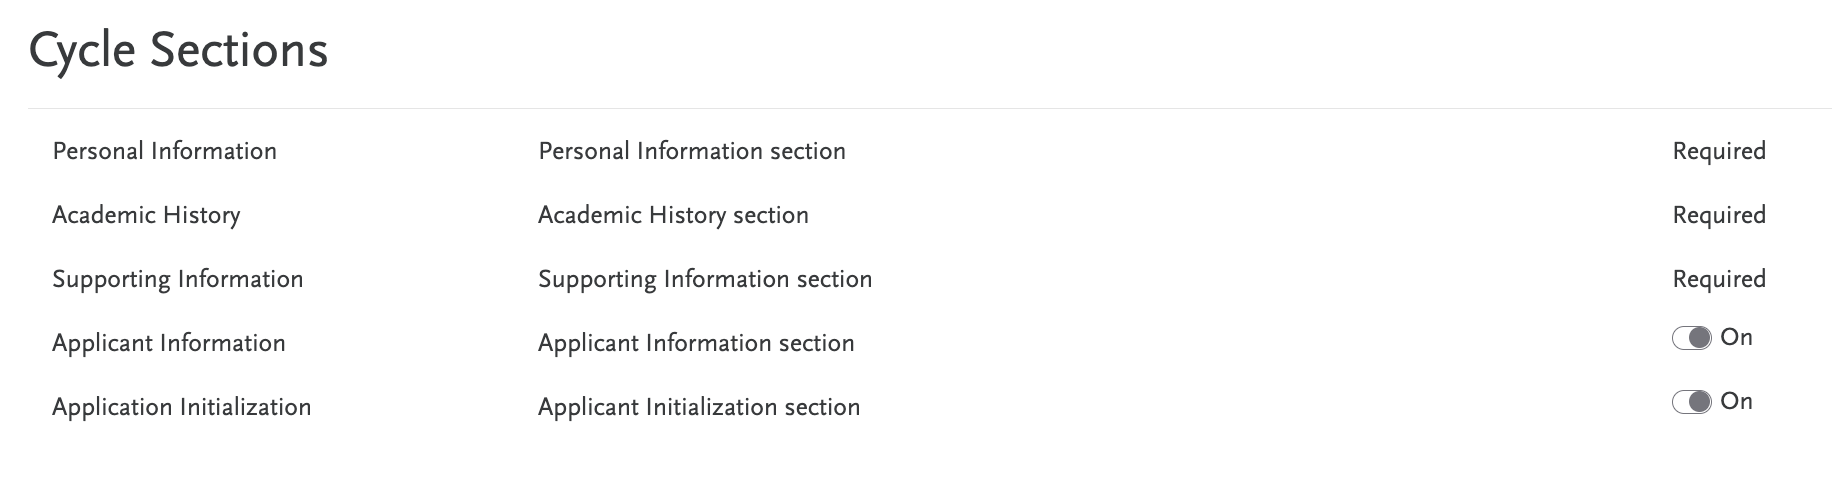
On the home page, you will also be able to activate or deactivate sections of the Applicant Portal including 'Applicant Information', where fee waivers, extended profile, and my data tiles live, and 'Applicant Initialization', where GDPR lives.
Applicant Information & Applicant Initialization
Once you activate Applicant Information, you will see the following. Each tile can be activated by switching the toggle to 'On'.

In addition, you can create a custom tile by clicking 'Add Tile' and naming the tile, then clicking 'Save' as shown below.

Add Custom Question Blocks and Questions
You can also add custom question blocks and questions.
- Click Add Question Block.
- Select Custom from the Block Type.
- Click Next.
- Enter the question block title.
- Enter your instructions. You can use the formatting options to further customize your text.
- Click Save & Add Questions.
- If the CAS uses Extended Profile, select if the question is a Custom Question or a Reference Question (i.e., a question reused from the Extended Profile section). Reference Questions include a disclaimer with a link back to Extended Profile.
- Enter the question text.
- Select if the question is required.
- Under Short Field Name, enter a unique name for the custom question. This name can be used to quickly identify the same question across cycles. You can also alter the question text while keeping the same Short Field Name. This field is limited to a maximum of 150 characters, cannot contain spaces, and must be unique to the CAS and cycle.
- Select the answer type.
- Multiple Choice: questions can be single or multiple answers. Single answer questions appear as drop-downs for applicants to select from. Applicants can choose only one response. Multiple answer questions appear with checkboxes for applicants to select. Applicants can choose one or more responses.
- Select the input type.
- Enter the answer option values. You can choose to enter export codes, where you create codes to pair with the answers. Alternatively, click Browse and upload a CSV file with the answer option values and export codes.
- Click Add Option to add additional options, if necessary. Click the delete icon to remove any answers.
- Essay: questions appear with a text box where applicants can type their response.
- Enter the maximum characters an applicant can enter. This includes spaces and punctuation.
- Either/Or: questions appear with radio buttons where applicants can choose from two responses.
- Enter the answer option values. You can choose to enter export codes, where you create codes to pair with the answers.
- Section Text Box: A block of instructional text that you can insert to provide applicants with additional information. This is not an actual question, so applicants can't enter a response. We recommend only using this option if you have a very specific use case.
- Date: questions appear with a text box where applicants must enter their response in date format via a calendar picker.
- Numeric: questions appear with a text box where applicants must enter a number.
- Enter the maximum number of characters (not including decimal points).
- Select if numbers over 999 will automatically be formatted with proper commas.
- Enter the number of decimal places.
- Click Add Another Question. If finished, click Save & Close.
Once your question block is added, you can:
- Edit it by clicking Edit.
- Add additional questions by clicking Add Question.
- Delete it by clicking Delete. If you delete a question set, all questions under that question set are also deleted.
- Minimize its questions by clicking the arrow.
- Reorder your question sets by dragging and dropping.
Once your question is added, you can:
- Edit it by clicking the edit icon.
- Delete it by clicking the trash icon.
- Reorder your questions within and across custom question blocks by dragging and dropping.
Add Question Rules
Once you add custom question blocks and questions, you can configure Question Rules. Question Rules allow you to define how applicants interact with questions and answer options.
Question Rules can only be configured for custom questions on quadrant subsections (e.g., the Other Information section). You can also only configure them once you have created custom questions.
Question Visibility
The Question Visibility rule allows you to hide specific questions until an applicant enters an answer and/or meets specified conditions. You create Conditions that display additional questions, known as Affected Questions, based on the applicant’s answers.
For example, if “Other” is an answer option for a “How did you hear about us?” question (Condition), you can set a secondary question of “If Other, please explain” (Affected Question) to appear when an applicant selects “Other.”
To configure question visibility:
- Click Question Rules.
- Click Add Rule.
- Select Question Visibility from Rule Type and click Next.
- Select if ANY of these conditions can be true. or ALL of these conditions can be true.
- If you select ANY of these conditions can be true., the Affected Question appears once the applicant meets any of the conditions you specify. All answer options appear as checkboxes.
- If you select ALL of these conditions can be true., the Affected Question appears once the applicant meets all the specified conditions. All answer options appear as radio options, unless the Question is configured as Multiple Choice; if this is the case, those answer options appear as checkboxes.
- Next, select the Condition. This is the question that the applicant must answer to show the Affected Question. All configured questions with selectable answers are available.
- Click Add Condition to add another condition, as needed. If finished, click Next.
- Select your Affected Question or Question Block from the list. This is the Question or Question Block that you want to hide until an applicant answers the Condition. Select as many Affected Questions and Question Blocks as needed.
- Click Next.
- Enter a Question Rule name. There is no character count minimum and special characters are allowed.
- Click Save.
Once saved, the rule appears on the section's Question Rules page. You can:
- Edit the Condition(s) by clicking Edit Rule, then Condition(s).
- Edit the Affected Question(s) by clicking Edit Rule, then Affected Question(s).
- Edit the Question Rule name by clicking Edit Rule, then Name.
- Delete the Question Rule by clicking Delete Rule.
- Minimize the Question Rule by clicking the arrow.
Conditional Answer Options
The Conditional Answer Options rule allows you to display different answer options based on an applicant’s answer to a specific question. In other words, you can "link" questions together so that an applicant’s answer to Question 1 (Trigger Question) changes the answer options that appear for Question 2 (Affected Question).
For example, you want to ask applicants "What is your Major?" (Trigger Question). You want the answer options to the subsequent question, "What is your Concentration?" (Affected Question) to change based on the applicant’s answer to Question 1. So, if an applicant selects "Biology" for the Trigger Question, the options for the Affected Question will be "Microbiology," "Cellular Biology," etc., and if an applicant selects "Chemistry" for the Trigger Question, the options for the Affected Question will be "Inorganic Chemistry," "Organic Chemistry," etc.
To configure conditional answer options:
- Click Question Rules.
- Click Add Rule.
- Select Conditional Answer Options from Rule Type and click Next.
- Select the Trigger Question. This is the question that will be answered first and will change the answer options of the Affected Question.
- Select the Affected Question. This is the question whose answer options will change based on the answer to a separate Trigger Question.
- Click Next.
- Next, create Answer Set Configurations for both the Trigger and Affected Questions. Select the answer option for the Trigger Question on the left that will change the answer options available for the Affected Question on the right.
- Click Add Answer Set to add more answer sets, as needed.
- Click Next.
- Enter a Question Rule name. There is no character count minimum and special characters are allowed.
- Click Save.
Once saved, the rule appears on the section's Question Rules page. You can:
- Edit the Answer Set(s) by clicking Edit Rule, then Answer Sets.
- Delete the Answer Set(s) by clicking Edit Rule, then Answer Sets, and then Delete Answer Set.
- Edit the Question Rule name by clicking Edit Rule, then Name.
- Delete the Question Rule by clicking Delete Rule.
- Minimize the Question Rule by clicking the arrow.
Tile Availability
The Tile Availability rule is only available for the Extended Profile section. This rule allows you to select which sections of the core application (i.e., Personal Information, Academic History, and Supporting Information) display based on an applicant’s response to Extended Profile questions.
To configure tile availability options:
- Click Question Rules.
- Click Add Rule.
- Select Tile Availability from Rule Type and click Next.
- Select if you want the tile availability to occur based on any or all of the conditions you establish.
- In the first drop-down, select the question.
- In the second drop-down, select the answer that changes the tile availability for the applicant.
- Click Add Condition to add more conditions, as needed.
- Click Next.
- Select if the answers cause the tile to appear or be hidden.
- Select the tiles that are affected.
- Click Next.
- Enter the Question Rule name. There is no character count minimum and special characters are allowed.
- Click Save.
Once saved, the rule appears on the section's Question Rules page. You can:
- Edit the Condition(s) by clicking Edit Rule, then Condition(s).
- Edit the Affected Tile(s) by clicking Edit Rule, then Affected Tile(s).
- Edit the Question Rule name by clicking Edit Rule, then Name.
- Delete the Question Rule by clicking Delete Rule.
- Minimize the Question Rule by clicking the arrow.