Managing Email Templates
Overview
The Marketing view in CSU Transfer Planner allows you to create and track your outreach methods. Using the Marketing tools, you can set up automated, personalized communications to any contact.
The Email Templates subsection is where you can manage prefabricated and custom email templates.
Prefabricated Email Templates
In CSU Transfer Planner, you'll automatically have access to several prefabricated email templates, which you can update as needed. These include:
- TSP Enrolled - Campus Agreement Welcome: this email template can be used for communicating with newly enrolled TSP students.
- TSP Enrolled - Campus Agreement Follow-up: this email template can be used for continued communications with TSP-enrolled students.
Creating a New Email Template
To create an Email Template:
- Open the Marketing view and click Templates from the Navigation Panel.

- On this page, you can view and manage your existing Email Templates. Use the drop-down at the top of the page to switch between active and inactive templates. To create a new template, click the plus sign at the top right.
- On the Create Marketing Email Template page, select an audience. Your selection here impacts where this template will be available to select (i.e., Quick Messages, Campaigns, or Event Messages) and narrows the list of variables you can apply when building the template to those that are compatible with your selected audience.

- Select a design for your Email Template. You can use the Email Designer (recommended) or the Classic HTML Editor.

- From the Email Designer section, select from the following options:
- Educational: starts with a preconfigured template with many design elements already added. This helps you get familiarized with many of the available options when designing your emails. It also allows you to get started quicker with a new template by simply modifying the existing content.
- 2 Column Responsive: starts with a template containing a few elements common in marketing emails. From there, you can add the text, images, links, and other content of your choice. As with other emails created using the Email Designer, the responsive layout of these emails is modified to fit the recipients' screen size.
- Empty Template: starts with a blank slate, allowing you to design your email from the beginning.
- From the Classic HTML Editor section, you can select an option that allows you to create an email template without the advanced options featured in the Email Designer section. You can also select the Custom Template option to design an email without any preconfigured layout, allowing you to add your own HTML content.
Designing Your Email
- After selecting a template type, you can begin configuring your email. At the top of the page, give your template an internal name and subject. The subject is what displays to the recipients of your email.
- Leave the default settings.
- Configure the content of your Email Template. Content Blocks, available from the Content tab on the right, are design elements you can add to your email template. When designing your email template, you can drop Content Blocks into rows. If you selected a preconfigured layout, there are several rows already available for you to modify.
- If you'd like to add an attachment to your Email Template, you can do so while configuring a campaign.
- Use the icon at the top left to switch between Desktop and Mobile view. This helps you predict how your email will appear for recipients using different display sizes.
Working with Rows
- As you build an email template, Content Blocks are organized by Rows. Emails you create using the Email Designer are responsive, meaning they adjust to the recipients' screen size. For this to work best, use multiple rows in your design.
- To add a new row to your template, select the Rows tab from the menu on the left and drag your desired layout into your template.
- Once you've added a row, you can click and hold the drag handle to move it to reorder it.
- Continue adding rows as desired.
- Click a row to add an internal comment to it, save it for use in another template, delete it, or copy it.

Working with Content Blocks
- Once you have one or more rows in your email template, you can drag and drop Content Blocks into them.

- Once a Content Bock is in place, you can click on it to move it, delete it, or copy it.
- When you're done editing the template, click Save Changes.
Working with Images
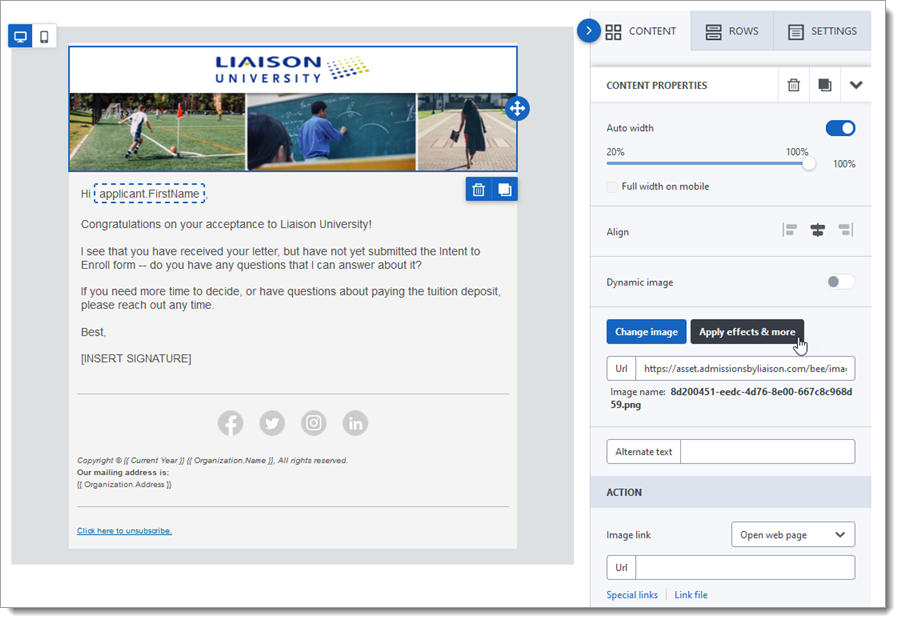
While designing your emails, you have access to an image editor that allows you to crop, rotate, resize, or apply filters and other enhancements to any image.
To add a new image, drag the IMAGE Content Block into your email template. For the best results, select an image that has a file size of 1 MB or less. When you insert an image or select an existing image in your template, you can modify it by clicking Apply effects & more.
If using a logo, we recommend that it be 600 px wide x any height (150 px is the typical logo height). Additionally, consider a student's email settings (e.g., dark mode, etc.) when formatting your logo (e.g., using a white background, etc.).
Working with Videos
Using the Video Content Block, you can easily share your videos. Once you copy and paste the URL of your video from YouTube or Vimeo, the email editor pulls in the cover image for the video, overlays a play icon on top of it, and creates a link to the video content.

Using the options under CONTENT PROPERTIES, you can modify the appearance of the play icon and video block.
When embedding videos, keep in mind:
- Actual videos are not embedded into the email. Instead, the cover image becomes a link to the video's location.
- Videos hosted by Vimeo only work if they are set to Public.
Working with Merge Fields
When creating an Email Template in CSU Transfer Planner, you can add variables, or merge fields. Variables allow you to customize your message, making it unique to each recipient. Among other things, you may add variables to insert data such as:
- Applicant's Name
- Applicant's Program
- Applicant's Standardized Test Information
- Applicant's GPAs
- Applicant's Letters of Recommendation (LOR) Status
To add a variable to your email template:
- Click into a Content Block including text.
- When the text editor menu appears, click Merge Tags.
- Select the variable you want to use. Begin typing in the Search merge tags field to search for specific variables. Note that not all fields are available to use as variables here. To ensure the merge field will work correctly, only use the options listed in this drop-down.

In the example above, selecting the applicant.firstName variable will present the applicant's first name, according to their application, in the email they receive.
Working with Email Responsiveness
The emails you create are responsive, meaning that their layout automatically adjusts to fit the recipients' screen size. To understand how an email will appear to recipients viewing it on a mobile device, use the Desktop/Mobile toggle. 
Working the Classic HTML Editor
Review the legend below to learn about the options available within the Classic HTML Editor.

- Display the template in web view.
- Display the template in tablet view.
- Display the template in smartphone view.
- Configure your header image. Double click to open a window allowing you to browse for an image or drag-and-drop it.
- Preview your template.
- Open full-screen mode to work with more editing options.
- Configure the template using JavaScript.
- Undo your previous action.
- Redo your undone action.
- Clean the image to restart with a blank slate.
- Configure the body of your message.
Adding Variables to the Classic HTML Editor
To add merge fields to your email template, paste the variable inside brackets.

If you know the name of the field you'd like to use as a variable, you can begin typing the field name, activating the Type-Ahead feature. When you start typing a variable, the interface presents you with available options that can complete your variable entry. For example, if you start typing "applicant", you're presented with the applicant category of fields.

After clicking applicant, you're presented with the field options within the applicant category.

Using this method, you can select the fields you'd like to include as variables in your email.
Editing in Full-Screen Mode
In full-screen mode, you can add new sections to your email template by dragging them from the Content Menu on the right and placing them in the email layout area.


- Style Manager: Select one of your existing email template components and click this icon to view the style options associated with this component.
- Trait Manager: Click this icon to work with your selected component's settings.
- Line View Editor: Click this icon to see your components listed line-by-line.
- Content Menu: Click this icon to view the list of available elements to drag into your email template.
Once your template is configured, click Save Changes at the top right.
Testing Email Templates
Once you create a new email template, you should test it to make sure it looks and works as you intended.
Note that testing email templates is only available to certain users in CSU Transfer Planner.
- Using the Navigation Menu, click Marketing.
- Click Quick Messages.
- Click the plus sign in the top right and select Email Message.
- Enter Test for the Internal Message Name field.
- Select Applicant (one per person) for the Audience Type field.
- Select All for the Include field.
- Select Email Address for the Delivery Address field.
- Click Next.
- Select your desired email template.
- Enter your email address in the Test Email Address(es) field.
- Click Next.
- Click the save icon in the top right.
- Click Message at the bottom, which takes you back to the email template.
- Click Send Test to send the email template to yourself.