Exporting Data
Overview
Exports allow you to extract student data for external use or to import it into another system. When creating an export, you use a defined set of filters for your students.
The Export Page
You can export a variety of data points, such as:
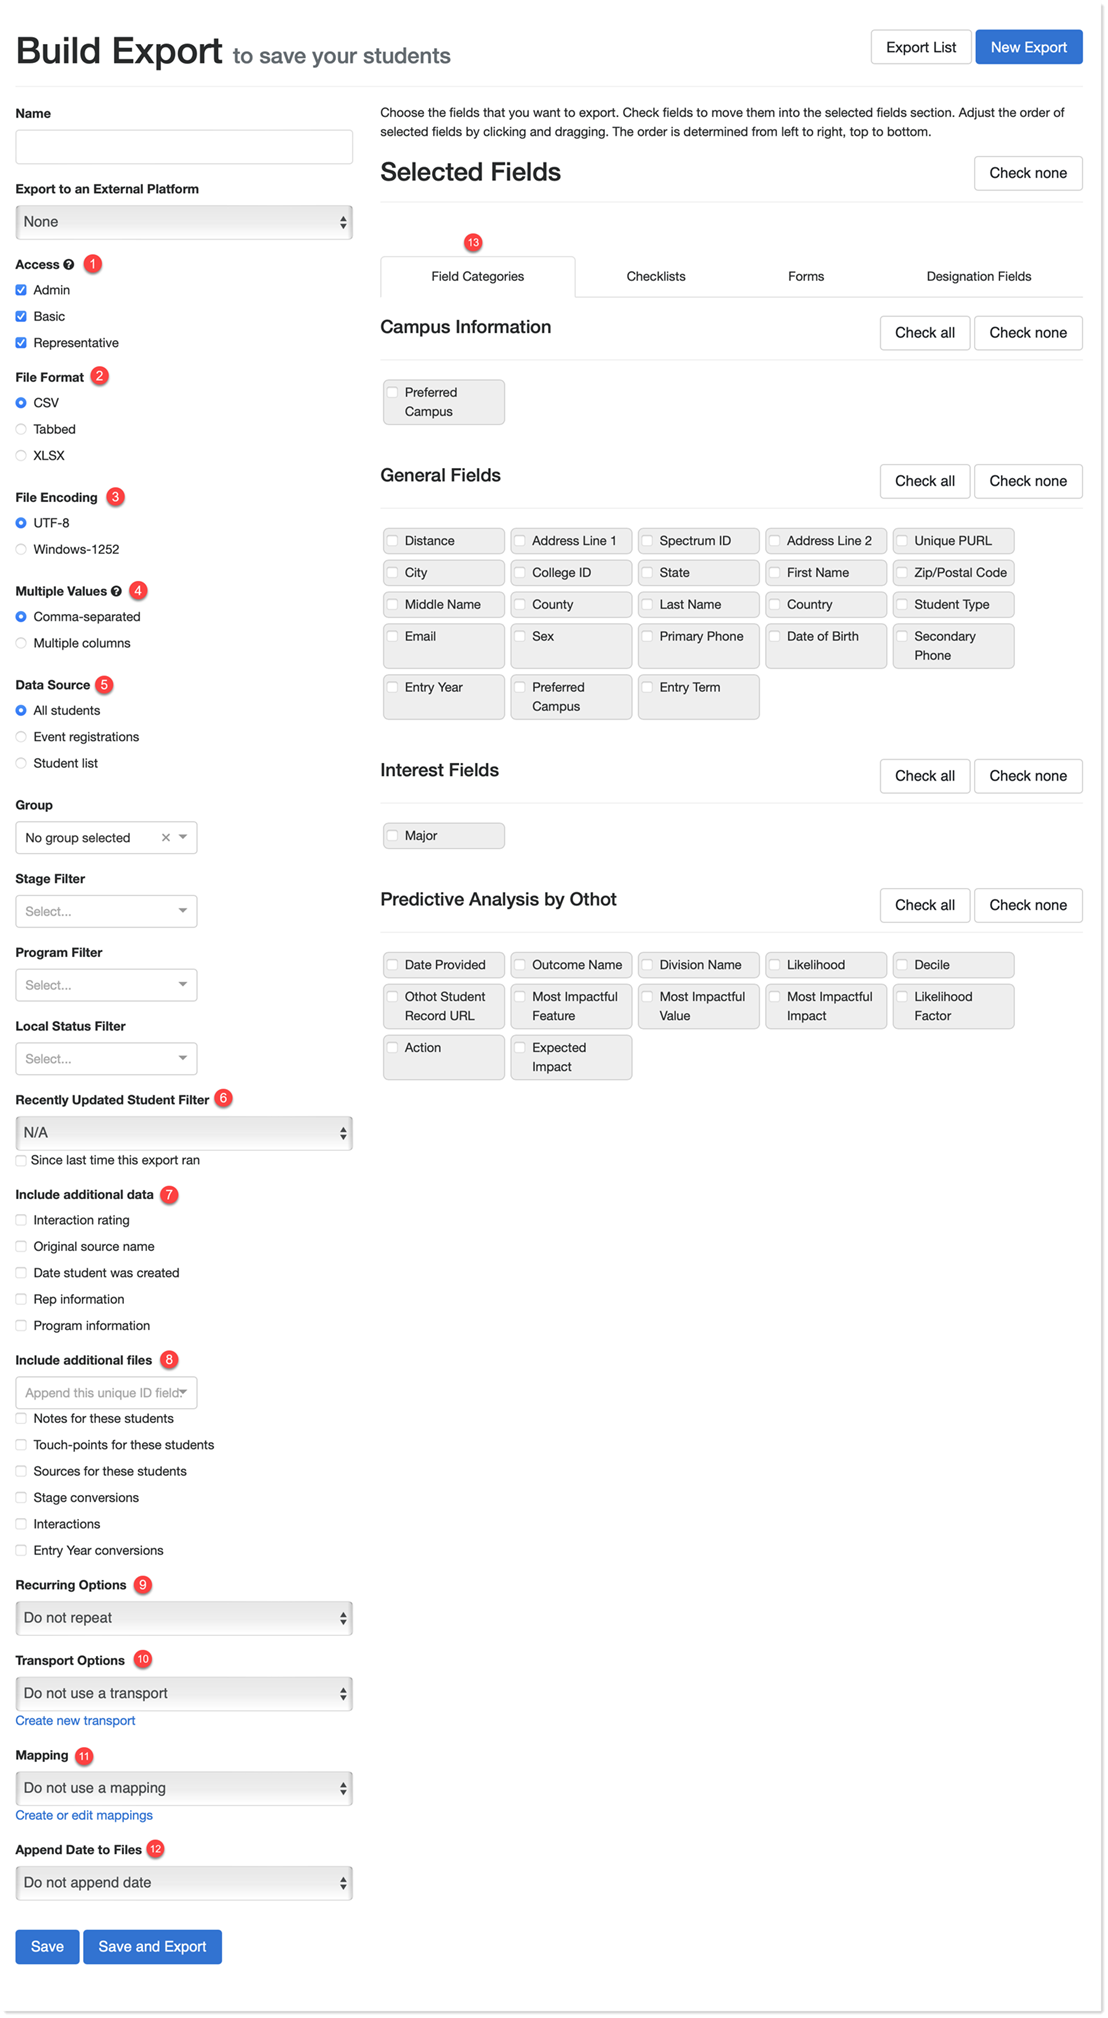
- Access: set who can see the export. Only applies to users who can view exports, not manage them.
- File Format: download the file in the format of your choosing.
- File Encoding: specify how to represent characters when text processing.
- Multiple Values: choose how you want a field with more than one value to display in the spreadsheet .
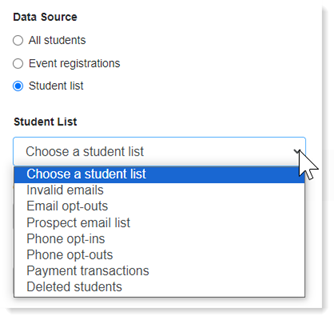
- Data Source: indicate where EMP is pulling the student data from.
- Note: filter options will change based on the data source selected.
- Recently Updated Student Filter: choose the timeframe from when a student record was last updated. The prompt defaults to N/A.
- Include Additional Data: check the box to include any extra data points for each student in the export.
- Include Additional Files: check the box to include any extra information about each student in the export. Use the drop-down to include the student’s unique identifier, such as a college ID or CAS ID.
- Note: this information is exported as a second export file to the standard export file.
- Recurring Options: choose an option from the drop-down on how often the export should reoccur.
- Transport Options: select the option that best suits the automatic data transfer set up.
- Mapping: select any customized fields you mapped.
- Append Date to Files: add the date to the end of the file name after the export (e.g., Daily Export DATE)
- Selected Fields:
- Click the Checklists, Forms, and Designation Fields tabs for additional filter options.
- Fields export in the order they are selected. Click a field to reorder it.
Once the export is saved, it is listed in chronological order with other exports.
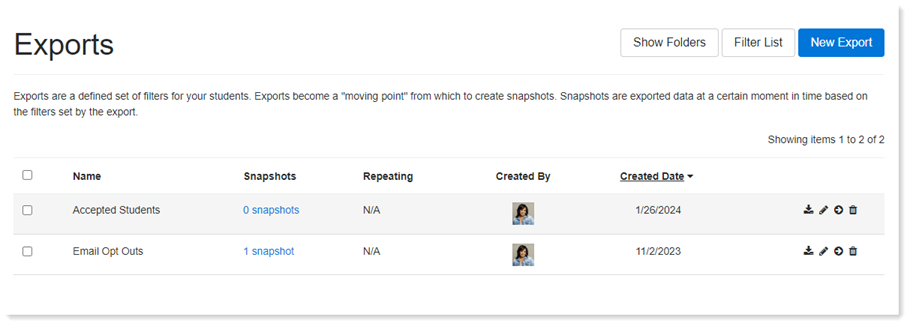
Exports serve as dynamic reference points to generate Snapshots. Snapshots represent exported data captured at a specific moment in time, determined by the applied filters during the export process. To create a snapshot, click the download icon. To view the file, click the snapshot, then the file.
Exporting a Student Group, Event Registration, or Student List
To export these items:
- Click Students in the top navigation bar.
- Select Exports from the drop-down menu.
- Click the New Export button.
- For Group Exports: choose the Group you want to export.
- For Event Registrations Exports: under Data Source, click the Event registrations button, then select your event.
- For Student List Exports: under Data Source, click the Student list button, then select the list.
- Select the data filters you want to apply to the exported Group.
- Select the frequency you want to run the export.
- Choose any data mapping options.
- Click Save and Export to run immediately or Save to run the export at a later time.