Create Schedules in WebAdMIT
For WebAdMIT exports to run automatically and at a scheduled time, follow these steps to configure the SFTP scheduler.
Set Up the SFTP Scheduler for WebAdMIT
Scheduling File Transfers for Exports, Reports, and PDF Manager Templates
- Using the Menu Bar, open the Reports & Exports panel, then click the Export Manager, Report Manager, or PDF Manager.
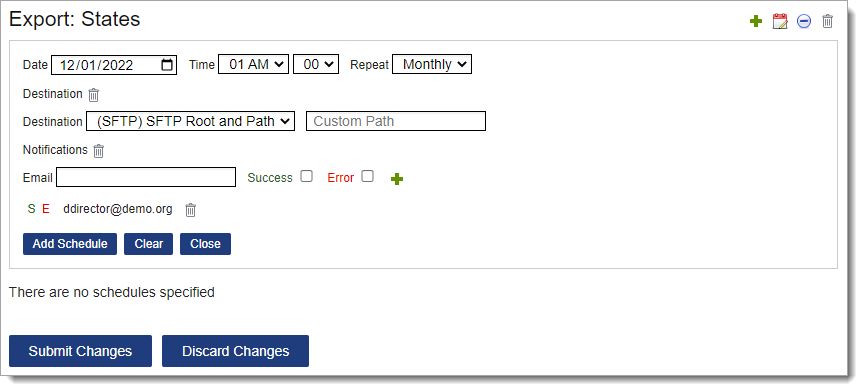
- Click the calendar icon near the template you want to schedule a file transfer for.
- Click the green plus sign to add a new schedule.
- Select the start day, time, and recurrence. Note that:
- The time you select is your local time zone.
- If you create multiple schedules for exports, reports, or PDF Manager templates, schedule the times at least two hours apart. For example, you can have a daily schedule run at 1 AM and a weekly schedule run at 3 AM.
- If you select a schedule to run on the 31st of the month, then the schedule will run on the last day of all months.
- Click the green plus sign to add a destination.
- If you have not created destinations, UI only is automatically selected, and all file transfers will only be sent to the Recent Files page in WebAdMIT.
- If you created destinations, you can select one, and if desired, add an additional default path. If you add a default path on this page, the destination path will not be validated before you save this schedule.
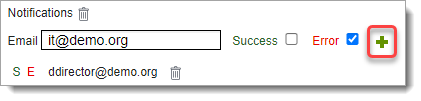
- Click the green plus sign if you want to be notified about your file transfer deliveries. Enter the email addresses you want to be contacted at, and select if you want to be emailed when your file transfer deliveries are successful or if there are errors. Be sure to click the green plus sign after entering these details to save your notification selections.
- Success emails are sent once an export, report, or PDF Manager template is produced and posted to your SFTP site or the Recent Files page (if you select UI only).
- Error emails are sent if the export, reports, or PDF Manager template fails to produce or post to your SFTP site or the Recent Files page. The emails will identify the reason for the failure.
- Click Add Schedule.
- Click Submit Changes.