Setting Up Data Transfers
Selecting a Data Upload Method
There are two methods you can use to upload data for predictions:
- SFTP (Secure File Transfer Protocol). With this option, you send your files to our SFTP site, then we pick them up.
- In-App. With this option, you manually upload files to the DATA page. Once uploaded, it takes us 3–5 business days to process predictions.
SFTP is the preferred, suggested method. While some level of effort is required to set this up, there's little to no future effort involved, as evidenced in this comparison:
|
Criteria |
SFTP |
In-App |
|---|---|---|
|
Setup Effort |
Medium |
Low |
|
Recurring Effort |
None |
High |
|
Automated |
Yes |
No |
|
Othot Data Extract |
Automated |
Manual |
|
Quality |
No Error |
Possible Human Error |
|
Data Benefits |
Up-to-date |
Status |
Formatting and Naming Your Files
Regardless of the data upload option you choose to use, the files must be in .csv format and abide by the IETF RFC 4180 standard. Additionally, we recommend you use the following file naming convention:
|
<customer>_<division>_<hiq>_<file source>_<train/predict>_<date>.csv |
|
<customer> |
Your institution's name. An abbreviation is acceptable (similar to a domain name). |
|
<division> |
Required if there are separate subgroups or instances under the primary customer; this may be excluded if not applicable. |
|
<hiq> |
description of a high impact question (HIQ) and applicable in case multiple HIQs exist now or in the future; an example for the likelihood for enrollment might be <enroll>. |
|
<file source> |
primary description for where the file comes from or what the file contains; might identify a CRM or SIS file or a description of what data is coming from the CRM or SIS. |
|
<train/predict> |
train designation is for historic files with known outcomes that will be used to build a predictive model; predict designation is for current files that will be used to predict on a current or future population. |
|
<date> |
the date the current data file is extracted or delivered from the source application; required for differentiation between expected daily or weekly predict files |
Using the SFTP Method
To set up this method, we'll need to work with a qualified technical contact at your institution. Once you've identified this individual, have them review the following information.
Information You Need
- FTP server properties:
- Host: sftp.othot.com
- IP address: 35.185.25.225
- Port: 22
- FTP server directory structure:
- Data: this directory is where you'll place your files for ingestion into Othot. It's the only directory where you'll have access to write.
- Processed: this directory is where we'll store files (as a backup) that have been ingested into Othot.
- Output: this directory is where we'll place files exported from Othot for your use in other systems.
- Archive: this directory is where additional or ad hoc files (e.g., files for model training) are placed.
- Constants: this directory contains static files that are not delivered with each update but are still necessary to create predictions.
Information We Need
Please send us the following information:
- Admin name.
- Admin email address.
- The frequency or cadence of file delivery (e.g., daily, weekly, other); we recommend daily.
- The time of day – in Coordinated Universal Time (UTC) – files will be uploaded; we recommend overnight.
- Your authentication preference, either SSH or username/password.
- If SSH, provide us with a public key.
- For security purposes, if you select the username/password method, we'll send the account password via Proofpoint.
- The following command can be used to generate an SSH public/private key pair:
ssh-keygen -t rsa -b 2048 -P "" -m PEM -C comment-here -f ~/Documents/ssh-keys/my_ssh_key
Replace "comment-here" with any comment that will help you identify the key later. Replace "~/Documents/ssh-keys/my_ssh_key" with your directory and filename.
- The above directory and filename is an example for Mac.
- For Windows, the directory and filename would look like this:
"C:\Users\YourUsername\Documents\ssh-keys\my_ssh_key"
- For Linux, the directory and filename would look like this:
"~/ssh-keys/my_ssh_key"
Other SFTP Information
Using SFTP with FileZilla
FileZilla is a GUI application that allows you to connect to remote servers. You can access our SFTP as follows:
- Click the
 icon.
icon. - If you already have sites, click New site to add another.
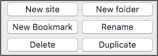
- Enter the host name, port, and credentials as provided to you.

Using SFTP with Informatica
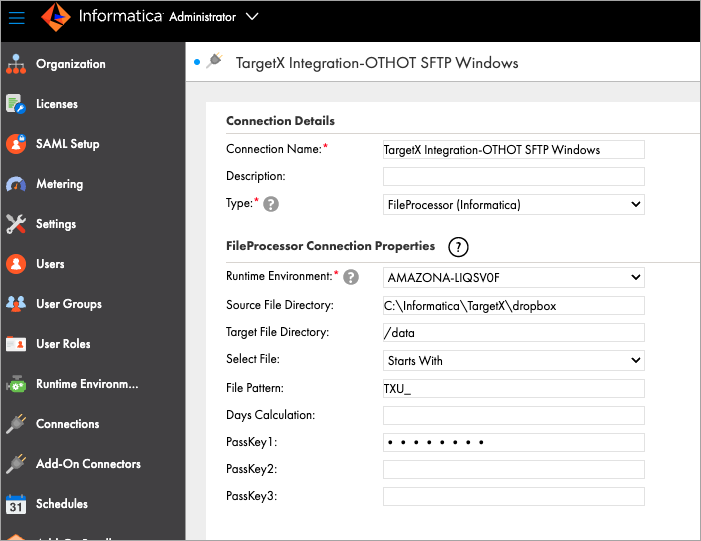
- Create a new Connection:
- Type: FileProcessor
- Source File Directory: directory with your files to be transferred to the Othot SFTP
- Target File Directory: /data
- Select File: filter type for selecting files to transfer
- File Pattern: naming pattern for selecting files to transfer
- PassKey1: your SFTP password (required if you are using username/password authentication)
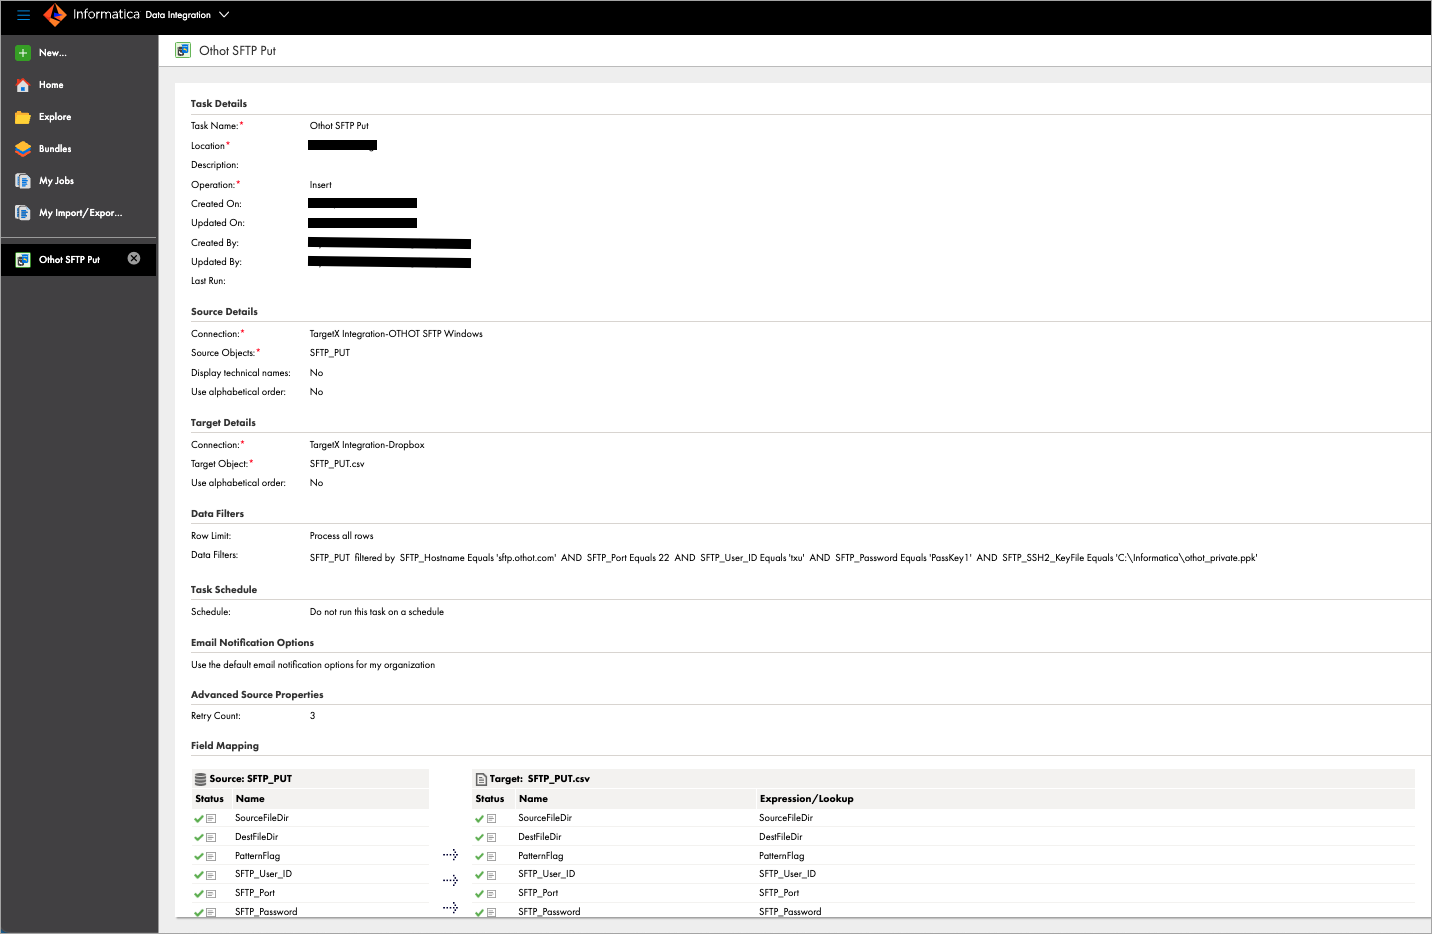
- Create a new Data Synchronization task:
- Source: New FileProcessor Connection and SFTP_PUT
- Target: Flat File Connection (i.e. Dropbox) and SFTP_PUT.csv
- Data Filters:
- SFTP_Hostname: sftp.othot.com
- SFTP_Port: 22
- SFTP_User_ID: your Othot SFTP username
- SFTP_Password: PassKey1 (required if you are using username/password authentication)
- SFTP_SSH2_KeyFile: your Othot SFTP private key file path (required if you are using SSH authentication)
- Field Mapping: Automap all fields
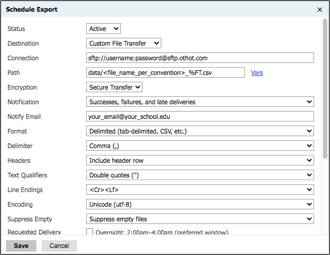
Using SFTP with Slate
We recommend the following settings for your export from Slate. For more information on this process, review their knowledge base article.
Tips for SFTP Success
To keep your predictions up-to-date in the platform, we need to make sure that the right files are delivered and that they are ready to be processed. When using SFTP, please:
- Ensure that changes to file headers are communicated to us before they are made in the export.
- Validate that all files are being delivered consistently as expected.
- Do not deliver empty files.
- Do not change the name of a file without notifying us and receiving confirmation.
- Do not change the delivery time of your files without notifying us and receiving confirmation.
Using the In-App Method
If you select this method, use the DATA page to upload your files. Remember to adhere to the file formatting and naming conventions noted above.