Managing Workspaces
In addition to Roles, the Workspaces feature is another way of customizing Outcomes for different users based on their permissions. For example, if you need to prevent some of your colleagues from seeing some of your configurations, you can establish workspaces to filter these items out.
Currently, you can set Workspaces to hide export destinations from users who you don’t want to see them. Note that users with the Manage Workspaces permission are excluded from Workspace restrictions.
Configuring Workspaces
To begin working with Workspaces, you'll first need to create a team that includes the users whose access should be the same. For example, if you only want your IT team to see some of your export destinations, you can create a team that includes all the IT team members who have access to Outcomes. You can also create teams for reviewers, interviewers, or any other groups of users who need identical access to features in Outcomes.
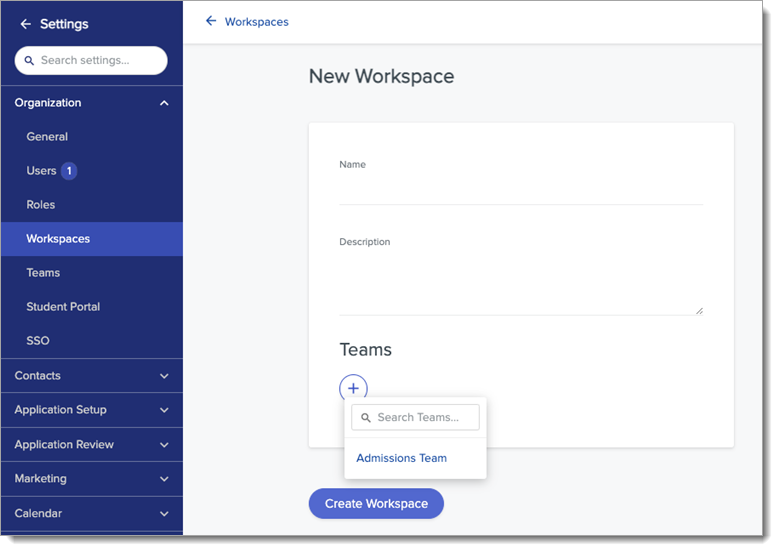
Once you have created a team, you can create a workspace to associate that team with. To create a workspace:
- Go to the Organization section of the Settings Menu and click Workspaces.
- From the Workspaces page, you can review and edit your existing workspaces. To create a new workspace, click the plus sign at the top right.
- Give your workspace a name and add the teams that should have access to it.

Using Workspaces
Once your Workspaces are created, you can apply them to different items where the Workspaces feature is available.
For example, navigate to the Import/Export section of the Settings Menu and click Export Destinations. From the settings of a new or existing export destination, you can enable the Restrict to Selected Workspaces option and add one or more Workspaces to the Workspaces section. This makes it so that only members of the teams in your Workspace (and any user with the Manage Workspaces permission) can view this export destination.
