Ensuring Salesforce Emails Send from Your Domain
Recent Salesforce updates may block emails sent from unverified or default addresses or domains (such as @targetx.com). This guide shows you where to review and update your settings, so emails are sent successfully from your institution’s domain.
Before you begin
- Ensure you’re using an email from your institution’s domain (e.g., @yourschool.edu)
- Avoid default @targetx.com addresses
- We recommend using a shared, role-based email address (for example, admissions@yourschool.edu) rather than an individual staff member’s account.
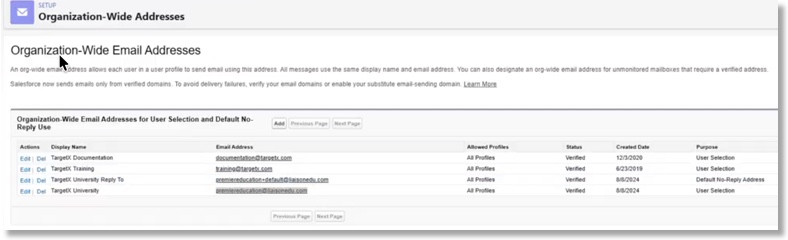
Step 1: Verify Organization-wide Email Addresses
These are the approved “From” addresses Salesforce can use.
- Navigate to Setup and search for Organization-Wide Addresses.
- Confirm you have emails with your domain listed.
- Add a new email address if needed:
- Click Add.
- Enter email address.
- A verification link will be sent to this email inbox from Salesforce. Verify the address using this link.
- Confirm status shows Verified in your Salesforce org.
Step 2: Update Process Automation Settings
Automation (such as Salesforce Flow) relies on these defaults.
- Navigate to Setup and search for Process Automation Settings.
- Update the following locations:
- Default Workflow User
- Automated Process User Email Address

Step 3: Check Digital Experience (Community) Emails
This controls emails sent from portals (application site, appointment scheduler site, etc.). You will need to confirm this for each site.
- Navigate to Setup and search for All Sites.
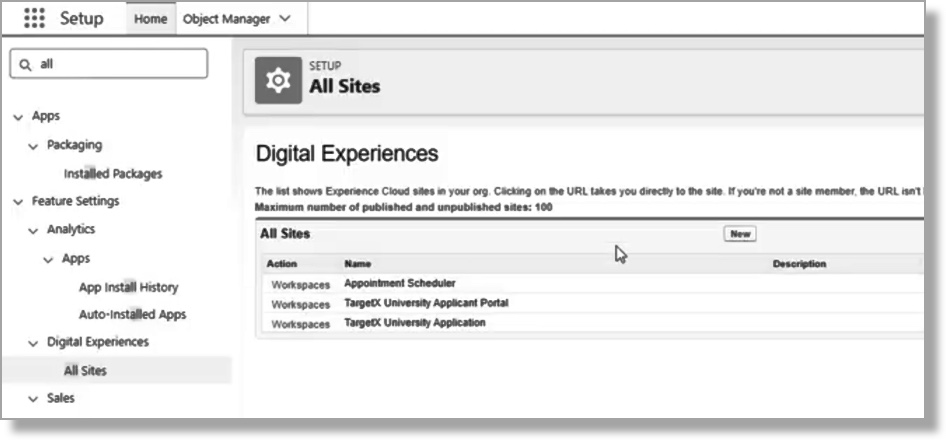
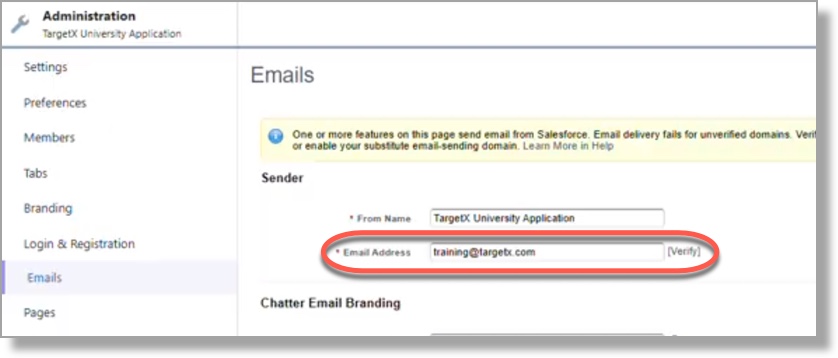
- Select your Site → Workspace → Administration → Emails
- Confirm the following:
- Email address uses your domain
- Email address exists in Organization-Wide Addresses
- Status is Verified
- Click Verify if needed
Step 4: Update Site (Guest User) Email Address
This setting routes emails sent by Site (Guest) users through a verified address, ensuring those messages are not blocked and delivered reliably.
- Navigate to Setup and search for Sites.
- Select your site (e.g., Event Site).
- Click Public Access Settings.
- Open the Guest User.
- Confirm the following:
- Email address uses your domain
- Email address exists in Organization-Wide Addresses

Step 5: Review Additional Email Settings
Check these commonly overlooked areas:
Recommendation Request Forms
- Ensure sender email is a verified org-wide address using a domain that has been configured using DKIM or Authorized Email Domains.

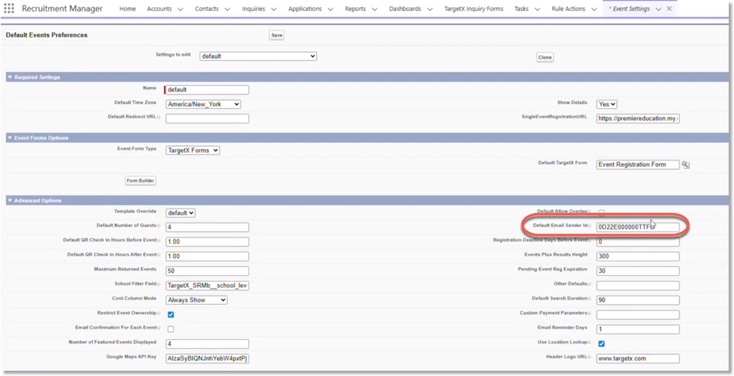
Event Settings
- Confirm Default Email Sender uses a verified email.
- If using a custom sender, it must also be verified.
Email Sender on Organization Events
- If specified, the Email Sender on Organization Events should use a verified email:

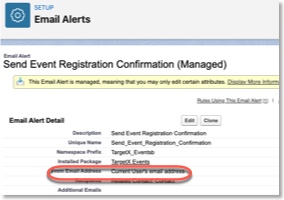
Email Alerts
- The From Email Address for Email Alerts must be a verified email:
Scheduled Report and Dashboard Subscriptions
- Emails send from the user who scheduled them
- That user’s email must:
- Be in Organization-Wide Addresses
- Be verified

Step 6: Review Flows Sending Emails
If you use Flows with email actions:
- Check each Flow’s From Address
- Ensure it uses a verified Organization-Wide Email
Step 7:Identify and Restart Scheduled Apex Jobs for DKIM Compliance
Scheduled Apex jobs must be restarted under a DKIM‑covered user to ensure outbound emails are properly authenticated and successfully delivered. Apex scheduled jobs that send outbound emails must run under a user whose email domain is included in the Salesforce DKIM configuration, as Salesforce applies DKIM signing based on the running user’s email domain and the “From” address. If a job is created or scheduled by a user with a non‑DKIM‑enabled domain, the resulting emails (e.g., Schedule Job reports, failures, or reminders) may fail DKIM/DMARC checks and be rejected, quarantined, or filtered as spam by recipient mail servers.
Identify Scheduled Apex Jobs
- Navigate to Setup.
- Search for and select Scheduled Jobs.
Review the Running (Submitting) User
- Review the Submitted By column.
- Click the Submitted By user name.
- Confirm the user’s Email Address domain.
Stop the Existing Scheduled Job
- Select Manage next to the affected job.
- Note what Apex Class is running. You will need this for the next step.
- Select Delete and confirm the deletion.
Restart the Apex Job Under the Approved Email Domain User
- Click the button Schedule Apex to restart the job.
- Give the job a name (it can be the same as the old job name).
- Paste the name of the Apex Class from the prior step.
- Set your schedule (e.g., Sunday Weekly and a Start and End Date).
- Click Save.
Typical, Scheduled Apex jobs for TargetX Clients include but are not limited to: Communication Planner Report Validator, Communication Planner Campaign Sync Retry, Communication Planner Auto Deactivate Campaigns and Tracks, Clean Up TargetX Logs, Email Broadcast Member Cleanup, etc.
Step 8: Configure Email Authentication (DKIM or Domains)
Confirm that Salesforce is authorized to send emails from your domain. This must be configured in production and reconfigured in the sandbox after every refresh. TargetX recommends that you satisfy this requirement via DKIM keys. You may also do so via Authorized Email Domains.
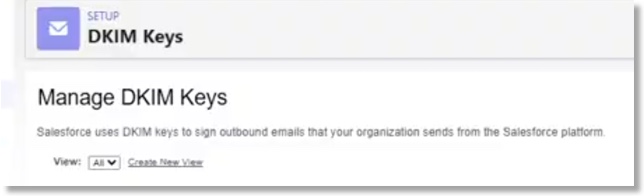
DKIM Key Configuration
- Navigate to Setup and search for DKIM Keys.
- Confirm your domain is listed (e.g., yourschool.edu)
- If missing, add and configure it in production
Authorized Email Domain Configuration
- Navigate to Setup and search for Authorized Email Domains.
- Select Authorized Email Domains.
- Click Add.
- Enter the domain name (for example, example.com).
- Click Save.
- Copy the verification key Salesforce generates (example: 00D000000000P18=1AB00000000000B).
- In your DNS provider, add a TXT record for the domain.
- Use the domain name with or without the _sfdv. prefix (for example, _sfdv.example.com or example.com).
- Paste the Salesforce verification key/value into the TXT record value field.
For additional information, see the Salesforce Help & Training article Salesforce Email Domain Verification Enforcement Overview.
Need Help?
If emails are still not sending after these updates, contact support or submit a case with details about where the email is triggered.