Installing Informatica Cloud Secure Agent (Windows)
System Requirements
For the latest Minimum System Requirements, see Informatica's Installation and Configuration Guide Verify the Minimum System Requirements.
Downloading the Agent Installer
- Log in to your CRM.
- Select the "Informatica Cloud" application from the application picker in the top right corner.
Notes:
- If you see a Register button in place of the Single Sign-On button, DO NOT click the Register button. This will create a new trial Informatica Org. Don't hesitate to contact your CRM Administrator to create an Informatica User.
- Secure Agent registration now requires an install token. To get the install token, copy the token when you download the agent or use the Generate Install Token option in Administrator. The token expires after 24 hours.
- Click the Integration tab, then click the Single Sign-On button.
- Open Administrator and select Runtime Environments.
- On the Runtime Environments page, click Download Secure Agent.
- Select the Windows 64 option, copy the install token, and click Download.
The installation program is downloaded to your machine. The name of the installation program is agent64_install_ng_ext.exe.
Note: for additional information, see the Informatica document Downloading and installing the Secure Agent on Windows.
Installing the Agent
- Run the agent_installer.exe file.
- In the "Choose Installation Folder" dialog Field, click Next.
- In the "Pre-Installation Summary" dialog Field, click Install.
- In the "Installation Complete" dialog Field, click Done.
- Register the Informatica Cloud Secure Agent using your Informatica Cloud username and password. This may be different than your CRM username and password.
- Click Register.
Note: for additional information, see the Informatica document Downloading and installing the Secure Agent on Windows.
Post-Installation Setup
- Go to Control Panel > Administrative Tools > Computer Management > Services.
- Double-click the "Informatica Cloud Secure Agent "Service.
- On the "General" tab, make sure Startup Type is set to "Automatic."
- Click the "Log On" tab.
- Click the radio button next to "This account."
- Browse for the desired User and enter related password credentials.
- Click the "General" tab.
- Click Stop.
- After the service is stopped (Service status: Stopped), click Start.
- After the service is started (Service status: Running), click OK.
Directory Structure Setup
- Download the Directory Structure .zip file.
- Save the .zip file to C:\Informatica (you will likely need to create the "Informatica" directory on your Informatica Cloud Secure Agent machine).
- Extract the compressed files to create the directory structure and prerequisite files.
- Check the structure's location. If you used the default C:\Informatica, then C:\Informatica\TargetX\dropbox should exist.
Environment Variable Setup
The recommended directory structure outlined above is used in all standard pre- and post-processing commands. You may choose to install the directory structure in a different path. However, keep note of this path for the steps below.
- In the start menu (or from a desktop shortcut), right-click on "My Computer."
- Choose Properties.
- A "View basic information about your computer" page will open. Scroll down and click Change settings.
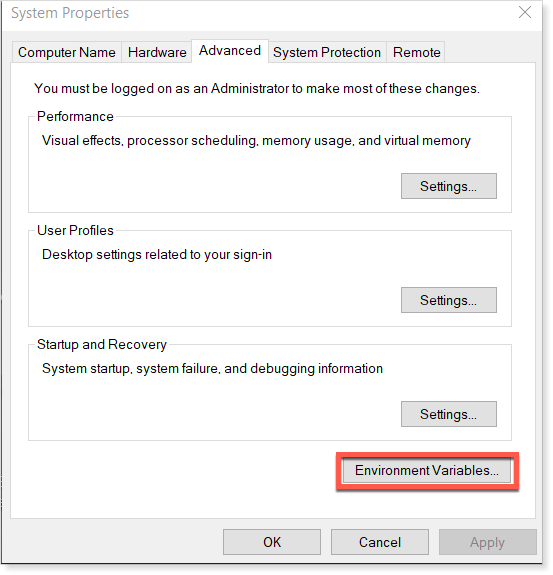
- Click the "Advanced" tab.
- Click Environment Variables.
- Under "System Variables," click New to add a new System Variable (not user variable):
- Name: TargetX_ETL_Dir
- Value: C:\Informatica (use the directory that contains your TargetX directory. For example, if you unzipped the directory structure file after the C:\Informatica directory, you only need C:\Informatica in this field. You must enter the path value to the left of the TargetX directory.)
- Click OK.
- Reboot the Informatica Cloud Secure Agent machine.
Install VC++ Libraries
The Informatica Secure Agent requires the installation of Visual C++ libraries on the host machine for proper operation. If the hosting system does not already have VC++ libraries installed:
-
Download and install the Microsoft Visual C++ Redistributable Packages for Visual Studio 2013:
https://www.microsoft.com/en-in/download/details.aspx?id=40784 -
Restart the Informatica Secure Agent.