Implementing TX SMS
Step 1: Create Main TX SMS Administrator Account
While most TX SMS is self-service, there is one initial step that TargetX will have to take for you. To get initial access to TX SMS, file a support ticket called TX SMS Access Request with the following content:
Hi TargetX,
My institution would like to begin using TX SMS. Could you please set up our org for use, with the following person as administrator?
<First Name> <Last Name>
<Email address>
Once your Administrator account has been set up, you can invite anyone at your institution who needs access, change permissions, and set up the connection to Twilio.
Note: When users get the invitation to TX SMS, select the Salesforce authorization option in the sign-up flow. They’ll need to authorize this way to get user info from your SF instance when sending messages.
Step 2: Create a Twilio Account
To use TX SMS, you’ll be connecting a Twilio account. Twilio is our delivery partner (they also own Sendgrid, who does our email delivery) and they are the market leader in the field:
- Go to https://www.twilio.com.
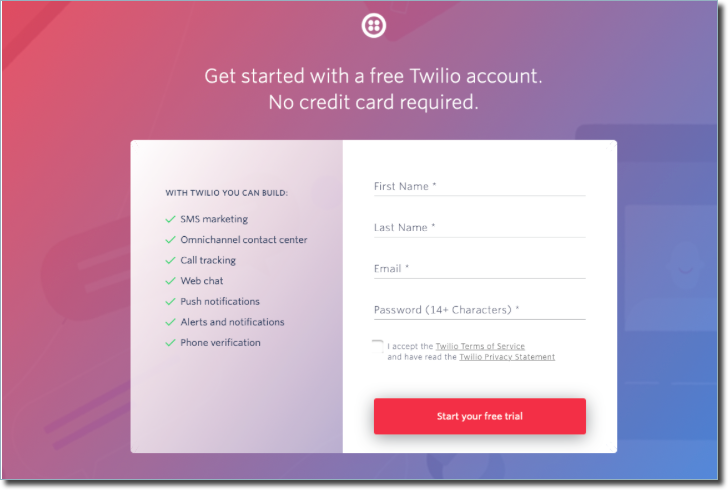
- Click Sign Up in the top right
- If you already have a Twilio account in use elsewhere on your campus, you can use that. Just log in to that account and select Create a New Project from the dropdown menu at the top left, then jump to Step 5.
- Enter your First Name, Last Name, Email, and Password on the create page.

- Verify your account by clicking the link in the email they send you.
- Next, provide a Phone Number and verify it by entering the code they text you.
- Now, it’s going to ask you some questions about how you’re going to use Twilio. Please select the following options:
- Which Twilio are you here to use? SMS
- What do you plan to build with Twilio? Customer Loyalty
- How do you want to build with Twilio? With no code at all
- Click Get a Trial Number in the center of your screen. It will pop up a screen with the number, and then select Choose this Number. We won’t be using the trial number, so no need to customize it.
- You’re all set on the Twilio side!
Step 3: Connect Twilio to TX SMS
- Navigate to sms.targetx.com.
- Login as the Administrator, which was set up in Step 1.
Note: Your organization’s Short Name will be the domain in your email. For example, tim@targetx.com would use `targetx` as the short name.
- Click the Gear icon in the lower left, then select Messaging Provider in the sidebar.
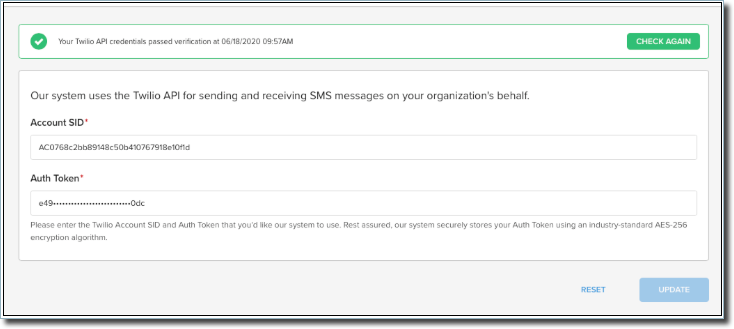
- On the Messaging Provider page, you should see two boxes: Account SID and Auth Token. If you open a tab to your Dashboard in Twilio, you will see those two pieces of information prominently in the center of your Dashboard.
- Copy them and paste them into TX SMS, then click Update.

- The system will validate your credentials, and you should see this message at the top of the page:

Note: You can always return to this page to re-validate your credentials by clicking Check Again to make sure your connection is still set up correctly.
Step 4: Upgrade Your Twilio Account
- Twilio Trial accounts can only have one phone number, which obviously won’t be sufficient for real usage (and it appends a message about a test to the start of your text!) so you’ll need to upgrade your Twilio account.
- Go to your dashboard at https://www.twilio.com/console and click the blue Upgrade Project button at the top of the screen.
- Add your address, a payment method, how much you want to fund your account, and whether you want that to refresh automatically. Once you’ve entered all this info, just hit Upgrade Account, and it’s time to start buying numbers!
- After you upgrade, you should consider going to https://twilio.org/application to apply for the Impact Program, which will give you a starting SMS credit and a discount of roughly 25% on your rates.
- Optional: If you expect to send messages internationally, go to this page to enable international messaging on a country-by-country basis. You can also always do this later if your plans change. Please read this guide for some considerations and Best Practices for International Texting with TX SMS.
- Go to the Other settings page in TX SMS Settings to set your default country code. You should set this to the country your institution is based in. This will make number formatting for in-country phone numbers more forgiving if they are not in the full E.164 format as outlined in the Best Practices for International Texting with TX SMS document.
Step 5: Begin the 10DLC A2P Registration Flow
- First, please read this Knowledge Base article to summarize the Twilio A2P Registration process. We strongly encourage you to read the full Twilio page as well.
- Complete Steps 1-4 in the How do I register? Section. This may take up to 72 hours to receive full approval. You will complete the remaining steps in this guide as you create your Messaging Services further along.
Step 6: Buy and Setup Numbers
Before beginning this step, it’s best to make sure your texting strategy is in place:
- Think about how many counselors need individual numbers.
- Think about how many bulk-capable inboxes you need and the volume you expect to send through those numbers.
The more you think ahead, the easier your number setup will be, and the fewer times you’ll need to go back and forth between Twilio and TX SMS. Please see TX SMS Best Practices for more information on texting best practices and daily volume. Also check out the Twilio documentation on Starter, Low Volume Standard, and Standard registration for A2P and Message throughput (MPS) and Trust Scores for A2P 10DLC in the US for further guidance.
Setting up a messaging service
- Go to https://www.twilio.com/console.
- In the left sidebar, select # Phone Numbers > Manage > Buy a number
- Click the Buy a Number button in the table to create a new number. You can provide an area code you’re looking for or leave it blank to select any available number.
- In capabilities, make sure the SMS and MMS options are selected, then click Search.
Note: Currently, we do not support MMS, but this will give you a bit of future-proofing if we add that functionality.
- Pick the number you want, then select the Buy option. You’ll then confirm your cost and capabilities. If you’re happy with what you see, click the blue Buy button in the bottom right.
- In the Friendly Name field, name this number, such as Admissions Inbox Number 1 or something to that effect. You want to name all the numbers you intend to group subsequently. In the Messaging Services section, do not make any changes. Save.
- Repeat steps 3-7 until you have the full numbers to group together. This can be only one number or up to 400.
- Go to https://www.twilio.com/console/sms/services and click Services > Create Messaging Service. For friendly name, use the base you used for step 7 above (IE, Admissions Inbox in our example). Then, Select What you want to use Messaging for: Generally speaking, this will be Engage in a discussion since TX SMS is designed for two-way traffic. Click Create Messaging Service.
- Click Step 3: Set Up Integration.
- Click the Send a Webhook radio button. Leave the fields blank; these will be configured for you by TX SMS. Click Add Compliance Info.
- If you completed Step 5: Begin the 10DLC A2P Registration Flow above, Business Profile and US A2P Brand should be checked. We need to click the Register Use Case button. Fill out the panel with the appropriate info:
- US A2P Brands: Whatever you set up previously, you will only need one.
- Campaign Use Case: Higher Education
- Campaign Use Case Description: A brief explanation of the use case for that inbox: “Notifying students about their applications” or “Discussing TargetX University with students” for instance.
- Message Contents: Check the boxes where appropriate. If you’re unsure, check both.
- Sample Message #1 & #2: Sample messages of the type you expect to send from that inbox.
- Click Register Use Case, then click Complete Messaging Service Setup and you’re all set.
- Go to https://sms.targetx.com/settings/inboxes, and click the Plus icon in the top right. We’re going to assign that service you just created to an inbox.
- Give your new Inbox a name (such as Admissions Inbox since that’s what I’ve been working toward in this example) and then select the Service you created to connect the inbox. Click Create.
- Click the three dot icon for that inbox in the table, and select Manage Users.
- Click the Plus icon in the top right to add a new user. You can add any user or users you invited in Step 6 above. Determine whether or not they should be able to send bulk from the inbox, then click Submit.
- That’s it! Any assigned user can go to https://sms.targetx.com/inboxes, select their inbox from the dropdown, and use it to send messages to their heart’s content.
Step 7: Invite SMS Users
- As an admin user, go to home.targetx.com and select the User Management tile.
- Select the + icon in the top right corner to invite a user with access to TX SMS. Provide their first name, last name, and institutional email.
- Decide if the user should be an administrator. As an administrator, they can:
- Invite or remove users
- Edit the connection to Twilio
- Create, edit, and remove inboxes inside TX SMS
- Assign users to or remove them from inboxes
- Select TX SMS in the application grant boxes, and hit Send Invite. Make sure the new user creates their account using the Salesforce connection option.
Note: To send Bulk messages and 1:1 replies in TX SMS you must have a Salesforce license.
- Repeat this for any users who will be using TX SMS. You can always come back and add more users if your strategy changes, there are no per-user fees or licenses.
Step 8: Configure Inboxes
You will now need to assign the Service to an Inbox:
- Go to https://sms.targetx.com/settings/inboxes , and click the + in the top right.
- Give your new Inbox a name (such as Admissions Inbox, since that’s what we’ve been working toward in this example), and then select the Service you created to connect the inbox. Click Create.
- Click the three-dot icon for that inbox in the table, and select Manage Users.
- Click the + icon in the top right to add a new User. You can add any user or users you invited using the steps above. Determine whether or not they should be able to send Bulk from the inbox, then click Submit.
- Your Setup is complete! Any assigned user can go to https://sms.targetx.com/inboxes, select their Inbox from the dropdown, and use it to send messages.
