Creating Interviews
You have the option to use an Invitee Campaign for Interviews, or you can add participants manually. An Invitee Campaign is helpful if the participants change based on criteria.
- Create a Campaign in the CRM for your interview invitations. Ex: Admissions Interview
- Add members to your campaign by way of a report or via search.
- Create your Event Interview record and search for your campaign in the Invitee Campaign field on the Interview:
- Classification = Interview
- Type = <user defined, such as Interview>
- Public = checked
- Invite Only = checked
- Invitee Campaign = <user defined>
- Email template = <user defined>
- Decide if you want to limit the number of students that can register or use a Waiting list.
- Save your changes.
Adding Staff to Interviews
Event Staff is added to Interviews by selecting an Invitee Campaign or adding them to the Organization Event under Staff & Volunteers section. Staff Confirmation and Staff Cancellation email templates are sent only to those listed in the Staff & Volunteers section.
Note: Administrators have the option to Clone interviews; this also gives the option to Clone With Staff and Invitees. When ‘Cloning,’ the Administrator is presented with a popup window to select whether Staff and Invitees of the Event should also be cloned.
Interview Attendees
Invited means the Student was Invited to the Event manually and can view the Interview in the Appointments and Interviews Community to schedule.
Confirmed means that the Student scheduled the Interview. The Interview will now be displayed under My Events for the Student.
New Invitation button makes the Interview available on Appointments & Interviews Community and displays as ‘Invited’ under the Attendees section.
New Registration button adds the Interview to My Events (The Student does not need to go to the Appointments and Interviews Community to schedule). An email confirmation will be sent to the Attendee if configured.
Limiting the number of students that can register for an interview
You can limit the number of students that can register for an interview by setting the Max Attendees field on the Organization Event record.
- Navigate to the Organization Events tab.
- Click on the Interview which you wish to limit Attendees.
- Click Edit.
- Locate the Max Attendees field and enter the maximum number of students who can register for the Interview.
- Save your changes.
If Waitlist has been selected on the Organization Event record and a student attempts to register for a full Interview, they will receive a message: “This Interview is currently full. Click Confirm to join the waitlist.”
Changing the name of Interviews
If you are not using "Interviews" and prefer to repurpose the functionality for another use, such as Group Meetings, you can rename "Interviews" accordingly:
- Navigate to Appointment Scheduler Settings.
- Update the Interview Custom Label to the new name you would like to use. For example, if you want to provide several sessions for academic services to groups of students, you might label them as “Group Meeting” and enter the label like the screenshot below:
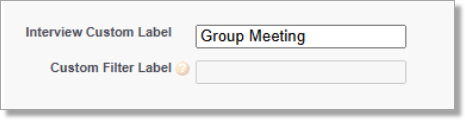
-
In all instances where the user previously saw "Interview" in the appointment scheduler, "Group Meeting" will now be displayed. The only exception to this change is on the Applicant Dashboard.
Updating the Interviews label in Applicant Dashboard
To update the Interviews label in the Appointment & Interviews button, modify the CSS in your Community Theme linked to the Applicant Dashboard by replacing "Appointments & Interviews" with your desired label:
/*code for appt and interviews label*/
.portal-block__button.go-to-appointments > a {
font-size: 0px;
}
.portal-block__button.go-to-appointments > a::before {
content: "Appointments & Interviews";
font-family: 'proxima-nova-semibold', Helvetica, Arial, San-serif;
font-weight: normal;
font-size: 16px;
color: #0077B9;
text-align: center;
text-decoration: underline;
}
Using our earlier example, the CSS would be updated with content: "Appointments & Group Meetings"; and would display the following:
