Configuring a Faculty Early Alerts Community
Create a Community (optional)
- Navigate to Setup and search for Digital Experiences (formerly All Communities).
- Click New.
- Select Template = Salesforce Tabs + Visualforce
- Click Get Started.
- Enter the Name for your Community, such as Faculty Early Alerts.
- Enter a URL, such as facultyearlyalerts
- Click Create.
- Once the Community is created (this may take a few minutes), you’ll be directed to the Workspace.
- Click the Administration tile.
- Add the Profiles/Permission sets you previously assigned to your Faculty users:
- Click Members in the left pane.
- Add your Faculty profile.
- Add the TX Faculty Alerts (Faculty) Permission Set
- Save your changes.
- Configure Tabs
- Click Tabs in the left pane.
- Remove all tabs and Add Faculty Alerts (Roster).
- Save your changes.
- Configure PageStopper
These steps will allow you to prevent a Community User from accessing their information from standard Salesforce pages (e.g., Contact) via the Community.
Salesforce states that reaching standard Salesforce pages from the Community is common functionality. If you choose not to configure the PageStopper, your Organization’s security and sharing settings will continue to limit users as expected.
12.1: Turn off setting to Allow Access to Standard Salesforce Pages on your site
- Navigate to Setup and search for Sites.
- Click your Faculty Early Alerts site.
- Click Edit.
- Uncheck the setting Allow Access to Standard Salesforce Pages.
- Save your changes.
12.2: Download PageStopper document
- Download the page named TXStandardPageStopper:
- If you do NOT have Online Application installed: download here.
- If you DO have Online Application installed, this is available in the Public folder.
- If needed, upload this file into Documents in your Org, in the Public folder, and mark it ‘externally available’.
12.3: Configure your Community to use the PageStopper document
- Navigate to Setup and search for Digital Experiences (formerly All Communities).
- Select Manage next to the appropriate Community.
- Select Administration Tab.
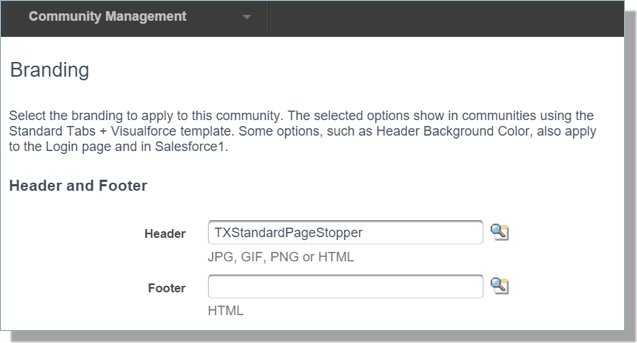
- Select the Branding Tab.
- In the section labeled Header and Footer, select the document named TXStandardPageStopper in the Header field.
- Save your changes.
Complete! Now, your Community users will no longer be able to access standard Salesforce pages but will still be able to access TargetX visual force pages within the app.
- Configure Pages
- Navigate to Setup and search for Digital Experiences (formerly All Communities).
- Select Manage next to the appropriate Community.
- Select Administration Tab.
- Click Pages in the left pane.
- Set Home Page to DEFAULT
- Configure Login & Registration Settings
- Click Login & Registration in the left pane.
- Under Branding Options, select a Logo Type and choose your Logo File.
- Select a Background color and Login Button color to match your institution colors.
- Update the Footer Text to your institution’s website.
- In the Login Page Setup section, set Login Page to DEFAULT
- Set Forgot Password to DEFAULT
- Set Reset Password to DEFAULT
- In the Registration Page section, uncheck Allow customers and partners to self-register.
- Save your changes.
- Configure Community Emails
- Click Emails in the left pane.
- In the Sender section, enter the following:
- From Name = <user defined>
- Email Address = <user defined>
- In the Email Templates section, enter the following:
- Welcome New Member checkbox.
- If you are using Single-Sign on, UNCHECK the Welcome New Member checkbox. If NOT, keep this CHECKED.
- When the Community is Activated, existing members will immediately receive the Welcome New Member email and be asked to create a password. When NEW members are added, they will immediately receive the Welcome email.
Note: Using standard Salesforce functionality, you can use Single-sign on for your faculty.
- Forgot Password = Communities: Forgot Password Email
- Change Password = Communities: Changed Password Email
Note: You can clone the New Member Welcome and Password emails and brand them as you see fit. If you clone these email templates, you MUST return to this window and update these pages with your updated versions.
- Save your changes.
*STOP*
Do not Activate your Community until you are ready for your Faculty members to receive the Welcome Email! Once you are ready, you can return to Activate the Community by following these steps:
- Navigate to Setup and search for Digital Experiences(formerly All Communities).
- Select Manage next to the appropriate Community.
- Select Administration tile.
- Click Settings in the left pane.
- Click Activate.
Note: You won’t be able to fully test the Community until it’s Activated.