Document Collection
In this section, you can configure the types of documents you want to collect from applicants. Examples may include supplemental essays, financial aid statements, etc.
To configure, click the Collect Documents link on the Applicant Gateway Editor page.
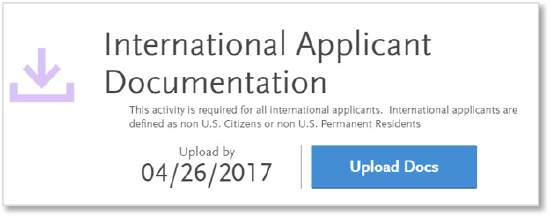
Example of Document Collection Activity

Create Introductory and Finishing Text
The text you include in the Activity Introduction displays to the applicant before they upload documents. You can use this space to describe how your program uses the information provided by the applicant and how to contact your admissions department.
The text you include in the Finishing Statement displays when the applicant completes the activity. You can use this space to explain the timeframes in which the admissions team reviews the information or any additional steps the applicant needs to complete.
- Enter a header/title for the Activity Introduction.
- In the next field, enter your introduction text.
- Enter a header/title for the Finishing Statement.
- In the next field, enter text that acknowledges the applicant successfully completed the activity.
- Click Save.
- Click Continue to move to the next section.
Create Instructions
In this section, you can add instructions for uploading documents. Note that applicants can upload up to 5 MB per document. Accepted file formats include Microsoft Word (.doc or .docx files), JPG, PNG, RTF, PDF, and TXT. The Activity Display Name defaults to Collect Documents and the activity expiration defaults to 60 days, but you can adjust this setting in the Activity Expiration drop-down. The following options are available:
- Default Expiration: use the default of 60 days from activation.
- Number of Days from Activation: specify the number of days from activation the activity will expire.
- Calendar Date: enter a date on which the activity will expire.
- Rolling: activity will not expire and applicants can submit it on a rolling basis.
Note that expired activities are not visible to applicants. You can also opt to allow applicants to upload documents after the program’s deadline date.
Add Documents
- Click + Document.
- Enter the document type (e.g., financial aid documents) and click Add. Note that only the first 15 characters will display in the Applicant Gateway Documents panel in WebAdMIT so ensure that the name clearly identifies the document.
- Use the Request toggle next to the document type in the Documents section to define whether it is required.
- If the document is required (indicated by a green checkmark), select the minimum number of documents of that type that the applicant must upload from the Min Required drop-down. For example, if you select 2 for a Personal Essay document type, applicants must upload two separate personal essays.
- If the document is optional (indicated by a grey x), select the maximum number of documents of that type that applicants can upload from the Max Allowed drop-down. For example, if you select 5 for a Personal Essay document type, applicants can upload up to five separate personal essays.
- Add more document types, as needed.
- Click Save.
Submit for Activation
Once you complete all required fields and save your Collect Documents activity, click Submit for Review to submit it to the Client Support Specialist team for activation. A success message displays.
The Client Support Specialist team will then activate the Applicant Gateway activity within two business days. If you need your activity activated as soon as possible, contact the Client Support Specialist team.
Once activated, the activity is available the next morning and can be assigned to applicants in WebAdMIT.
Important: once you submit the Collect Documents activity for activation, you can no longer edit it. Submit only when you are sure that the activity is complete and you have reviewed for accuracy. If you need to make edits after submission, contact the Client Support Specialist team. Requests for edits will be reviewed on a case-by-case basis. Please note that in most cases changes cannot be made.
To contact the Client Support Specialist team, call 857-304-2020 or email webadmitsupport@liaisonedu.com.
