Getting Started with the WebAdMIT API
This guide is for admission users who are interested in working with the WebAdMIT API to help with data transfer.
When you join any of our CAS communities, all the applicant data you require can be collected via the CAS and made available to your existing systems through our easy-to-use WebAdMIT API.
Determining Your Data Movement Needs
When thinking about integration, it’s important to start by asking three questions:
- Which applicants need to move to a different software system? For example, do you need to move all applicants or just those who are matriculated?
- What applicant information needs to be included in the move? For example, do you only need core applicant information for your matriculants, or do you need all applicant information so that you can review and score them in a separate system?
- When do they need to move? For example, do you need to continuously move all applicant data to run other processes on campus, or do you only need to move matriculated applicants to a different system at the end of the cycle? Your timing could be multiple times per day, once per cycle, or anything in between.
WebAdMIT’s Data Movement Tools
WebAdMIT includes three primary tools you can use for data integration:
- The List Manager: this tool allows you to create groups of applicants based on specific criteria. This is helpful if you only want to move select applicants and their data into your institution's SIS.
- The Export Manager: this tool allows you to extract applicant data according to what the destination system requires (i.e., your SIS, CRM, etc.).
- The PDF Manager: this tool allows you to export documents in bulk, including transcripts, letters of recommendation, or even a full, printable version of the application.
Creating an Export
Creating an export in WebAdMIT is a simple process that can be completed in four steps. You must have the Manage Lists, Reports, and Exports permission in your Work Group to do this.
Step 1: Select Your Applicants
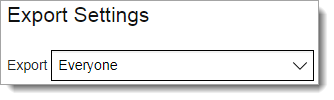
When creating an export, you’ll first need to decide whom you’re exporting. The default is everyone, which is your entire applicant pool for the CAS you are using, but you can also export a particular subset of the applicant pool by using WebAdMIT’s List Manager.
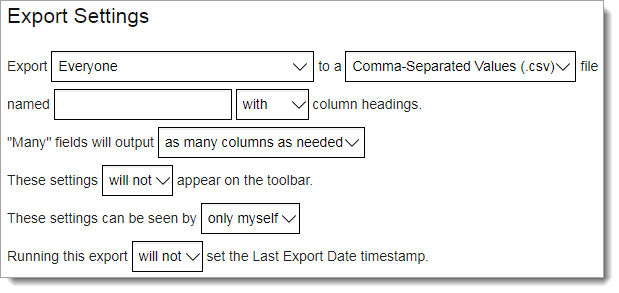
Step 2: Select Your File Format, Name Your Export, and Configure the Settings
Next, you select the export’s file format. The Export Manager supports the following formats:
- Comma-separated, or CSV, file.
- Fixed-width file (.txt), where every column has a set column width.
- Excel file.
After you select your file format, you name your export and configure the export’s settings.
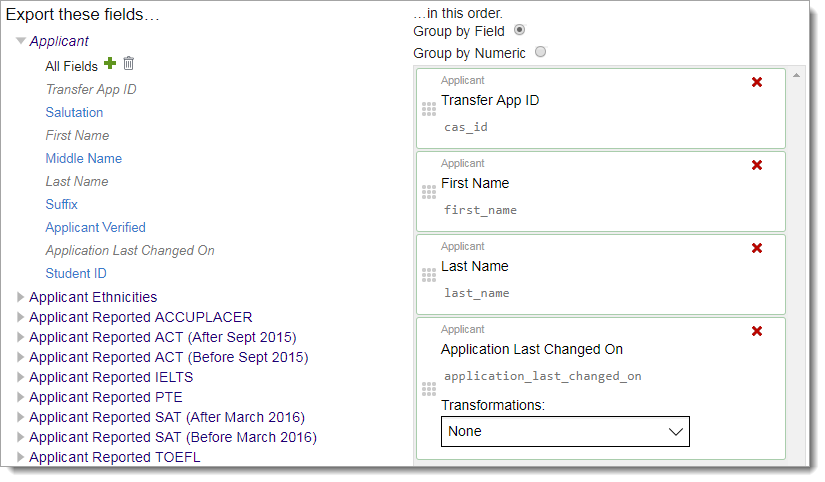
Step 3: Select the Fields You Want to Export
You can select as many application fields as needed for the export. For example, you might choose to export everything, or only a few data points like the applicant’s CAS ID number, name, address, submission date, and overall GPA.
Step 4: Create Your Export
When you’re done adding the fields, you can save and run the export.

Using the PDF Manager
Using our PDF Manager, you can save time and energy by batch downloading documents from WebAdMIT. Similar to the Export Manager, you can create a batch in four easy steps. You must have the Manage Lists, Reports, and Exports permission in your Work Group to do this.
Step 1: Select Your Applicants
Just like the Export Manager, you select the applicants for which you want to download documents.

Step 2: Name Your Download and Select Your Document Type
Next, you select the document type you want to include in the batch. Typically, schools choose to download the full application PDF since it combines into one package all of the applicant’s application data, letters of recommendation, document uploads, and any other application components.

Step 3: Name Your File
The PDF Manager allows you to adjust the file name pattern to fit your needs.

Step 4: Save and Run the Download
Once you run the download, WebAdMIT will prepare the documents and output a zip file containing each file named according to the pattern you established.

Using the WebAdMIT API for Automation
While it's relatively simple to set up exports and batch download PDFs, you may wish to automate the process. For example, you might need to run an export every day that shows you all applicants whose data changed within the last day. Additionally, this data may need to be imported into another system on your campus. Alternatively, you might need to download documents once a month and move them to your document management system. Using our API, you can simplify these processes and ensure the two systems "talk" to each other by creating commands to perform specific tasks (i.e., run this export/PDF download, tell me when it’s ready, give me the file to download).
By using the WebAdMIT API, you just "set it and forget it," meaning you'll never have to worry that an export or download isn’t occurring, or that it was downloaded to the wrong location. With our WebAdMIT API, it just works. Furthermore, because this WebAdMIT API can be called on demand, you decide when you want to run your exports and downloads (e.g., every day, or even every few hours).
Using nearly any programming technology or scripting framework, or a testing tool such as Postman, you can make simple URL calls to execute the commands of the WebAdMIT API.
Gaining Access to the WebAdMIT API
To work with the WebAdMIT API, the API Access permission should be enabled in your Work Group. Then:
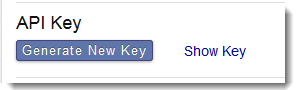
- Generate an API key. This key serves as your credentials for logging into WebAdMIT and is the same for all CASs and cycles you have access to. To generate an API key, log in to WebAdMIT and:
- Click Account, then Edit My Account.
- Click Generate New Key. If applicable, this action replaces your previous key.
- Test a simple call such as https://api.webadmit.org/api/v1/user_identities, passing your API key in the header of the request as indicated in the documentation. Note that each CAS and cycle has a user identity that is used in other API commands.
For full documentation on the WebAdMIT API, including how to talk to our WebAdMIT API, obtain an API key, and run the export commands, visit https://liaison-intl.github.io/.
Resources
We realize data integration can seem overwhelming, so we’re always happy to support you through the process. As you explore your data integration options, take note of the following resources:
- If you're an IT analyst and working with the WebAdMIT API to assist your admissions team, review our analyst's guide.
- If you're a developer and need programming assistance or documentation, review our programming guide.
- Contact the Client Support Specialist Team.