Creating a Variable Application Property Based on Application Submission Date
Outcomes allows you to create Custom Properties that capture the applicant information of your choice. Using the Calculated Property option, you can insert JavaScript code that makes a determination and returns a value based on the conditions you configure. In this article, you'll learn how to add a calculated property that returns a different value based on when the applicant submitted their application.
For example, if your applicants are grouped or reviewed differently based on whether they submitted their application before or after a specific date (e.g., a different start term), you can use this advanced configuration to add a field that indicates which group they are in.
This field could then be included in exports, filters, the Application Summary, or the Applications Grid.
Building the Custom Property
To complete this configuration, you'll first need to create a custom property that looks for the submission date and returns the value of your choice. To do this:
- Begin creating your custom property. Drag the Calculated Property option into the Manage Application Properties field.
- In the window that appears, select String as your data type.
- Paste the JavaScript expression provided below into the Expression field.
- Replace the variables as described below.
- Click Add to add the property.
- Click Save Changes to save your work.
Adding the JavaScript Code
When creating a calculated custom property as described above, you're presented with an Expression window. Paste the following code into that window. Use the view source icon to copy the code snippet.
{
  let dateField = cas_date_submitted;
  let startDate1 = new Date("2024-06-15T00:00:00");
  let startDate2 = new Date("2023-10-16T00:00:00");
  let returnOption1 = "Text Option 1";
  let returnOption2 = "Text Option 2";

  /*This field calculates which text should based on their cas_date_submitted value*/
  if (typeof dateField == "undefined") {
    return null;
  }

  let date = new Date(dateField);

  if (date >= startDate1 && date <= startDate2) {
    return returnOption1;
  } else if (date > startDate1) {
    return returnOption2;
  } else {
    return null;
  }
}
For this code to work in your environment, you'll need to update the variables with data that is relevant in your Outcomes instance.
Replacing the Variables
The following variables are present in the JavaScript expression listed above. To effectively implement this configuration, replace the variables as follows:
- '2024-06-15T00:00:00' - this is the value for startDate1. To replace this, change the value to the date that corresponds with your first relevant submitted date. For example, if the first available date for applicants to submit is March 1, 2024, this should be updated to '2024-03-01T00:00:00'.
- '2024-09-15T00:00:00' - this is the value for startDate2. To replace this, change the value to the date that corresponds with your first relevant deadline. For example, if, to be included in your first group, applicants need to have submitted before June 1, 2024, this should be updated to '2024-06-01T00:00:00'.
- "Text Option 1" - replace this with the value you want to be returned to your field if the applicant's submitted date is between the two dates you provided above. For example, if you want applicants who sumbitted between those dates to be labeled as September 1st applicants, you can change the line to:
let returnOption1 = "September 1" - "Text Option 2" - replace this with the value you want to be returned to your field if the applicant's submitted date is after the second date you provided above. For example, if you want applicants who submitted after your second date to be labeled as January 5th applicants, you can change the line to:
let returnOption2 = "January 5"
As coded, the custom property will remain blank if the submitted date is before the value you entered as startDate1.
Working with the Custom Property
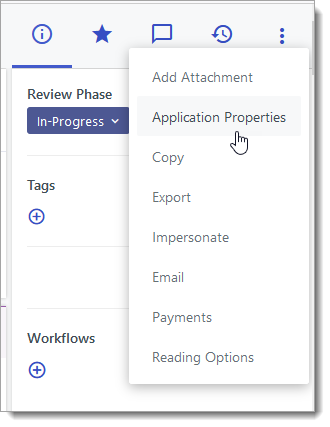
Once you've configured your custom property, by default, it becomes visible for each application on the Application Properties page.
If desired, can also use the property in other areas, such as:
- In exports: find your custom property in the Available Fields area while configuring an export to include it there.
- On applications: you can add your property to the Application Summary or Sidebar.
- On the Applications Grid: you can customize your Applications Grid to add additional fields, including your custom property.