Configuring Marketing Settings
The Marketing module in Outcomes allows you to send coordinated messages to users via emails, text messages, and voice messages. To work with these features, you'll first need to configure:
- Email Information: This includes configuring your From Email Address and From Email Label.
- Text and Voice: This includes configuring your From Phone Number.
Configuring Email Settings
Configuring your email settings allows you to establish how your emails appear to recipients, and where their replies go. To configure your email settings:
- From the Settings page, open the Marketing menu and click Email Info.
- Fill in the Sender Information.
- From Email Address: the email address that appears as the sender when your emails are sent from Outcomes. Review the Configuring Your Sending Domain and From Email documentation for more information.
- From Email Label: the name that appears as the sender when your emails are sent from Outcomes.
- Reply-To Email: the email address that Outcomes uses when the recipient replies.
- Sending Domain: the domain address Outcomes uses to indicate who the email is from. Review the Configuring Your Sending Domain and From Email documentation before editing the value here. Work with Liaison to determine how this should be set, as additional configuration may be necessary. Note that due to email providers' policies for identifying SPAM, the Sending Domain must match the domain used in the From Email address (e.g., a From Email of info@liaisonedu.com has a domain of liaisonedu.com).
- Fill in the Contact Information.
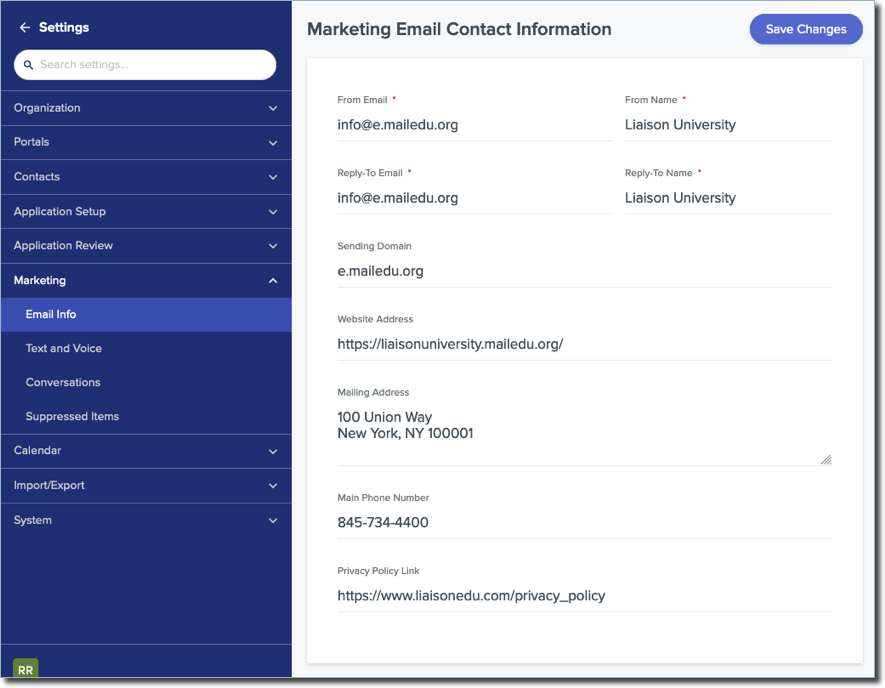
- Website Address: a link to a page on your website. You can configure this to appear on the emails you send.
- Mailing Address: your institution's address. You can configure this to appear on the emails you send.
- Main Phone Number: your contact phone number. You can configure this to appear on the emails you send.
- Privacy Policy Link: this is a link to your privacy policy. You can configure this to appear on the emails you send.
Configuring Your Sending Domain and From Email
When configuring your Marketing settings, you need to provide a Sending Domain (including a domain and a subdomain), and a From Address.
- A domain is the text that appears after the @ sign in your email address. For example, "liaisonedu.com" is the domain in the email address contact@liaisonedu.com.
- A subdomain is additional information added to the beginning of a domain name that helps separate and organize content. For example, in info.liaisonedu.com, “info” is the subdomain and “liaisonedu.com” is the domain.
To properly configure your Marketing Settings and to ensure email deliverability, the domain in your From Address (information after the “@”) must match what is configured in the Sending Domain. For example:
- Sending Domain: info.liaisonedu.com
- From Address: support@info.liaisonedu.com
Liaison uses the information you provided for your Sending Domain and From Address to configure your DNS (Domain Name System) records. DNS records (also known as zone files) are part of a system that translates domain names into IP addresses. Domain names are the human-readable addresses, while IP addresses are the numerical addresses that computers use to communicate with each other over the internet.
Creating a DNS record allows us to white-label your sending domain and email URLs to increase email deliverability by letting other mail servers know they can trust that your server is not a spam host.
We will provide you with the following record types to install in your domain provider:
- SPF (Sender Protection Framework) TXT record: This record tells the recipient’s email provider that Liaison has permission to send email on your behalf.
- DKIM (DomainKeys Identified Mail): This record tells the recipient’s email provider that this piece of mail has not been tampered with in transit from Liaison’s servers to the recipient’s inbox.
- CNAME (Canonical Name): This record powers advanced email features such as unsubscribes, opens, and clicks.MX (Mail eXchange) This record tells the recipient’s email provider where to deliver the reply.
You will need to install these records in your domain provider. Every domain provider has a different installation method, but it may be helpful to review samples from GoDaddy, Dreamhost, or other domain providers.
While you are installing these records, you should also install a DMARC record if your domain does not already have one. It’s possible that this already exists, as some domain providers provision these automatically. Review the Recommended DMARC Rollout Tutorial from Google for a thorough review of how you can roll out DMARC on your domain.
Once you have installed these records, contact Liaison and we will verify the installation on our side. Once the installation is complete, we recommend you follow a domain warm-up schedule so your emails are not sent to spam by email providers due to large volume from a new domain.
Domain Setup Steps
To set up your domain:
- Decide what subdomain you would like to use. The format for subdomains follows this pattern: text.yourdomain.com. For example, “info.schoolname.edu.”
- Next, work with your Implementation Project Manager so they can request that our Product Developer team set up the proper DNS records.
- Set up DMARC record.
- Using the subdomain of your choice, Liaison provides you with these DNS records: CNAME, TXT, MK, SPF, and DKIM.
- After you have these records, reach out to your IT team or administrator to add them to your public-facing DNS server.
- Once that is completed, inform your Implementation Project Manager at Liaison so the Outcomes Developer Team can verify your records.
Updating Sending Domain
If, for any reason, you need to change or update your sending domain, contact Support or your Client Success Director.
Changes to the sending domain may require that Liaison reissue DNS records and that your IT Team or Administrator install the updated DNS records. We also recommend following a warm-up process after changing your sending domain.
Attempting to add a domain that is not registered may result in the following errors or warnings:
- Error saving email info: Could not verify sending domain
- Do not change the Sending Domain field before talking to your Client Success Manager
New Sending Domain Warm-Up Process
If you have recently configured or updated your sending domain, we recommend following a "warm-up" process to help ensure your email deliverability.
Understanding Sender Reputation
An email sender reputation is a score that an Email Service Provider (ESP) assigns to an organization that sends email. The higher the score, the more likely an ESP will deliver emails to the inboxes of recipients on their network. If the score falls below a certain threshold, the ESP may reject that sender's messages or deliver them to recipients' SPAM folders.
Each ESP privately determines which factors to include in its sender reputation score and how heavily it weighs each factor.
Some of the factors that may impact this score are:
- The amount of email sent by the organization.
- How many recipients mark the organization’s emails as spam or otherwise complain to the ESP about the messages.
- How often the organization’s emails hit the ESP’s spam trap.
- How many of the organization’s emails bounce because they were sent to unknown users or for other reasons.
- How many recipients open, reply to, forward, and delete the organization’s messages, as well as click the links found in them.
- How many recipients unsubscribe from the organization’s email list.
Warming-Up a Domain
Domain warm-up gradually increases email volume from a new sending domain to build trust with email providers and increase your sender reputation score. This ensures your emails land in inboxes, not spam folders. Note that If your institution does not send more than 1,000 emails at one time, you do not need to warm up your domain.
The warm-up schedule involves slowly increasing the volume of your outbound email and should look like this:

- Segment: the total number of emails you'll send that day (i.e., 1,000 emails on day 1, building up to 250,000 emails on day 15).
- Day: count of days over which you'll send emails to each segment of recipients
Note: Slight deviations (give or take a few hundred per day) from the target segment will be sufficient.
To build this schedule:
- Create a total segment of all applicants you are planning to email.
- Break that segment into smaller segments, increasing the count of recipients until you reach your total segment of all applicants.
- For example, if you have 25,000 total applicants, you'll send the same email to nine different groups of applicants, gradually increasing the recipient count each day as outlined in the chart above.
- Create an email template to send to each segment.
- Make sure you personalize these emails to encourage applicants to engage with them (e.g., opening your emails and clicking the links in them).
- Create a campaign that sends these email templates on consecutive days until you have sent an email to your total segment.
Note: after the domain warmup has been completed, it's important to continue sending emails on a consistent basis to continue building your email reputation.
Example:
- Total Segment = 10,000 applicants
- Smaller Segments Needed:
- Segment 1: ~1,000 applicants
- Segment 2: ~2,500 applicants
- Segment 3: ~5,000 applicants
- Segment 4: ~6,500 applicants
- Segment 5: ~8,000 applicants
- Segment 6: ~10,000 applicants
- Smaller Segments Needed:
- Emails (6): A, B, C, D, E, F, and G
In this example, there are a total of 10,000 applicants that will be sent emails. The warm-up is completed in six days.
Domain Warm-Up Frequently Asked Questions
- What if I have an urgent event or campaign that needs to get sent out during the middle of the warm-up? I can’t wait for the warm-up to be ready to send the entire volume I want to send.
Bypassing the warm-up will lead to your email getting routed to spam. Major ESPs never publicize your sender reputation but will still act on your mail if you have a bad reputation. You can still send your campaigns out, but it's best to do this incrementally until you have reached your 90-day average sending volume.
- What if I have never sent 1,000 emails in one day?
In this case, there's no need for a domain warm-up! With lower email volumes, your email reputation will not be impacted by the variances of your sending. Congratulations! You are ready to resume normal marketing communication flow.
- What if I don’t have any active campaigns ready to go live or fit the volume required of the domain warm-up?
That is okay! When you have a campaign that is of the appropriate size for the domain warm-up, you can warm up your domain in the lead-up to that large send. Your new domain will not be affected by waiting days, weeks, or even months for the warm-up to happen.
General Email Best Practices
Industry experts suggest doing the following things:
- Maintain consistent email volume. Sending sprees can raise red flags for spam filters, so remember to pace yourself.
- Respect consent. Only email those who have signed up to get your messages. If recipients mark your messages as spam, it can cause deliverability issues in the future.
- Fix broken links and images. Broken elements can trip spam filters. Double-check that these items are working properly.
- Personalize your messages. Relevant, targeted content keeps users engaged, reducing spam triggers.
- Minimize email and attachment size. Large emails and hefty attachments often trigger spam filters. So, as a general rule, keep email size under 100KB and attachments under 10MB.
- Monitor bounces and complaints. Aim for less than 5% bounce rate and 0.1% complaint rate.
- Clean your list regularly. Remove bounced, unsubscribed, and complaining contacts immediately, and do not send them future messages.
Experts recommend not doing these things:
- Don't mark internal messages as spam. Marking internal emails as spam damages your domain's reputation, potentially causing future deliverablity issues.
- Don't use opt-in forms with pre-checked boxes. Opt-in forms that are checked by default violate regulations in some areas. Always let users choose to subscribe on their own.
Configuring Text and Voice Settings
Configuring your Text and Voice Settings allows you to establish what phone number you'll use to contact applicants via text and voice messages. To configure these settings:
- From the Settings page, open the Marketing menu and click Text and Voice.
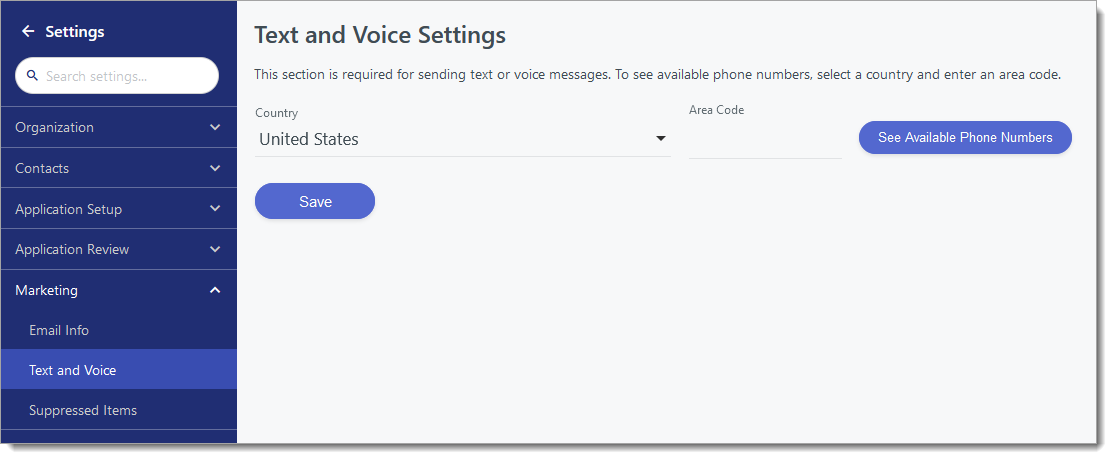
- If you don't have a phone number configured, enter your desired area code and click See Available Phone Numbers. These phone numbers are provided to you by Liaison. If any are available, they appear in a dropdown, allowing you to select which one you'd like to use.
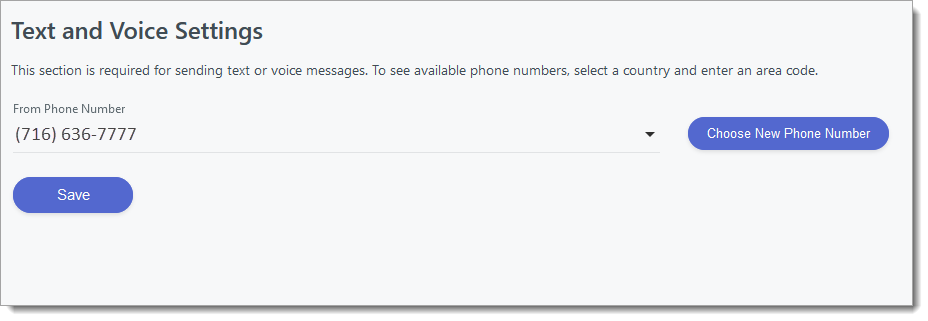
- Select a number and click Save to keep it. Going forward, Outcomes uses this phone number for your marketing text and voice messages. Note that this number is what applicants will see as the source of your message. These numbers aren't available for applicants to call, but, where applicable, when an applicant responds with a text, it appears in the Conversations module. Click Choose New Phone Number to search for another.
Once you've configured voice messages, you can send them to desired audiences.
Reviewing Suppressed Communication
The Marketing tool in Outcomes suppresses some messages, preventing them from being sent. This can happen when:
- an email address is found to be invalid, or
- an intended recipient has opted out of receiving messages.
To review a list of suppressed messages, navigate to the Marketing section of the Settings menu and click Suppressed Items.
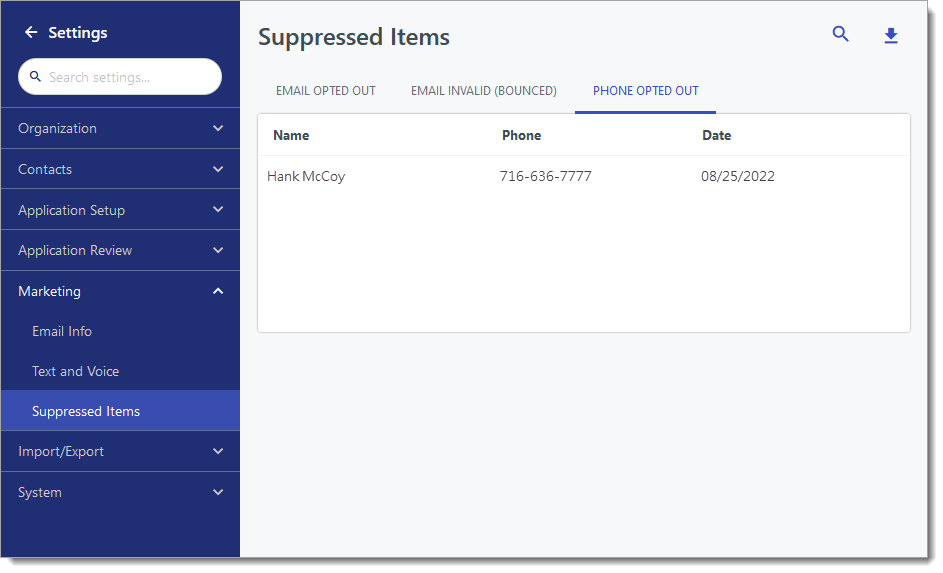
Use the tabs on the right to toggle between OPTED OUT EMAILS, INVALID (BOUNCED) EMAILS, and OPTED OUT PHONES.