Navigating Marketing
The Marketing view in Outcomes allows you to create and track your outreach methods. Using the Marketing tools, you can set up automated, personalized communications to any contact or application.
- Campaigns - From this area, you can organize email, text, and print communications based on audience and sequence. Examples of this include Drive to Apply Emails, texts to inquiries, or orientation invitations for accepted students.
- Email Templates - From this area, you can use a point-and-click HTML email editor to craft email content to be reused as needed.
- Print Templates / Approvals - From this area, you can set up automated media to be printed and mailed by our NY-based production team.
Campaigns

- Marketing Menu: select between Quick Messages, Campaign Builder, and Templates.
- Campaigns Dropdown: use this dropdown to select between active and inactive campaigns.
- Search Button: use the search to find existing campaigns.
- New Campaign: click the plus sign to begin building a new campaign.
- Campaign List: review your existing campaigns using this grid.
- More Options: use this button to access the Copy, Delete, and Deactivate actions.
To perform bulk actions on your campaigns, use the appropriate checkboxes to select them individually, or use the top checkbox to select them all.
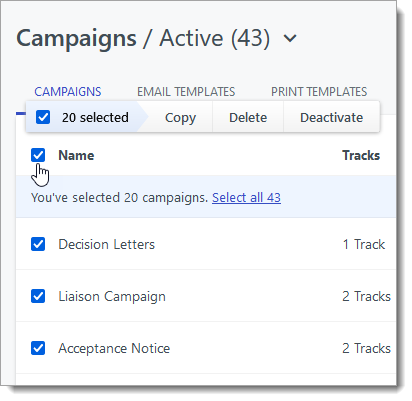
Bulk actions include:
- Copy: create a new campaign using the settings of your existing campaign(s).
- Deactivate: deactivate the existing campaign(s).
- Delete: remove the existing campaign(s).
Email Templates
In the Marketing area of Outcomes, you can create email templates to send to applicants. To access the Email Templates section, click Templates from the Navigation Menu under Marketing.

To create a new template, click the plus sign at the top right. Click on any template to review or edit it. To switch between active and inactive templates, use the dropdown at the top of the page. To perform bulk actions on your Email Templates, use the appropriate checkboxes to select them individually, or use the top checkbox to select them all.

Bulk actions include:
- Copy: Create a new campaign using the settings of your existing template(s).
- Deactivate: deactivate the existing template(s).
- Delete: remove the existing template(s).