Liaison

Managing Phases

Phases are different periods during the application cycle that you establish. You can create Phases to organize applicants, corresponding with their current status with your institution. For example, you can create Phases for applicants who are under review, to be interviewed, or awaiting additional information.

Creating Phases

To create a Phase:

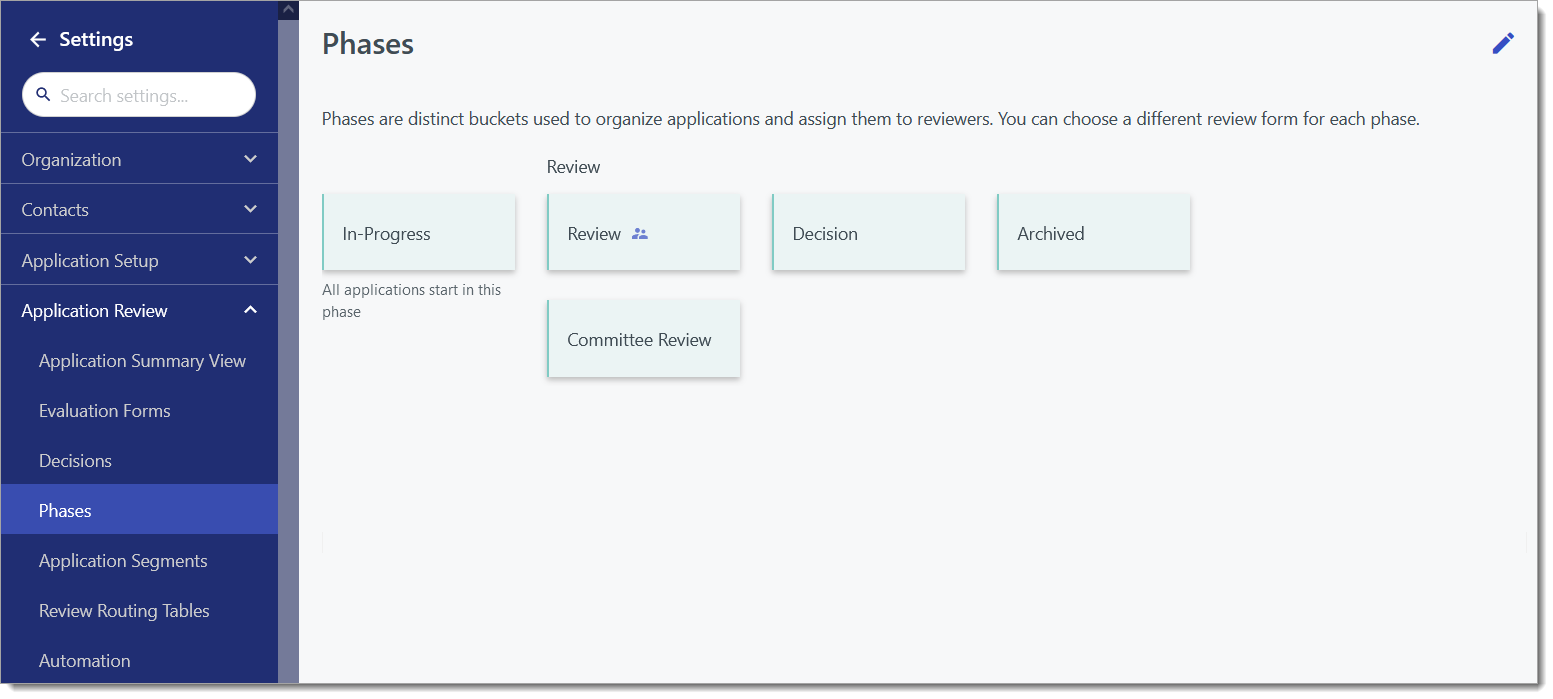
  1. Go to Phases under Application Review in the Settings menu.

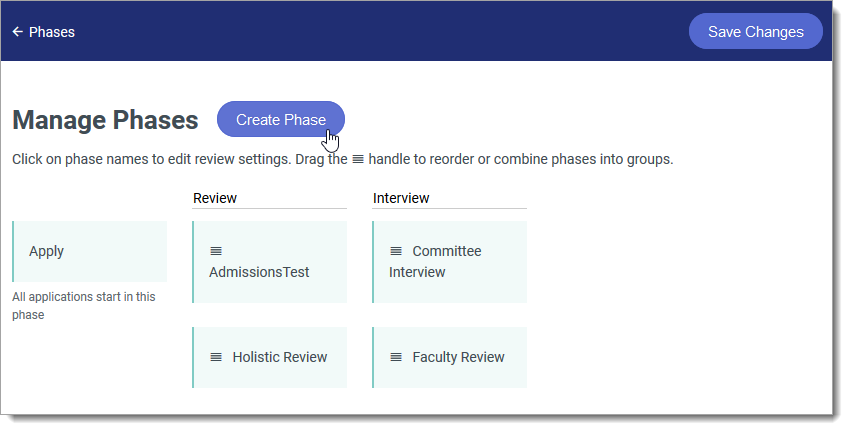
  2. Click the Edit Pencil at the top right. From here, you can review your current Phases, move them into different groups, and rename existing groups.

    Access your Phases from the Settings menu

  3. Click Create Phase to begin creating a new Phase.

    Click Create Phase to build your Phase

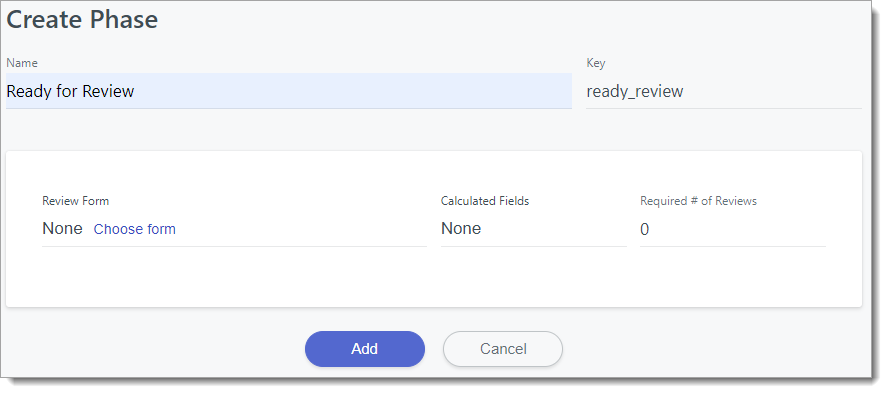
  4. After naming the Phase, choose whether you want to associate a Review Form to the Phase by clicking Choose form. If you add a Review Form here, the form appears on the Review Tab when reviewing an application, allowing a reviewer to record the results of their review. Where desired, you can select fields from this Review Form to add as Calculated Fields. This allows you to calculate the Average, Sum, or Median score awarded to an application by your reviewers for that field. You can also set a number of required reviews to track when this application has been sufficiently reviewed.

    Configuring your Phase Settings

  5. Making a selection here allows any applicant placed in this Phase to be assigned to be reviewed using the form of your choice. Click +Add Assignments to decide who will be assigned to review applications in this Phase. By clicking Choose segment, you can divide the applicants in this Phase, assigning to different reviewers or teams based on the Segments they fall into. If you don't select Segments here, by default, all applications in this Phase will be assigned to the reviewers or teams you choose.

    Click Choose a Segment to assign applicants in this Phase based on their Segment

  6. If you've decided to distribute the assignments based on Segments, you can add several Segments to assign by. Once you're done, you can choose what to do with any remaining applicants who are in the Phase but not assigned based on their Segment. The default is to leave them unassigned. Click Edit to adjust this.

    Assign the remaining applicants in this Phase

  7. When finished, click Add.

    Click Add to complete the Phase

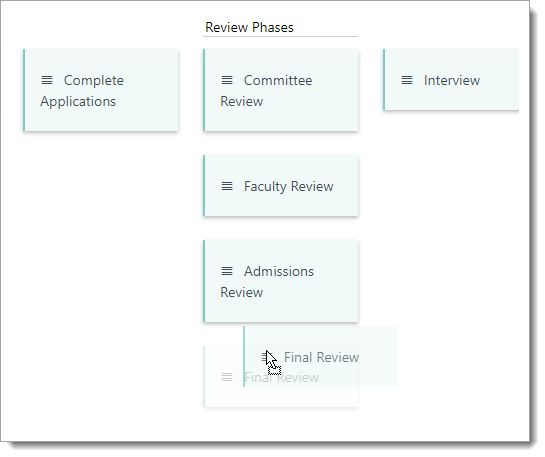
  8. If desired, click and drag to move the Phase into its appropriate group. When two or more Phases are grouped together, a Group Name field appears, allowing you to name the Phase group.

    Group your Phases by placing them in line with each other

Once Phases are created, you can move applicants into them as desired.

  • Was this article helpful?