TX Form Examples
Event Form Example
This example outlines a simple registration form for an upcoming college open house. It captures guest count, preferences, and academic interests.
Note: You can create TX forms for Events from several locations. In this example, we will be referencing the Organization Events tab.
Step 1: Create Custom Questions
If needed, begin by adding any Custom Questions to your event. For example:

Step 2: Create a new TX Form
- Navigate to Organization Events and click the Event you will be using for the form.
- Locate the Event Forms Options section.
- Click the Form Builder button to create a NEW form.
- Click the + to create a new form.
- Enter a Form Name, such as 'Fall 2025 Undergraduate Open House'
Step 3: Set up Basic Information Section
- Click the Content tab to begin adding Sections to your form. A new Section will be automatically added.
- Add a Name to your Section, such as 'Contact Information'.
- Click on the Question content block to add it to the form.
- Choose Object = Contact, Field = First Name
- Click the Required toggle.
- In the form panel, enter a display label for the question, such as 'First Name':

- Click the ' Drag and drop or select content blocks from the content tab' area to add the next question.
- Choose Object = Contact, Field = Last Name and click the Required toggle.
- In the form panel, enter a display label for the question, such as 'Last Name.'
- Click the ' Drag and drop or select content blocks from the content tab' area to add the next question.
- Choose Object = Contact, Field = Email and click the Required toggle.
- In the form panel, enter a display label for the question, such as 'Email Address.'
Step 4: Add Academic Interest Section
- Add another Section.
- Add a Name to your Section, such as 'Academic Interest'.
- Click on the Question content block to add it to the form.
- Choose Object = Contact, Field = Program
- In the form panel, enter a display label for the question, such as 'Program of Interest.'
- Verify the picklist options and add, edit or delete as needed.
- Save the form.
Step 5: Preview, Publish and Verify the form
When you preview your form using the Form Builder, your Custom Questions will not be displayed. Therefore, in this example, we will preview the form from the Organization Events section. This process requires you to publish your form first to ensure that all elements, including custom questions, are correctly displayed during the preview.
- Click the Details tab on your form and click the Publish Form toggle.
- Save the form.
- Navigate to your Organization Event. The form you just created should be populated in the Event Form field.
- Click the Registration Link to view the form with your Custom Questions.
- Complete the form and click Register to verify that the form works as expected.
Sample form based on our example:

Inquiry Form Example
This example walks you through setting up a simple Inquiry Form that allows prospective students to request more information about your institution or programs.
Step 1: Create a new TX Form
- Navigate to TargetX Builder.
- Select the TX Forms icon.
- Click on the General icon.
- Click the + to create a new form.
- Enter a Form Name, such as ‘Prospective Student Inquiry Form’, and click Create.
Step 2: Add a Contact Information Section
- Click the Content tab to begin adding Sections to your form. A new Section will be automatically added.
- Add a Name to your Section, such as 'Contact Details.’
- Click the Question content block to add it to the form.
- Choose Object = Contact, Field = First Name
- Click the Required toggle.
- In the form panel, enter a display label for the question, such as 'First Name.'
- Repeat for the following:
- Last Name → Field: Contact → Last Name (Required)
- Email Address → Field: Contact → Email (Required)
- Phone Number → Field: Contact → Mobile Phone (Required)
Step 3: Add and Academic Interest Section
- Add another Section.
- Add a Name to your Section, such as 'Academic Interest'.
- Click the Question content block to add it to the form.
- Choose Object = Contact, Field = Degree, Field Type: Picklist
- Verify the picklist options and add, edit or delete as needed.
- In the form panel, enter a display label for the question, such as ‘Degree of Interest.'
- Repeat for the following:
- Anticipated Major → Field: Contact → Anticipated Major
- Entry Term → Field: Contact → Anticipated Start Term → Type: Picklist (e.g., Fall 2026, Spring 2027)
- Student Type → Field: Contact → Student Type → Options: First-Year, Transfer, International, Adult Learner
- Save the form.
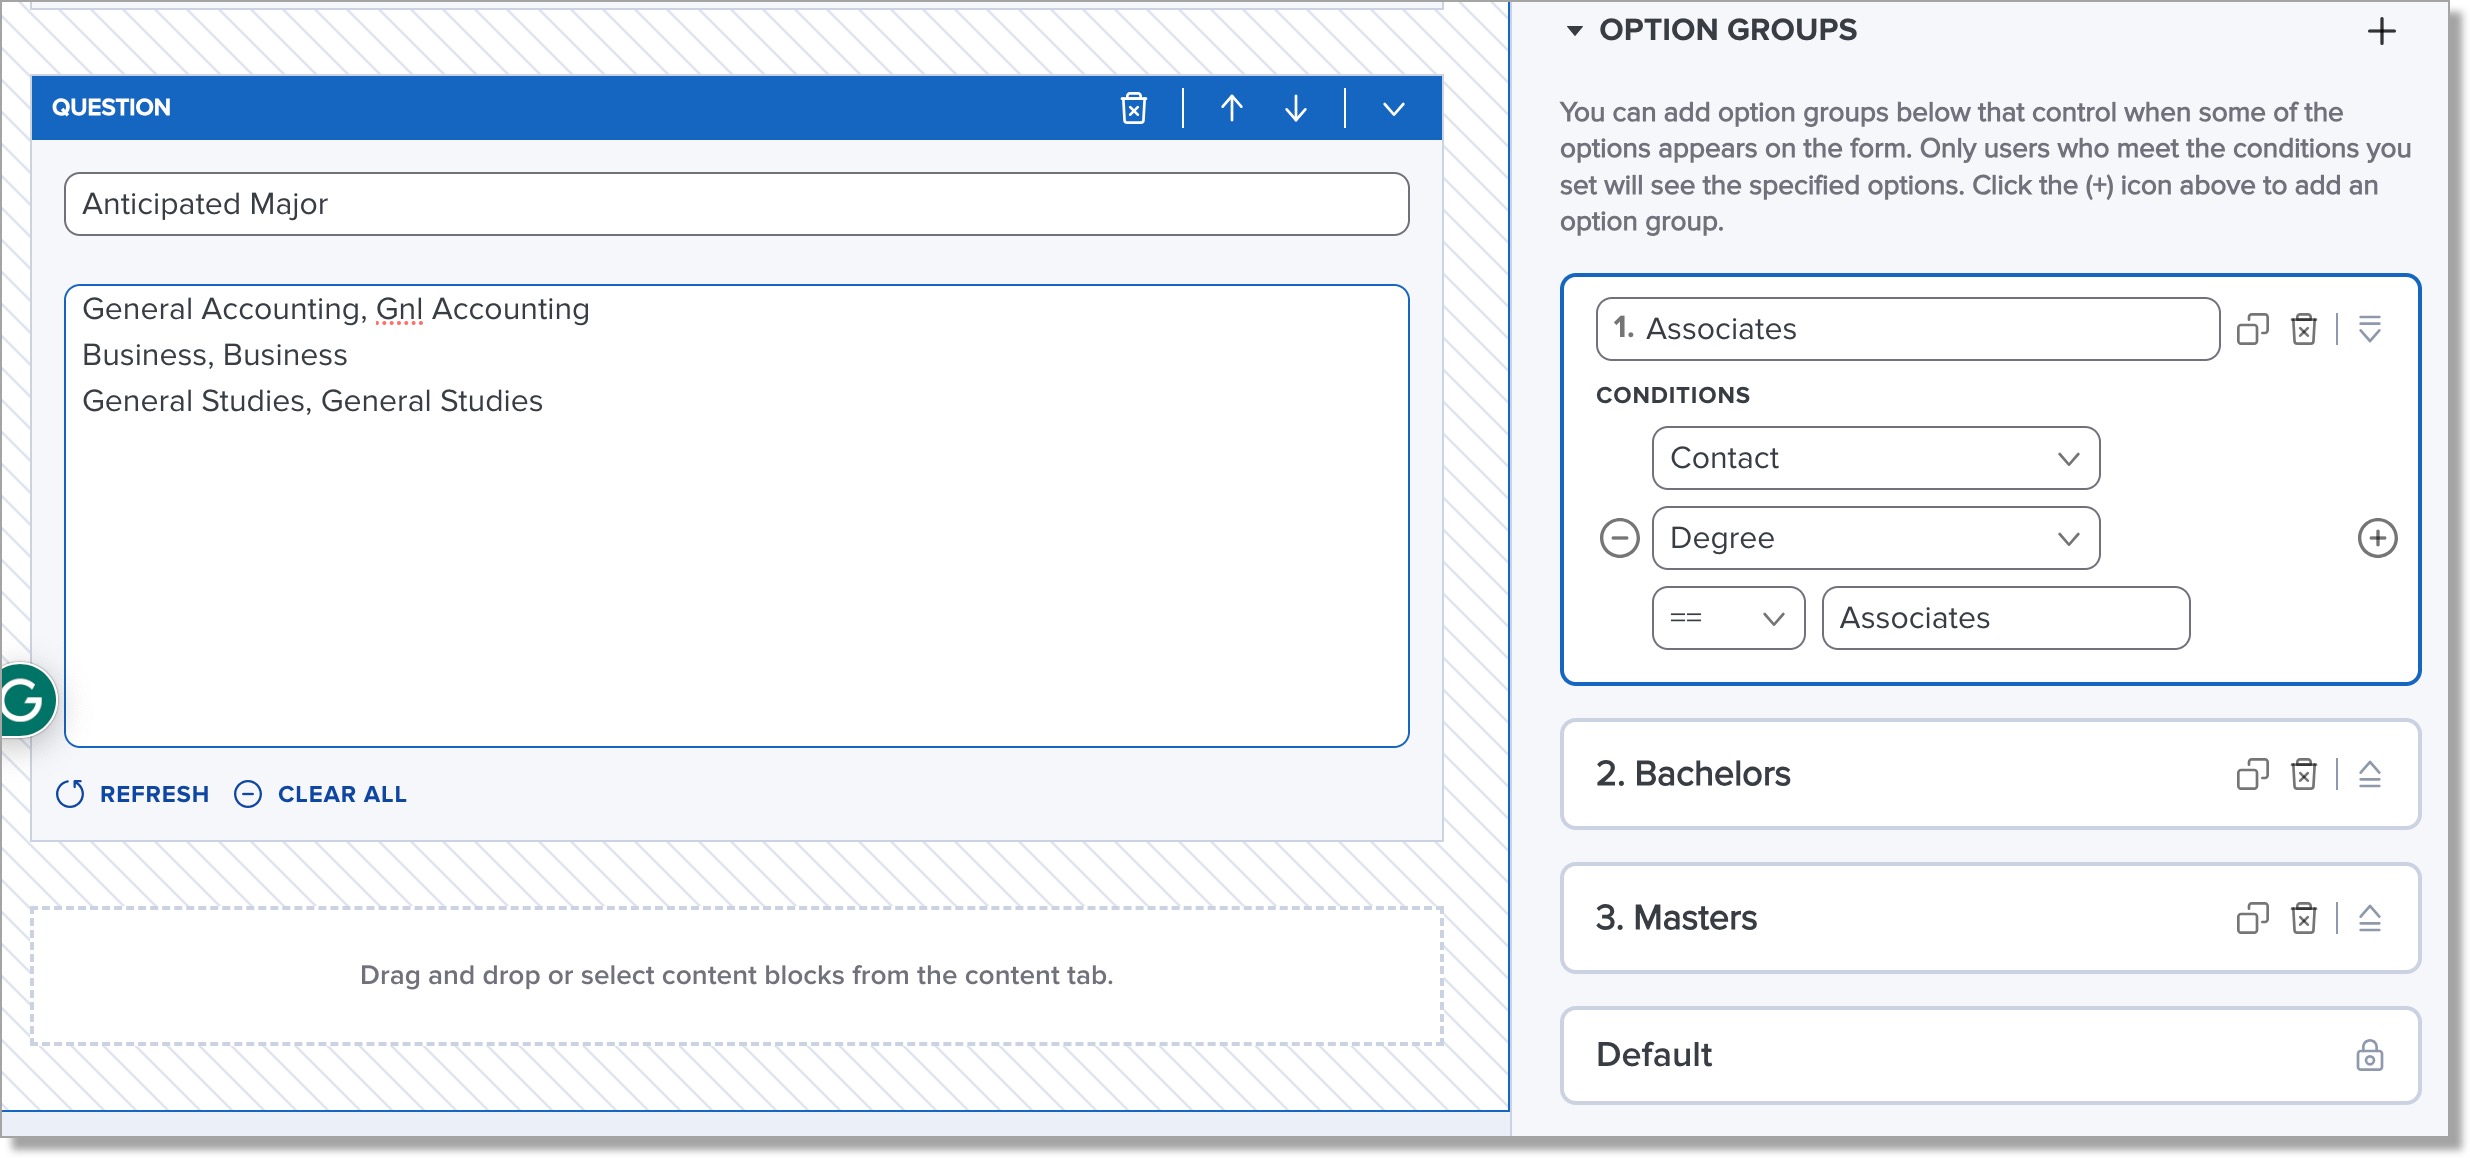
Step 4: Create an Option Group
In this example, we will configure the Anticipated Major field to change depending on the Degree selected:
- Click the Anticipated Major question.
- In the Option Groups section, click +
- Enter a name for the group, such as ‘Associates’
- Specify the conditions as ‘Contact.Degree == Associates’
- In the left pane, edit the list of Majors to display only those that are relevant to an Associates degree.
- Click + to add the next Option Group with the following criteria:
- Name = Bachelors
- Conditions = Contact.Degree == Bachelors
- In the left pane, edit the list of Majors to display only those that are relevant to a Bachelors degree.
- Click + to add the next Option Group with the following criteria:
- Name = Masters
- Conditions = Contact.Degree == Masters
- In the left pane, edit the list of Majors to display only those that are relevant to a Masters degree.
- The Default option can be used for any values that do not need a specialized list of values.
- Save your form.
Sample option groups might look like this for different groups. Notice that the ‘Anticipated Major’ list varies depending on the option group that is select in the right side pane:

Preview the form to verify that lists display as expected:

Step 5: Add a Source Section
- Create a section called “Marketing Source.”
- Add a new question:
- Field: Contact → Lead Source, add a label, such as 'How did you hear about us?'
- Type: Picklist (e.g., Friend/Family, Social Media, Website, College Fair, High School Counselor)
Step 6: Preview and Publish
- Preview your form by selecting the Preview icon at the top of the form.
- Check field labels, required questions, and layout.
- Click Publish and share the public form link.
For next steps, see the article Previewing, Publishing, and Sharing Your TX Forms.