Managing TX Print Templates
Creating a new TX Print Letter template
- Before you begin creating a Letter template, you should first create a TX Print Report.
- From TX Print, click the Letter icon [
].
Note: To ensure a sharp image when printing, a resolution of 150 pixels/inch to 300pixels/inch is recommended. For example, a 3 inch wide image on a letter with 150 pixels/inch the width in pixels would be 450 pixels.
- Click the + in the upper right.
- Enter the following:
- Sample Template (optional) allows you to start with a template that has already been set up which you can then edit for a new purpose. If left blank, your template will be empty, and you will build it from scratch.
- Name
- Description
- Size (in inches) currently allows either US Paper (8.5 x 11) or A4 Paper (8.27 x 11.69)
- Margin (in inches)
- Sample Report - This will be used for autocompleting merge fields and for print preview of your Letter. Select the report you created in Step 1.If you do NOT select a Sample Report, you will have to manually type the merge fields into your template, i.e.
{{fieldname}}
- Save your template.
- Click the Layout tab to begin adding Sections.
- For each Section, add the Elements you want on the Template (text or image). You can also leave a section blank if needed:
- Image elements require an Image URL and your choice of alignment (left, center or right). The URL can be any hosted image that can be accessed over the internet without any authentication (public). A resolution of 150 pixels/inch to 300pixels/inch is recommended.
- Text elements will display along with formatting tools in the selected section. To add merge fields from your Report, enter a { where you want the merge field added. This will pop up a list of the merge fields from your Sample Report. Click the relevant field to add it to your letter.
- A Dynamic Date field can be added by entering
{{tx_date}}. When you preview or generate Print Jobs, this will display the current date.
- To add an image (such as a signature):
- Click on the section where you want to place the image.
- Click the Image option from the Content tab.
- Enter the Image URL and the Align option.
- To Preview, click the at the
top of the window.
- Click Load Contacts to load the list of Contacts from your Report.
- Select a Contact from the list to preview the letter with the Contact data.
- Save your changes.
- Click
at the top of the window to return to the Letter Builder.
Adding an Image to a TX Print Letter Template
Image elements require an Image URL and your choice of alignment (left, center or right). The URL can be any hosted image that can be accessed over the internet without any authentication (public). A resolution of 150 pixels/inch to 300pixels/inch is recommended. If publicly available images are stored in Salesforce, you can copy the image's address directly from either the documents tab or files (only in Lightning). You can also choose to upload your desired image to the hosting platform of your choice, and take the image address from there.
- From TX Print, click the Letter icon [
- Click in the section where you want to place the image.
- Click the Image option from the Content tab.
- Enter the Image URL and the Align option.
Notes:
- If you use a Public link from a File, open the public link in an Incognito window, right-click on the image and select Copy Image Address. Use this link in TX Print.
- To ensure a sharp image when printing, a resolution of 150 pixels/inch to 300pixels/inch is recommended. For example, a 3 inch wide image on a letter with 150 pixels/inch the width in pixels would be 450 pixels.
Including a ‘Current Date’ field in your TX Print letters
Users can add the current date by using the Dynamic Date field:
- Navigate to TX Print.
- Create or Edit the Letter where you want to include the Current Date.
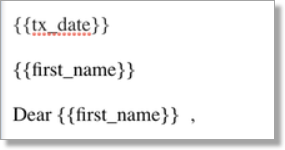
- Enter
{{tx_date}}where you want the date to be displayed. When you preview or generate Print Jobs, this will display as the Current Date. - Save your changes.
Example:
 |
will display as | 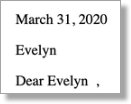 |
Creating a new TX Print Envelope template
- From TX Print, click the Envelope icon [
].
- Click the + in the upper right.
- Enter the following:
- Name
- Description
- Size (in inches) currently allows either #10 Envelope (4.125 x 9.50) or Custom
- Position(in inches)
- From the Top
- From the left
- Sample Report - This will be used for autocompleting merge fields and print preview.
- Click Create.
- In the Content tab, enter Text using the formatting tools or add merge fields from your Report, enter a { where you want the merge field added. This will pop up a list of the merge fields available from your Report. Click the relevant field to add it to your envelope.
- Save your changes.
- To Preview, click the
- Click Load Contacts to load the list of Contacts from your Report.
- Select a Contact from the list to preview the envelope with the Contact data.
- Click the
Creating a new TX Print Label template
- From TX Print, click the Label icon [
].
- Click the + in the upper right.
- Enter the following:
- Name
- Description
- Size currently allows Avery 5160. For details on compatible Avery labels, see Avery Label compatibility with TX Print.
- Sample Report - This will be used for autocompleting merge fields and print preview.
- Click Create.
- In the Content tab, enter Text using the formatting tools or add merge fields from your Report, enter a { where you want the merge field added. This will pop up a list of the merge fields available from your report. Click the relevant field to add it to your label.
- Save your changes.
- To Preview, click
- Click
Note: If your labels do not align properly on Avery 5160 stationery, please ensure that in your print settings are as follows:
- Paper size is set as US Letter or A4
- Margin is set to none
- Scale is set to default
Avery Label compatibility with TX Print
We support a range of Avery labels in TX Print, but their naming conventions can be confusing as the same template size can have various product codes. We indicate the 3 main codes for each template size, but here is a full list of compatible Avery labels.
Avery 5160/5260/5960 - 15660, 15700, 15960, 16460, 16790, 18160, 18260, 18660, 22837, 28660, 32660, 38260, 45160, 48160, 48260, 48360, 48460, 48860, 48960, 5136, 5260, 55160, 5520, 55360, 5620, 5630, 5660, 58160, 58660, 5960, 6240, 6521, 6525, 6526, 6585, 75160, 80509, 8160, 8215, 8250, 8460, 85560, 8620, 8660, 88560, 8860, 8920, 95520, 95915, Presta 94200
Avery 5162/5262/5642 - 18262, 48462, 48862, 5262, 5522, 5654, 5962, 6445, 6455, 8162, 8252, 8462, 95522, Presta 94206
Avery 5161/5261/5383/5961 - 5161, 5261, 5383, 5961, 8161, 8461, Presta 36450, Presta 36451, Presta 36452, Presta 36453, Presta 36454, Presta 36509, Presta 36510, Presta 36511, Presta 36512, Presta 36513, Presta 36549, Presta 36550, Presta 36551, Presta 36552, Presta 36553, Presta 94202
Spacing in your templates
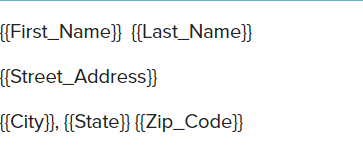
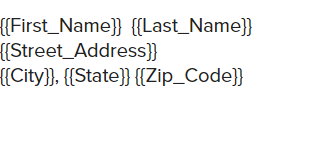
Pressing Enter adds a paragraph space, "Shift+Enter" creates a manual break without paragraph space:
Paragraph space:
Manual break: