Checking-in Students for Events
Overview
The Events Check-In App displays the following when adding events:
- Up to 50 upcoming events within the next 30 Days
- Events that have not been canceled
- Events that already exist in the user app (on the My Events page) will appear in the download list but greyed-out since they were already added to the app
- The download list is sorted in chronological order by Event Start Date
If you have more than 50 events, you must wait until some events pass and then sync your app again for the next set of events to be available.
The App allows up to five devices to log in per Username. If you log in to additional devices, users will be logged out and will lose their check-in data if they haven't synced.
- Select the desired Event in the My Events page either by clicking the Event name or on the arrow icon to the right of the Event.
- Click the Attendees tab. You can click the Search Field on the Event Attendee page to search for a student by name.
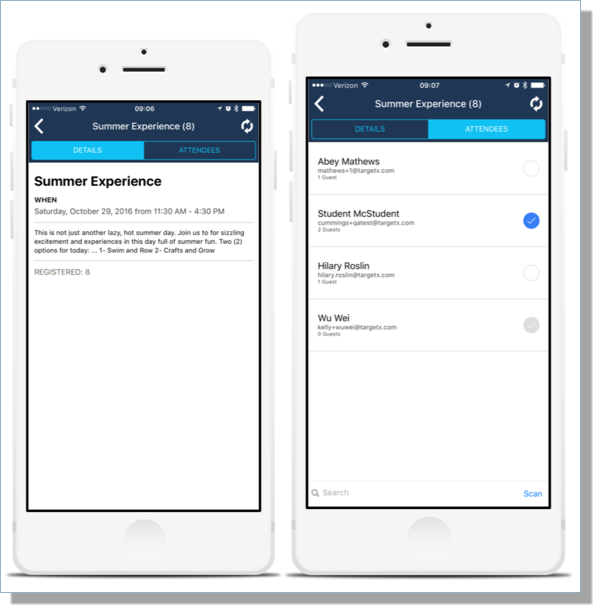
-
Click the checkbox to the right of the student's name. When selected, a pop-up window allows you to view/update the Number of Guests, Check-In for the selected Event, or Cancel the check-in and return to the Event Attendee list without saving the information.
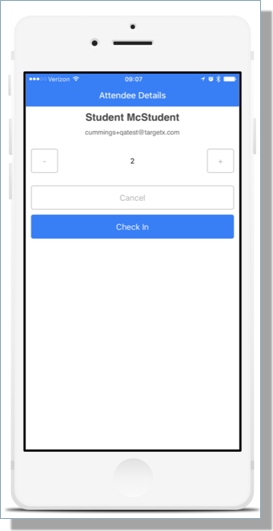
Note: Event Staff members can Uncheck an Attendee if they wish to remove the check-in. Once synchronization is complete, the check-in will be removed.
-
Navigate back to My Events page to choose another event if desired.
Using QR Codes for Event Check-In
When a student registers for an event, you can include a QR code in the HTML version of the confirmation email. They can then scan this code when they check-in for the event to streamline the process and reduce manual work on your end. Events 5.0 introduced enhanced QR Code functionality.
Note: The QR code Check-In functionality and configuration process also works for the Staff and Volunteers associated with the Organization Event.
Building the Restricted QR code
- Click your profile icon (top right) and Switch to Salesforce Classic.
- Navigate to your Organization Calendar tab by clicking on the plus sign in the top navigation bar.
- Copy the URL starting from https:// up to and including /apex/
Example: https://targetx-eventsb.na14.visual.force.com/apex
- Add the copied portion of the URL from the previous step into the following code:
<img alt="Image Missing" src="https://quickchart.io/qr?key=q-y4owo7q9quojmp34rgtdlotxlgycu181&text=https://<<Insert logged in URL prefix here>>/targetx_eventsb__QRcheckin?cid={!Contact.Id}" width="200" height="200" />
- Insert the above code into the HTML Source code of your email. Remember to add the QR merge field to the Event Confirmation email and the Event Off Waitlist email.
- To insert it into the HTML source, click Source in the builder and copy it directly into there to avoid picking up unwanted formatting that will not display the QR Code.
Adding QR Merge Field to Confirmation Email Templates
There are two options available when configuring QR codes for event check-in. Public QR codes can be created to allow attendees to check themselves in at events. Restricted QR codes can be created to allow only staff members to check in event attendees.
Public QR Codes
To build the public QR Code in your confirmation email:
- Add your Events site to the following code:
<img alt="Image Missing" src="https://quickchart.io/qr?key=q-y4owo7q9quojmp34rgtdlotxlgycu181&text=https://<<SITEURLHERE>>/targetx_eventsb__QRcheckin?cid={!Contact.Id}" width="200" height="200" />
- Insert the above into the HTML Source code of your email. Remember to add the QR merge field to both the Event Confirmation email and the Event Off Waitlist emails.
Restricted QR Codes
To build the restricted QR Code in your confirmation email:
- Click the Organization Calendar tab.
- Copy the URL starting from https:// up to and including /apex/
Example: https://targetx-eventsb.na14.visual.force.com/apex
- Add the copied portion of the URL from Step 3 into the following code:
<img alt="Image Missing" src="https://quickchart.io/qr?key=q-y4owo7q9quojmp34rgtdlotxlgycu181&text=https://<<Insert logged in URL prefix here>>/targetx_eventsb__QRcheckin?cid={!Contact.Id}" width="200" height="200" />
- Insert the above code into the HTML Source code of your email. Remember to add the QR merge field to the Event Confirmation email and the Event Off Waitlist emails.
Adding Merge fields
Instructions for adding merge fields to email templates using the Old Email UI:
- Select the Events Email Template where you want to add a Merge field.
- Click the Edit HTML Version button within the template and make your selections.
- Select Field Type – the object you want to pull the information from. For example, Student fields.
- Select Field – the actual data you want to add to the email content. For example, First Name.
- Copy Merge Field Value – copy this value and paste it where you want it to appear in the body of your email.
Example: Contact Fields - First Name - {!Contact.FirstName}
What Happens When the QR Code is Scanned?
Depending on when this code is scanned, it will direct them to one of 2 pages:
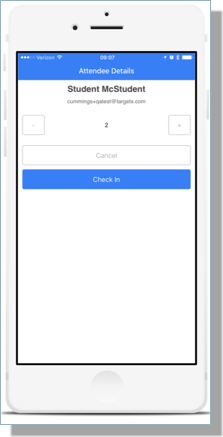
- During the QR check-in window (defined below): Scanning the QR code opens a page asking how many guests are joining the student to verify that it matches the number indicated on their registration. After clicking Save, it also marks them as "Attended" for the event.
- During times outside the QR check-in window: Scanning the QR code will redirect to a page displaying the message that no events are available for check-in.
Note: Users scanning a Restricted QR code during or outside the check-in window will be asked to sign in to Salesforce before being redirected to the appropriate page.
Permissions for scanning Restricted QR codes: On Active Users, edit their Profile and provide access to Read and Edit Contact, Contact Schedule Item, and Organization Events object permissions. They must also have access to the Visual Force Pages related to Events.
Defining the QR Check-In Window
QR Code check-in is active during and for a configurable window before and after the event.
- Default QR window settings: The Events Settings page has parameters to set the default number of hours the QR check-in window stays open before and after the event start and end times. Access this page by navigating to [Your Name] > Setup > Develop > Custom Settings > Manage Events Settings > Edit.
- Event-specific QR window settings: You can specify the QR check-in window for each event.
- On the Event Details page, scroll down to the Preferences section.
- Populate the QR Check-in Hours Before Event and QR Check-in Hours After Event fields.
Note: These values will default to the number of hours set in the Custom Settings but can be edited.
Additional QR Code Check-in Functionality (available in Events 5.0 and higher)
In Events versions 5.0 and higher, additional QR code check-in functionality is available, including:
- Ability to check in a single attendee for all registered events within the active check-in window.
- Option for individual check-in pages for each registered guest of an attendee when the "Use Named Guests" custom setting is enabled for Events. For more information, please see Using Named Guests in Events.
- Create a Contact-specific (not event-specific) QR code to be used when an attendee checks in to multiple events during a visit.
Create QR Tags via Conga (Events 5 and higher) 
Want to include QR codes in your output file? Well, here's how to do it:
- Create a formula field on the Contact object:
- Create a new field and select Formula
- Provide a field label
- Formula Return Type is Text
- In the formula, enter:
- Formula Template for Non-Restricted QR Code:
"https://quickchart.io/qr?key=q-y4owo7q9quojmp34rgtdlotxlgycu181&text=Insert Event Site URL Here/TargetX_Eventsb__qrcheckin ?cid="+Id
- Then press Next and continue to Save the new field.
- Merge the field in your template to include the QR code:
a. IMAGE: Prefix needs to be included in the actual merge field: IMAGE:INSERT_MERGE_FIELD
(do not check the option in Word "Include Prefix"; you manually need to type this in before the field name from your excel file)
Scanning QR codes with the Events Check-In App
A QR Code "scan" button is available on the Event Details and Event Attendee pages, which, when clicked, opens a built-in QR Code Scanner:
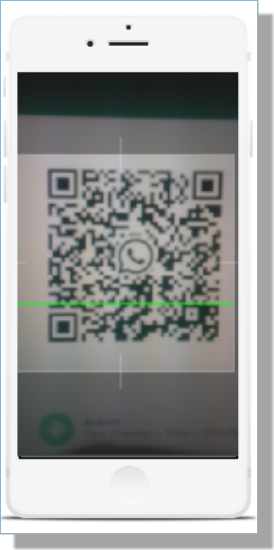
When a user scans a student's QR Code, that student's record will be auto-located and present the Check-In pop-up.
Tracking Event Check-In
As guests arrive at your event, you can mark those guests as Attended in one of two ways (the same check-in processes apply to those serving as Staff or Volunteers):
If you include QR codes in your confirmation email, you can easily scan these codes using a scanner or even a smartphone, and the guest’s status will automatically be updated to “attended.” QR Codes have a time window that they can be used before and after an event; these are configured in Events Custom Settings.
For instructions on generating QR codes in your email templates see Using QR Codes for Event Check In.
The other means of marking your event guests as attended is to have the event open on your computer at the event check-in desk. You can then use the Filter to find the specific guest, and click the “Attended” checkbox. As attendees arrive, you can use the filter section to search for them by first name or full name. Note: Use an * as the filter to bring back ALL registrants.
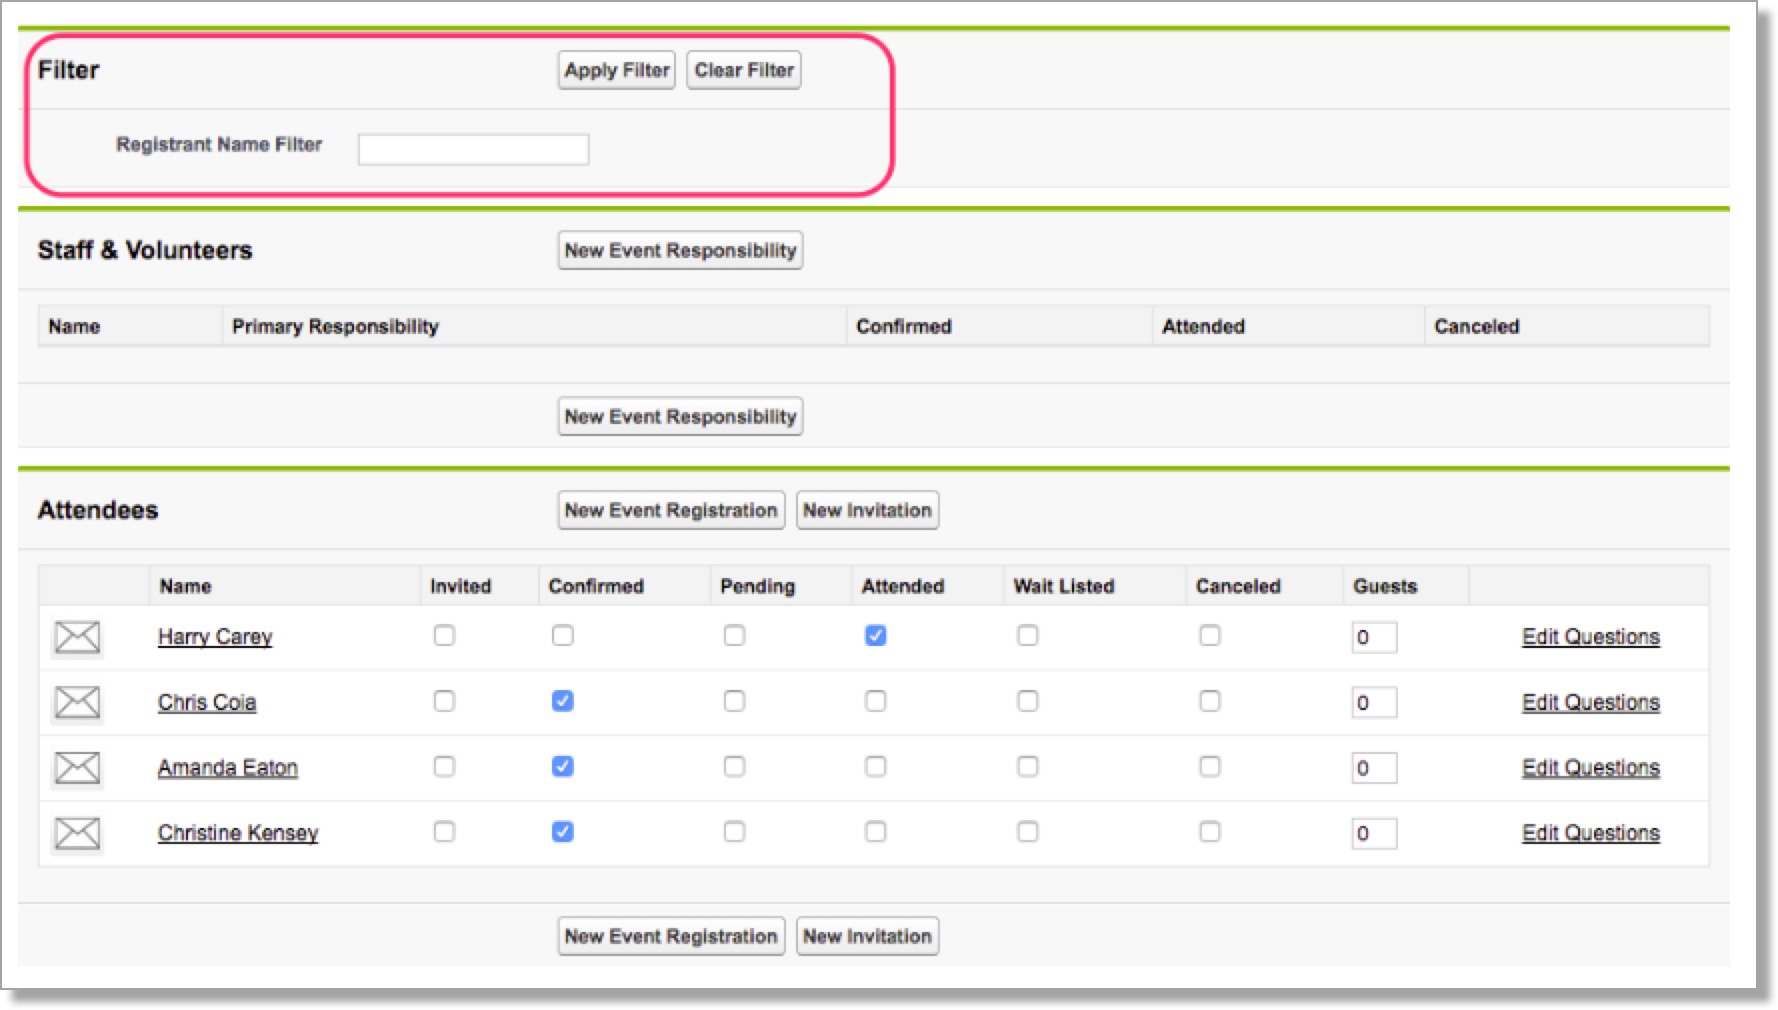
Note: If you are updating the number of Guests, you must click outside of the Guests Field or press the tab key on your keyboard for the auto-save to be triggered.
If an unregistered or uninvited guest wishes to attend your event, you can add him or her to the guest list by clicking the New Event Registration or New Invitation buttons.