Configuring Custom Settings for Events
Events Custom Settings are used to customize settings for different Events. You can configure multiple custom settings, not just a single default setting. This allows for separate functionality to be used by different departments/divisions or with different event categories. A URL parameter is used to define the custom setting for registrants. For additional information on creating additional custom settings, see: Creating Alternative Custom Setting Records for Events.
Accessing Events Custom Settings
-
An enhanced Custom Settings Visualforce page is available to access Events Custom Settings, which better organizes and clarifies the settings. For more information, please see Creating Events Custom Setting Visualforce Tab, after which point the page will be accessible using the custom tab.
Copy your Salesforce URL, up to the ".com"
You can also reach the Events Custom Settings Visualforce page by following these steps:
- Examples: https://na10.salesforce.com or https://myenhanceddomain--targetx-eventsb.vf.force.com/
- Examples:
- https://na10.salesforce.com/apex/targetx_eventsb__eventssettings or
- https://myenhanceddomain--targetx-eventsb.vf.force.com/apex/eventssettings
Note: It is also possible to reach the Events Custom Settings by going to Navigate to Setup and searching for Custom Settings. However, the Custom Settings tab is better organized, has additional features, and is easier to use.
Understanding the Events "Default" Custom Setting
-
The default custom setting file is installed with the Events application and may not be deleted. When no custom setting is specified in the public-facing URL, the default setting will be used. The default custom setting file will also apply to any pages accessed by internal staff.
You may wish to configure alternative default settings for different types of events; you can create Custom Setting Records for Specific Events. For details on creating alternative Custom Setting records for Events, see the article: Creating Alternative Custom Setting Records for Events.
Configure Events Nearby
To ensure that the Events Nearby search functionality works, the Google Maps API Key must be populated with a valid API key:
- Navigate to Events Custom Settings.
- Click the Edit button to add the Google Maps API Key.
- Once you add the Google Maps API Key, save your changes.
Setting Up Events Nearby (Locations)
To utilize the Events Nearby (Locations) feature in Events 6.x and higher, it is necessary to have a Google API key. This key must also be configured in the default base custom settings. Furthermore, a remote site setting is required for https://maps.googleapis.com. This configuration enables the automatic population of geolocations for each address, allowing the Google Map API to accurately calculate the distance between the current location and the event location.
Step 1: Configure Events Custom Settings
For more information about Events Custom Settings, see Custom Settings for Events.
- Use the following instructions to configure Events custom settings and navigate to the Events Settings page:
- Copy your Salesforce URL, up and including the .com
Example: https://na10.salesforce.com
- Append your Salesforce URL with /apex/targetx_eventsb__eventssettings
Example: https://na10.salesforce.com/apex/targetx_eventsb__eventssettings
- Under the Advanced Options section, confirm the following Events Settings are defined based on your institutional preferences; see below for details on each setting:
- Number of Featured Events Displayed
- Use Location Lookup
- Google Maps Geocoding API Key (the Google Maps API Key must also be entered in TargetX CRM Base Settings).
- Header Logo URL
- The number of Featured Events Displayed (Number Field) Indicates the maximum number of Featured Events that will appear in the Featured Events Carousel.
Example:
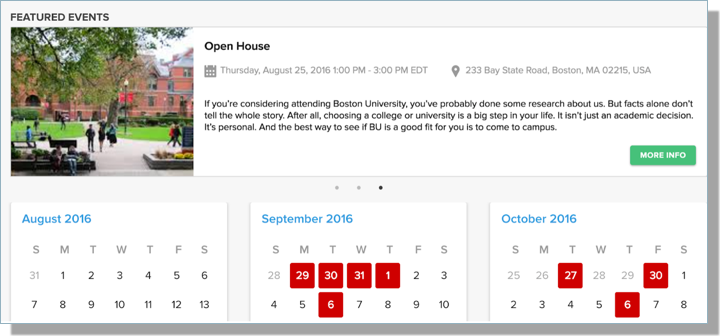
Events will rotate through the Featured Events carousel starting with the current date forward, showing no more than the number defined in this setting.
- The default Number of Features Events Displayed is four (4) - if this custom setting field is left blank.
- TargetX recommends setting the Number of Featured Events Displayed between two (2) and five (5) Featured Events.
- To avoid or set the Number of Features Events no larger than twenty (20)
- Do not set the Number of Featured Events Displayed higher than twenty (20) - to ensure proper display to students.
- Use Location Lookup (Checkbox) If checked, Events can be filtered and searched for using the Location lookup object, which supports geolocation searches. Use of this feature requires that your institution obtain a Google Maps Geocoding API Key to function properly.
Note: If Location Lookup is checked, Events will no longer use the Location picklist field on the Organization Event object when filtering or searching for events. Existing event URLs that use the Location picklist field will not work unless a matching Location record is created in the Location object.
For more information on how to use and create Locations, please see Location Lookup Object.
- Google Maps API Key (String Field) Supports populating geolocation information related to event locations (Latitude & Longitude) and the new Nearby Events search functionality. To use this feature, you must have a valid Google Maps Geocoding API Key from Google.
To obtain a Google Maps Geocoding API Key from Google, follow the steps in the article: Configuring Google Maps API Key
Notes:
- Events leverage the Standard API Keys (not Premium API Keys).
- Please copy this Google Maps API Key to a safe location. You will use this Google Maps API Key in a subsequent step.
- Header Logo URL (String Field) This URL will redirect students to the specified website when they click the Header Logo Image.
- Upon completing the Advanced Options settings, Save your changes.
Step 2: Configure TargetX CRM Base Settings
To complete the configuration of the new Events Nearby search functionality, you must update the Google Maps Geocoding API Key in the TargetX CRM Base Settings. This will ensure your Location records can get geolocation information (latitude, longitude) any time Location records are inserted or updated with new address information.
- Navigate to Setup and search for Custom Settings.
- Click Manage next to the TargetX CRM Base Settings.
- Click Edit next to the Default custom setting.
- Add your Google Maps Geocoding API Key and Save your changes.
Step 3: Configure Remote Site Setting for Google Maps Geocoding API
- Navigate to Setup and search for Remote Site Settings.
- Click New Remote Site.
- Enter the following:
- Remote Site Name = Google_Maps_Geocoding_API
- Remote Site URL = https://maps.googleapis.com
- Active = Checked
- Save.
Required Settings
-
Required settings represent the bare minimum settings for default Event settings. Individual events rely on the Name field to determine which set of custom settings should be used; therefore, the Name field is required and should be set to ‘default’ for the primary default custom settings.
Name: Unique name for the custom setting. For the default setting the name should always be “default”. If Event Form Type = Form Assembly- FormAssembly URL Prefix: Your FormAssembly URL, not including http://
- Default TargetX Form = Create/Select the TargetX Form to be used as a default.
- Note: Ensure that the SingleEventRegistrationURL is updated to your event-specific site URL followed by /events#/esr so it appears as follows:
- <Site URL>/events#/esr
- Example: https://targetx.secure.force.com/events#/esr
Event Forms Options
- The Event Forms Options allow you to select either Form Assembly or TX Forms. TX Forms for Events are a lightweight option for creating basic Event Registration forms. This feature is NOT a replacement for Form Assembly but rather a tool for basic configurations or a backup option if Form Assembly experiences downtime. If TargetX Forms is selected, click New Form to create a new TX Form or use the lookup to select an existing form.
- School Picker Record Type field restricts the Form Assembly school picker to only show accounts matching the selected record types.
To determine the FormAssembly ID for your forms, see the article: Event Registration Form Templates.
Advanced Options for Events
-
Template Override: Allows you to enter specific Events Custom Code (CSS and Javascript) to control the look and feel of the registration experience.
Default Allow Overlap: If enabled, defaults to allow contacts to register for overlapping events unless otherwise specified for a given event
Default Number of Guests: Sets maximum number of guests allowed in the pick list presented during registration.
Default Email Sender Id: The Org Wide Email Address ID to be used as the default email sender for all automatically generated Events emails. Must be tied to an email address with all all rights in Salesforce. To set the Default Email Sender, see Setting the default email sender in Events.
Default QR Check-in Hours After Event: Number of hours after an event starts that QR codes can be scanned for check-in.
Default QR Check-in Hours Before Event: Number of hours before an event starts that QR codes can be scanned for check-in.
Events Plus Results Height: Pixel height for the search results on the Events Plus page
Maximum Returned Events: Number of events to display before paginating results.
Pending Event Reg Expiration: Sets the length of time (in minutes) before event registration will be canceled if not completed and/or for paid events if payment is not processed.
School Filter Field: Determines which field in Salesforce to use as the filter field for the school picker
Other Defaults: You can set a default value for any Event fields not specified on the Custom Setting page. Custom Setting values must be entered in the format API_NAME;VALUE::API_NAME;VALUE, where the API Name of the field is followed by a ";" and then the default value. Multiple fields and values are separated by "::"
Cost Column Mode: Will show or hide the "Cost" column on the Events site based on the setting.
0 = Never Show: Cost column will always be hidden 1 = Dynamically: Cost column will only show for paid events 2 = Always Show: Cost column will always displayDefault Search Duration: Determines the number of days that will be displayed on the Events Search. Will default to 90 days if left blank.
Restrict Event Ownership: If checked, only users with the Can Own Events profile setting can be set as the Event Owner.
Custom Payment Parameters: Any additional Custom Parameters for your Payment Gateway.
Registration Deadline Days Before Event: Sets the number of days before an event on which registration should end. Registration will close at 11:59 pm.
If the Registration Deadline Date is 0, registration is allowed until the end date/time of the event. If the Registration Deadline Date is greater than 0, this allows registration until the number of days before the start of the event.Note: For multi-day events, if you want to reopen registration throughout the duration of the event, you will have to change the start date every day to TODAY.
Email Confirmation For Each Event: Determines if a registrant receives a confirmation email for each event in the cart or if only one confirmation will be sent for all events in the card. This setting ONLY applies to Primary events and Sub-events.
- Checked: one email will be sent for EACH event.
- Unchecked: one email will be sent for ALL events in the cart.
-
Email Reminder Days: Number of days before the event date that a reminder email will be sent. For example, entering one would mean the email reminder will be sent the day before the event. This setting is used for both Events and Interviews & Appointments.
Number of Featured Events Displayed: The maximum number of featured events displayed on the Events Calendar.
Use Location Lookup: Should the Events registration use the location picklist on the event object? Or should it use the new location object instead?
Note: The Location picklist is on the Org Event object, so you can configure the values there, but if you want to use the Google Maps API integration, you will need to use the Locations object lookup on the Org Event.
Google Maps API Key: The API key used to integrate Events with Google Maps. Header Logo URL: This URL will redirect the student to the specified website when they click on the Header Logo Image
Named Guests in Events
Event Triggers
-
There are two default triggers specific to Events. These settings determine if these triggers are used.
Disable Contact Merge Trigger: If checked, will disable the trigger that ensures QR codes for losers of a merge will still work. Must be turned off to run batch Apex to delete contact records. Next School Visit Trigger Enabled: When enabled, data from the upcoming travel event is populated on fields on the corresponding School/Account record, which can be used for reporting and/or in email templates.
Payment Timeout
- The Payment Timeout section is used to start or stop the Payment Expiration Timer, which clears abandoned and unpaid event registrations.
For additional information on Event Payments, see the article: Working with users that registered for an event but didn't pay.
Next Event Updater
-
Key visit data from an event is automatically copied to the Account object for the school being visited. This is done by enabling the Next School Visit Trigger and starting the Account Next Event Updater job. Use the Start and Stop buttons here to start and stop the Next Event Updater job.
- Activate the Next School Visit Trigger.
- Navigate to Events Custom Settings.
- In the Account Next Event Updater section, click Schedule Job or Run Now:
- If the job is currently running, a message will display to the user that the job is already running.
- If the job is scheduled, you will have the options to Stop Job or Run Now. The Next Scheduled Run will display on the left.
- If the job is NOT scheduled, you will have the options to Schedule Job or Run Now.
Event Reminder Emails
-
Reminders of upcoming events can automatically be sent from the CRM several days before the event itself. Note: Emails are delivered at 1 AM on the day specified in the custom setting. The time zone will match that associated with the staff user who configured the functionality in your Org.
Use the Start and Stop Job buttons here to start or stop the job that schedules the event reminder emails.
Notes: Event Reminder Emails are also used for Appointments and Interviews. Sub-events do not get separate reminders.
1. Navigate to Events Custom Settings.
To Schedule a set time each day for the job to run, select a Time and click Schedule Job. To run the job immediately, click Run Now button:
2. In the Events Reminder Emails section, click Schedule Job or Run Now:- If the job is currently running, a message will display to the user that the job is already running.
- If the job is scheduled, you will have the option to Stop Job or Run Now. The Next Scheduled Run will display on the left.
- If the job is NOT scheduled, you will have the option to Schedule Job or Run Now.
Customize Event CSS
- If you use Custom Event CSS to integrate Events into your institution’s website, you can edit that CSS here. Clicking the Edit Custom CSS object button will navigate to the Events Custom Code window. For sample codes and additional information, please see the article: Customizing Event CSS and Javascript in Events 5.0 and higher.
Interviews and Appointments Custom Settings
Interview and Appointment Custom Settings are unavailable on the Events Custom Settings Visualforce page/tab. To access these settings, see Appointment Scheduler Settings.
Creating Alternative Custom Setting Records for Events
Secure Event Links in Email Templates (Events 6)
-
This batch job updates the necessary URL’s in Events 6 to include ACCESS keys.
Note: This tool can NOT be run in Sandbox.
The following are examples of the URLs that the tool will update:
https://full1-targetxdemo-15c8879cfb3.cs2.force.com/events#/calendar?cid= https://full1-targetxdemo-15c8879cfb3.cs2.force.com/events#/calendar?cid=\{!Contact.Id}¶m1=value1 Navigate to Events Custom Settings. Locate the Secure Event Links in Email Templates (Events 6) section.
Verify the email address under Email Address to Notify. This will default to the email for the logged-in User. Click Scan Event Email Links. The Email Address to Notify will receive an email with the status of what will be updated, such as:
- Did not find any Events 6 links to update.
- Templates found containing Events 6 links that need to be updated.
<Template Name>
TargetX Templates found containing Events 6 links that need to be updated.
<TargetX Template Name>
After reviewing the email with the status of the process, return to the Access Key Checker section. Check the box Perform Template Updates. Click Scan Event Email Links. This will make the updates to the URL’s with the Access Key.