Using the Location Lookup Object
Overview
The primary use of the Location object is how it relates to Event searches, filters, URL parameters, and Events Nearby functions. The Location LookUp object enables your institution to capture Location address, campus, building, room, and geolocation (latitude, Longitude) information. Events will no longer reference the legacy Location Picklist field on the Organization Events object if enabled.
Utilizing the Location Object
To utilize the Location lookup object, follow the steps below:
1. Create a Location Tab
- Navigate to Setup and search for Tabs
- Click New
- Click New in the Custom Object Tabs section
- Configure the new tab in the New Custom Object Tab wizard:
- Object = Location
- Choose a Tab Style
- Other fields are optional
- Click the Next button
- Determine which profiles will have access to the Location tab.
- Click the Next button.
- Add the tab to your CRM apps.
- Click the Save button.
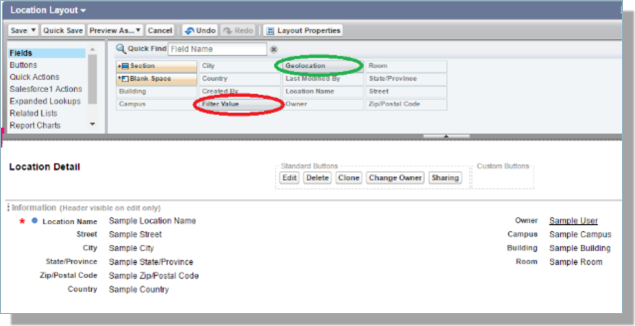
2. Add Filter Value and geolocation to the Locations page layout
- Navigate to Setup, search for Objects, and click the Locations label
- Scroll down to Page Layouts and click Edit
- Drag and drop the Filter Value and Geolocation fields to the Page Layout to add them.
- Note: the purpose and options to populate the Filter Value are described in the step below.
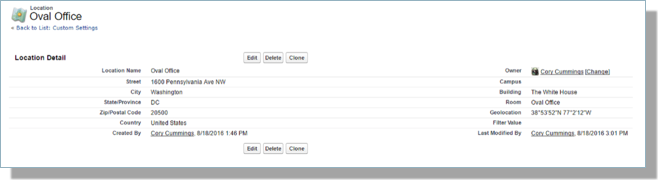
3. Create Location records
- On the Locations tab, click New.
- Enter a location name, e.g., Oval Office.
- Enter relevant location information. This can be in the form of an address, building & room number, or longitude/latitude.
Notes:
- Latitude and Longitude are entered as separate decimal values, e.g., 38.8976763 and -77.0365298. Salesforce will automatically convert them to degrees & minutes.
- Only the location name is required. You do not need a building name, room number, or latitude/longitude to have an accurate location record.
- If the Location record only has a geolocation - the map link will not display to students. You must also include address information for map links.
- Populate the Filter Value field for each Location record. This Filter Value MUST be populated for Events to leverage Location search and filters. The value entered into this Filter Value is:
- The options that appear to students under the Location filters.
- The value that Event Managers will use when restricting Event sites to by Location - using Location URL parameter(s) in an Events URL.
- Populated either manually when the record is created/updated or automatically via a customer-defined CRM Workflow.
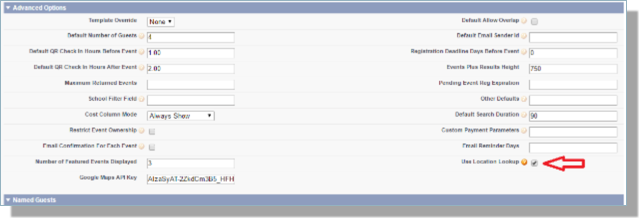
4. Check Use Location Lookup on Event Settings custom setting
- Navigate to the Events Custom Settings tab.
- Note: for more information on the Events Custom Settings tab, see Configuring Custom Settings for Events.
- In the Advanced Options section, click the Use Location Lookup checkbox.
- Click Save.