Restricting Access to Standard Salesforce Pages in Communities
As we continuously evaluate and update our security standards and recommendations, we have some additional recommendations that we want to share with you. In addition to the guidelines in the January '19 Release, we recommend some other changes to your Communities settings to further restrict access to standard Salesforce pages.
Standard Salesforce pages can be accessed via Communities if a user alters the URL directly, circumventing the client-side page-blocker script. Salesforce provides a per-community configuration setting, only accessible via the Salesforce Metadata API, to disable access to standard pages, but it has some drawbacks. Among them, it disables some Communities' admin controls and requires stripped-down layouts -- notably, page layouts that must be assigned to community user profiles. We recommend you disable chatter for community profiles immediately and complete the following steps:
- Disable access to standard Salesforce pages for any community sites related to TargetX products.
- Configure stripped-down layouts for community users:
-
Verify Page Layout assignments.
Updated Page Layouts are available in the April '19 Release, or you can update your Page Layouts manually.
-
- Review List View Layouts or update these layouts so that they are not made visible to Community Users.
- Review Search Layouts or update these layouts so that they do not contain fields with sensitive information (i.e., any field that contains data that you would not want a user to see).
Disabling Standard Pages in Communities
This is an advanced process, but a CRM Admin should be able to complete these steps using Workbench and a text editor:
- Download this file: package.xml file to use with Workbench to retrieve your Communities Site metadata.
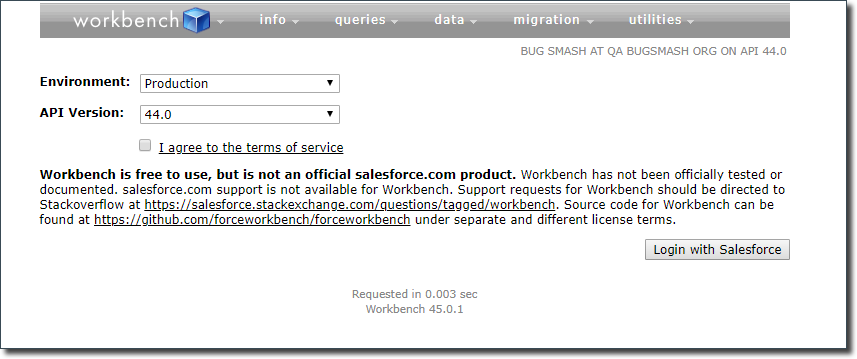
- Navigate to Workbench (https://workbench.developerforce.com/login.php) and agree to the Terms of Service:
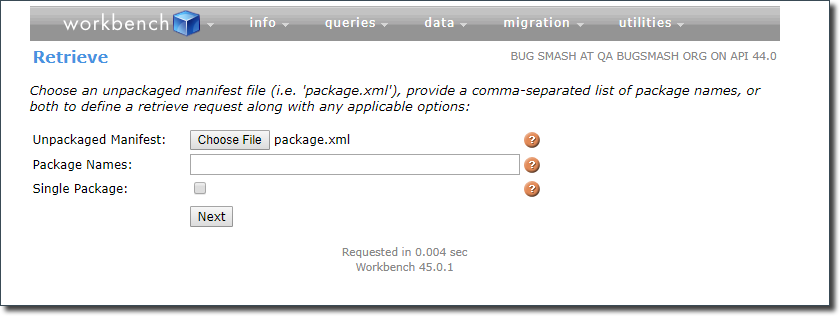
3. Retrieve your Communities Site metadata:
- Click Migration then Retrieve
- Click Choose File
- Select the package.xml file that was created in step 1
- Click Next
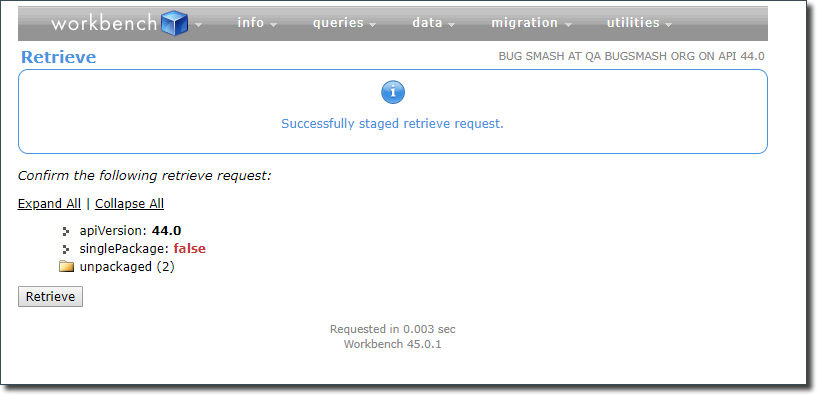
4. Click Retrieve
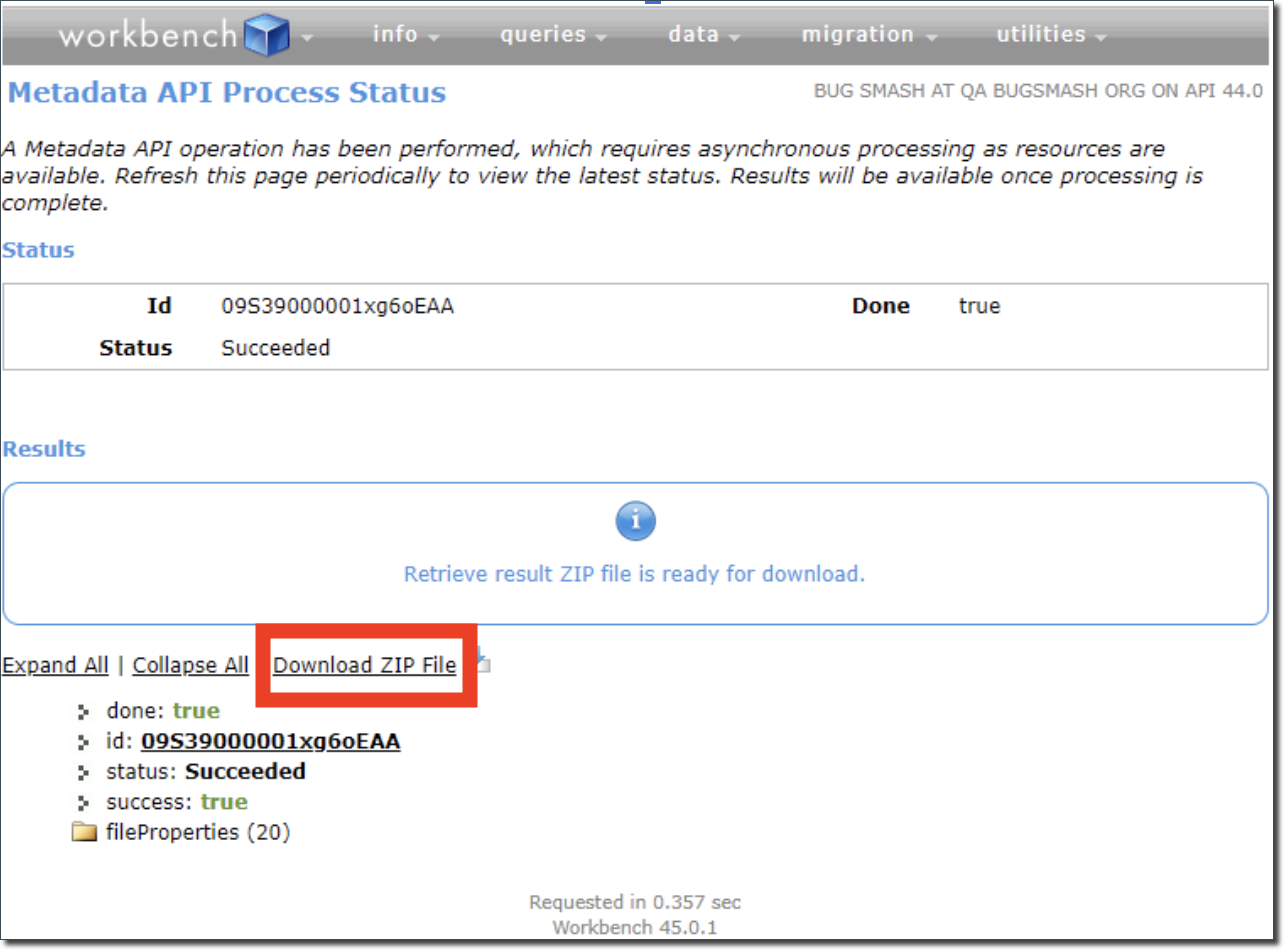
5. Click Download ZIP File
6. Change the Communities Site metadata files to disable standard Salesforce pages with a text editor.
- Extract the contents of the downloaded zip file
- In the location where you extracted the contents of the zip file, navigate to unpackaged\sites
- In the text editor, open any .site files for which you want to restrict access to standard Salesforce pages
- In the files, change the following:
<allowStandardPortalPages>true</allowStandardPortalPages>
to
<allowStandardPortalPages>false</allowStandardPortalPages>
- Save the files
- Create a new zip file ("changes.zip") with the updated contents of the downloaded and extracted zip file
- The top level of the new zip file should contain the "unpackaged" directory and all subfolders and files within
- The top level of the new zip file should contain the "unpackaged" directory and all subfolders and files within
7. Deploy the changes via Workbench:
- In Workbench, navigate to Migration then Deploy
- Click Choose File
- Set Rollback on Error to checked
- Set Test Level to RunLocalTests
- Click Next
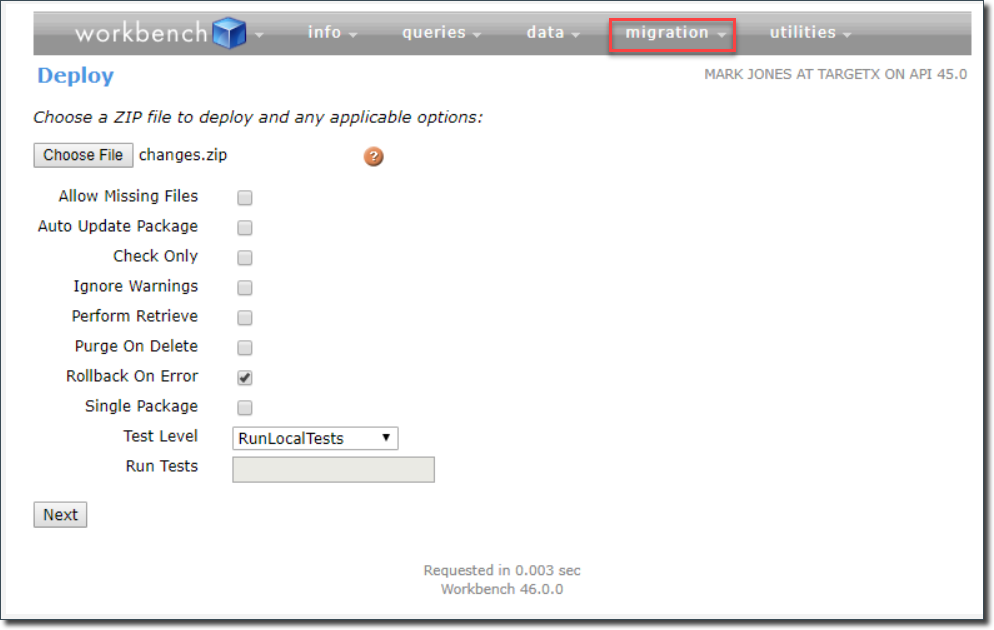
8. Click Deploy
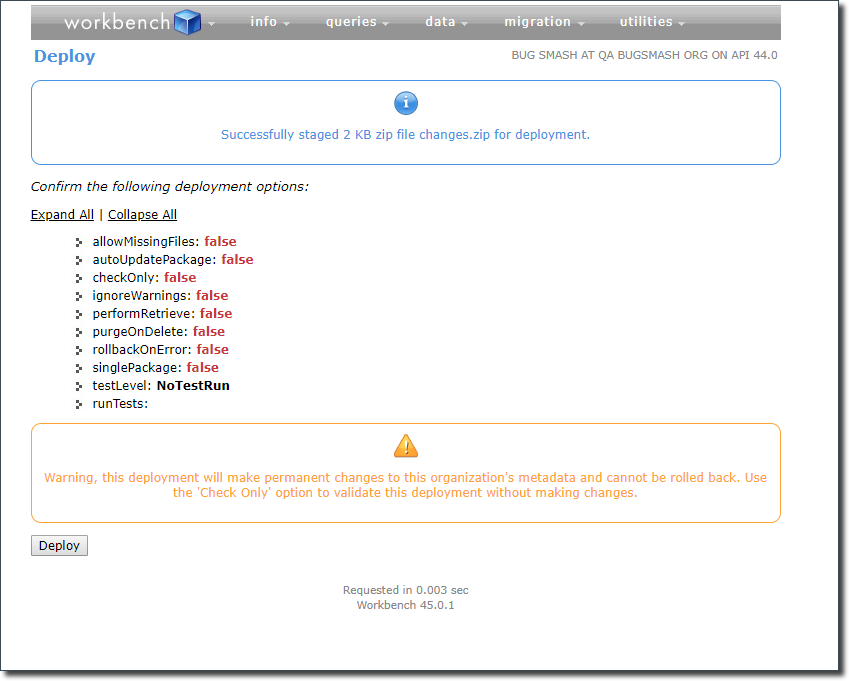
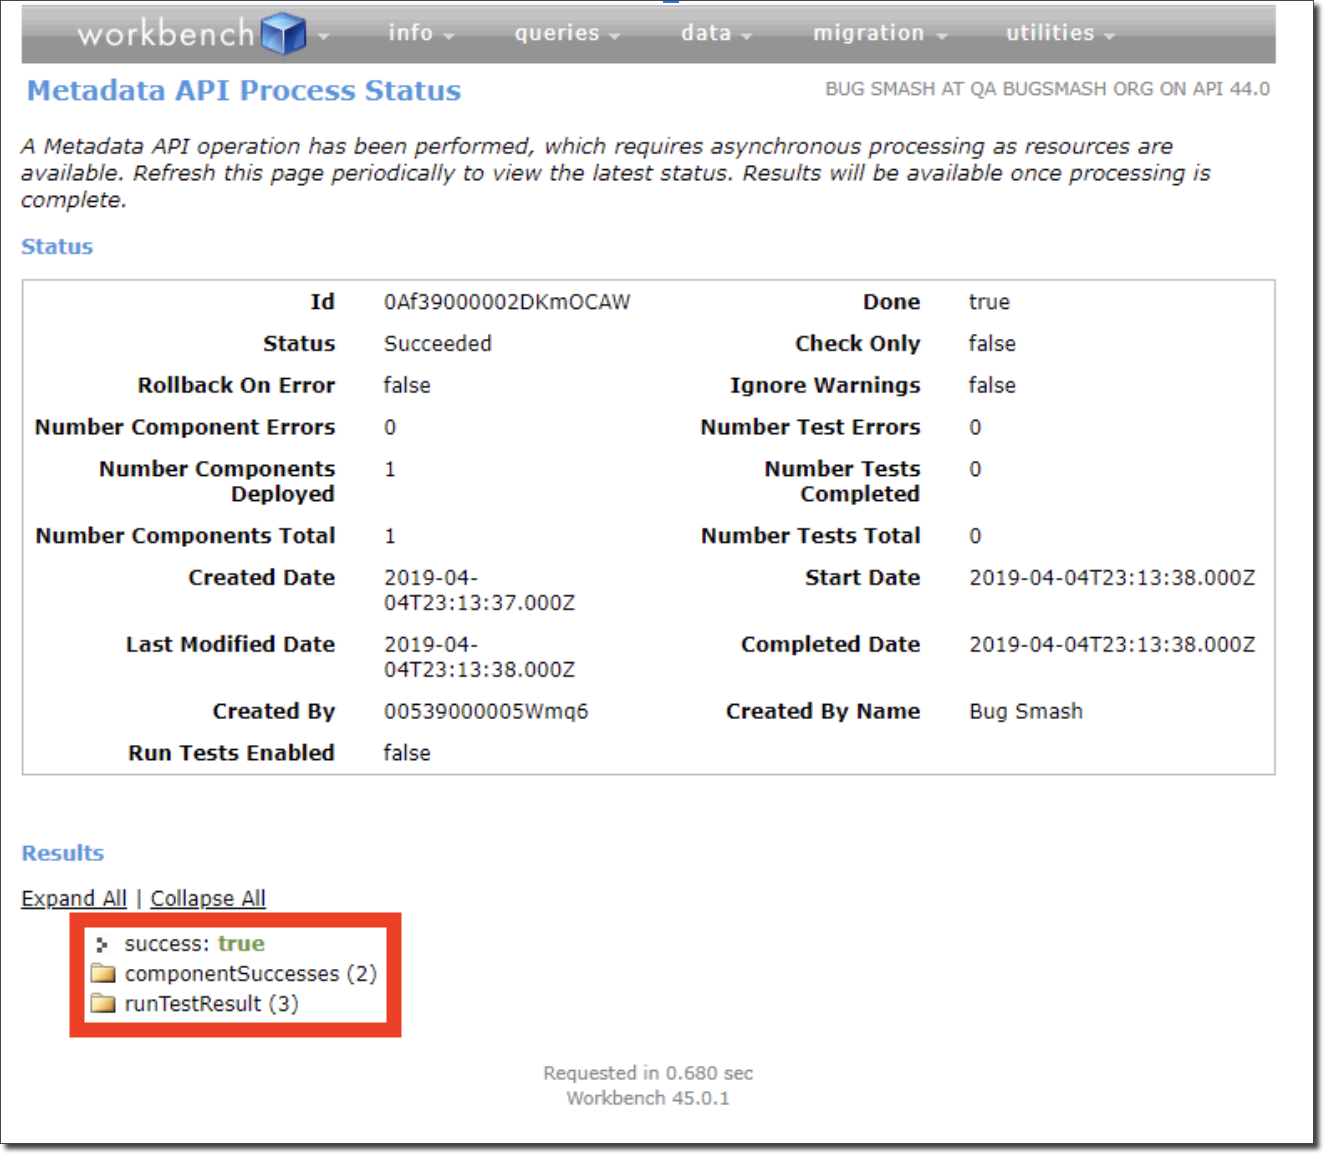
9. On the following page, confirm you see the message "success: true" and that there are no "componentFailures"
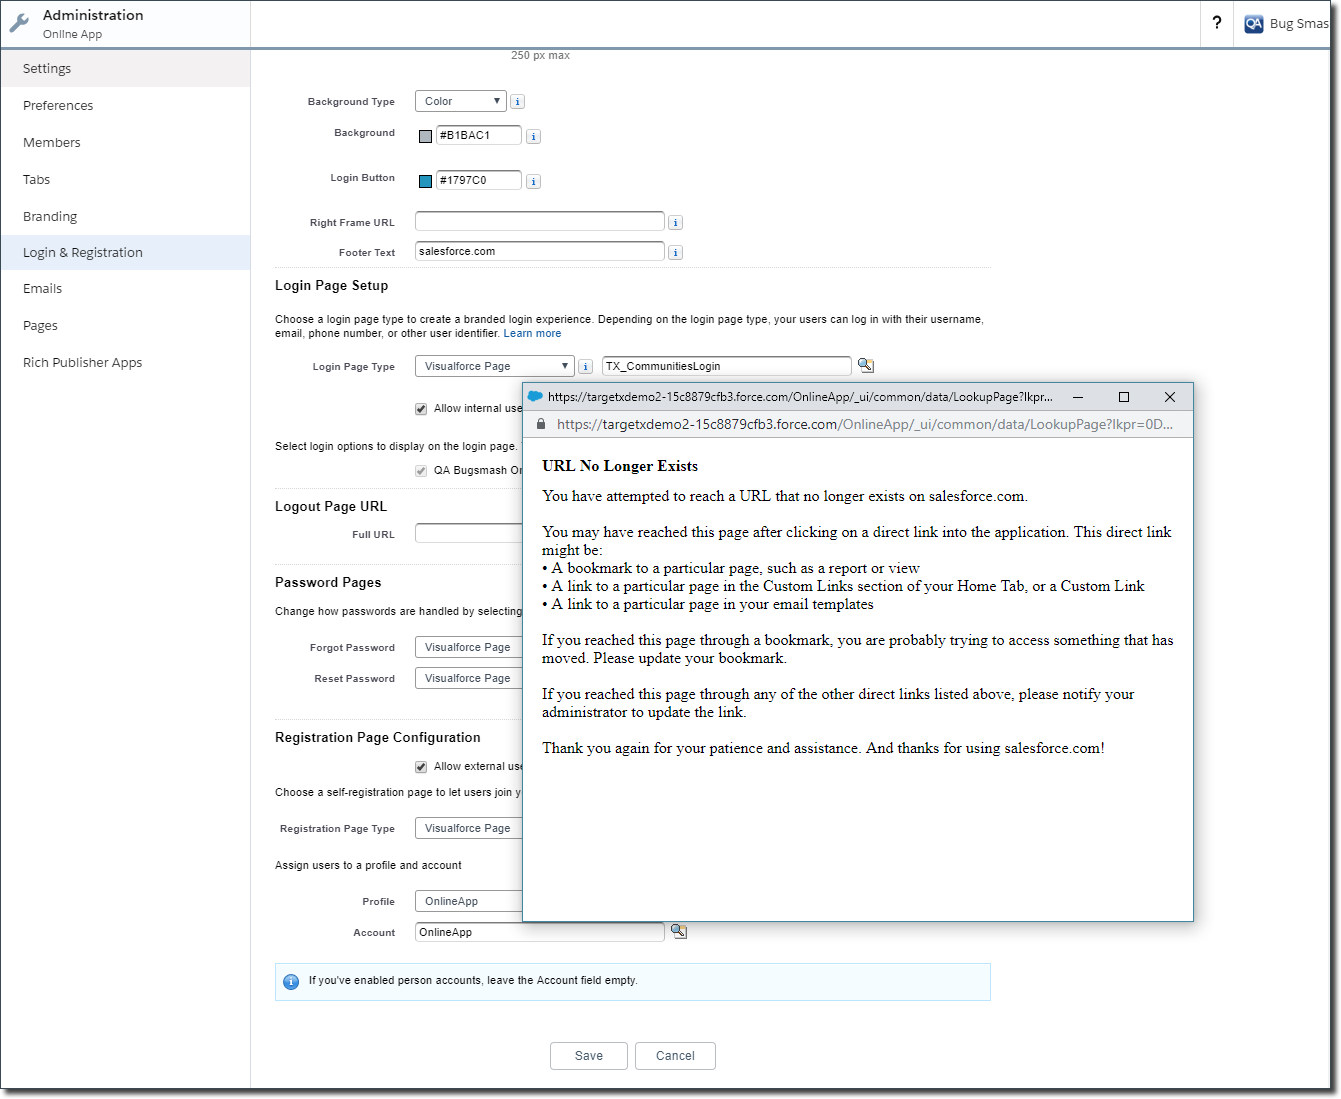
Note: disabling standard pages breaks some aspects of Communities administration.
For example, selecting the Login page in the Communities workspace (shown below) will result in a "URL No Longer Exists" error. IF YOU GET THIS ERROR, ALL OF YOUR ABOVE STEPS ARE CORRECT.
To re-enable standard pages for communities, perform the above steps but use the following setting: <allowStandardPortalPages>true</allowStandardPortalPages>
Update Community Standard Page Layouts
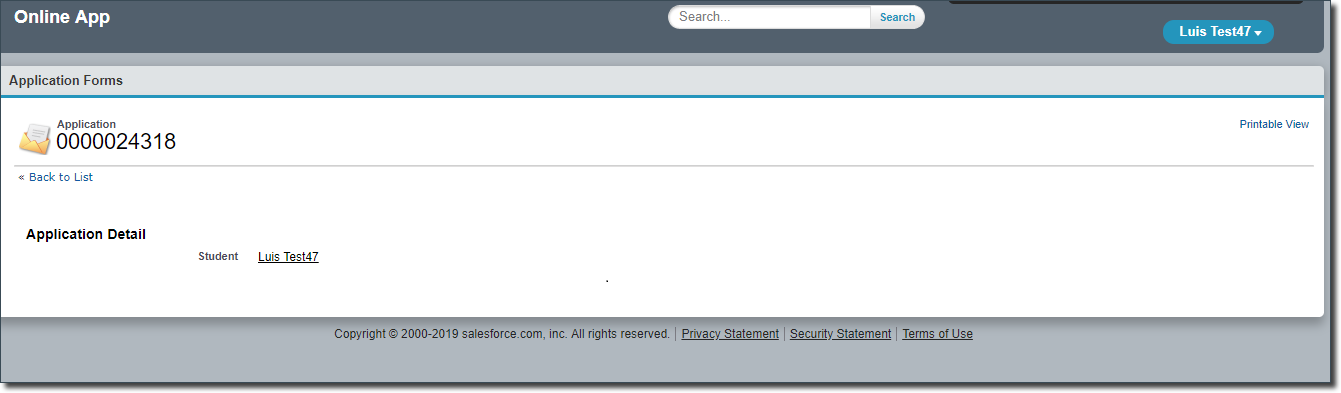
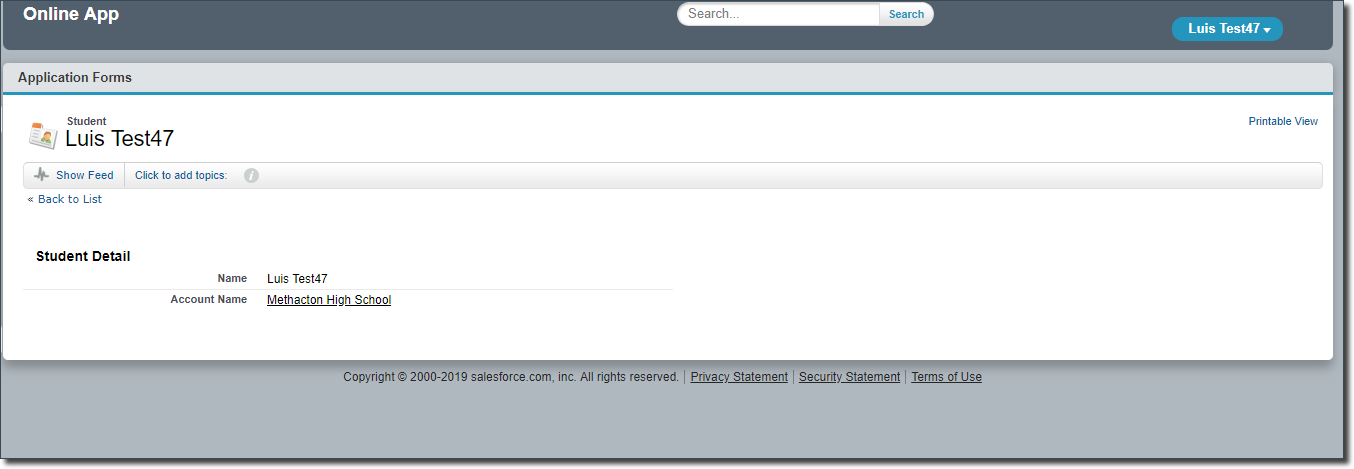
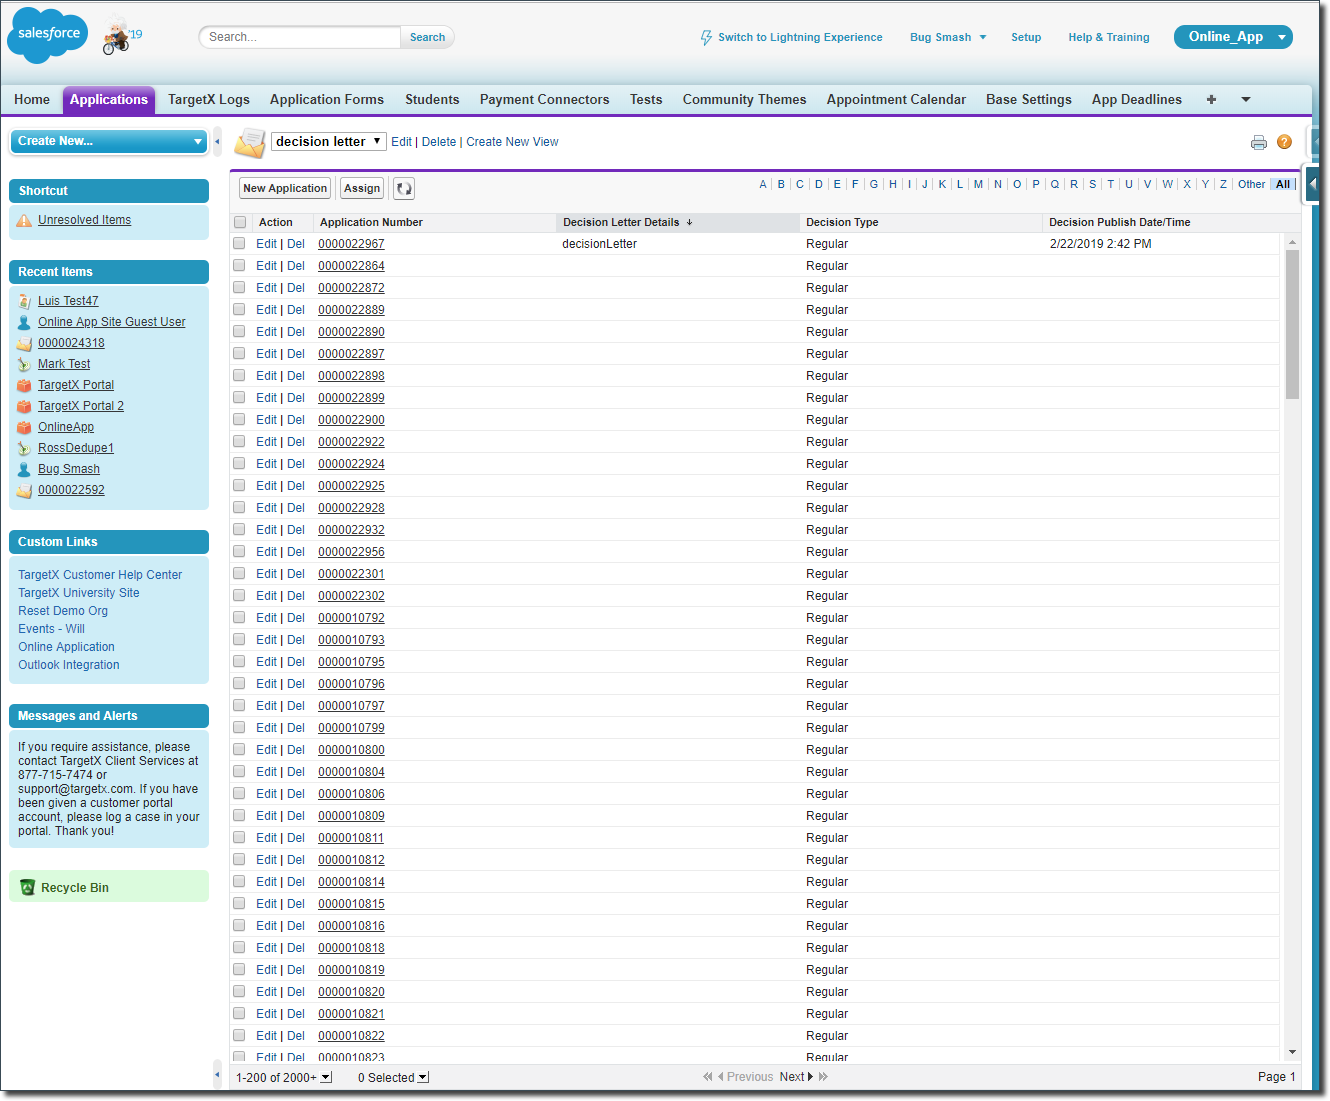
Configure layouts for community profiles to limit what data those users can access. This can be time-consuming based on the number of objects accessible to community profiles. When complete, if a user navigates to a standard Salesforce page URL and bypasses the page blocker, they will see the following:
- Review which objects your Community Users have access to
- Navigate to your list of user profiles: http://login.salesforce.com/00e
- For any profile assigned to access Communities, review the list of objects under "Object Settings" for which the profile has "Read" access listed. The following steps should be done for each object for which the profile has at least "Read" access.
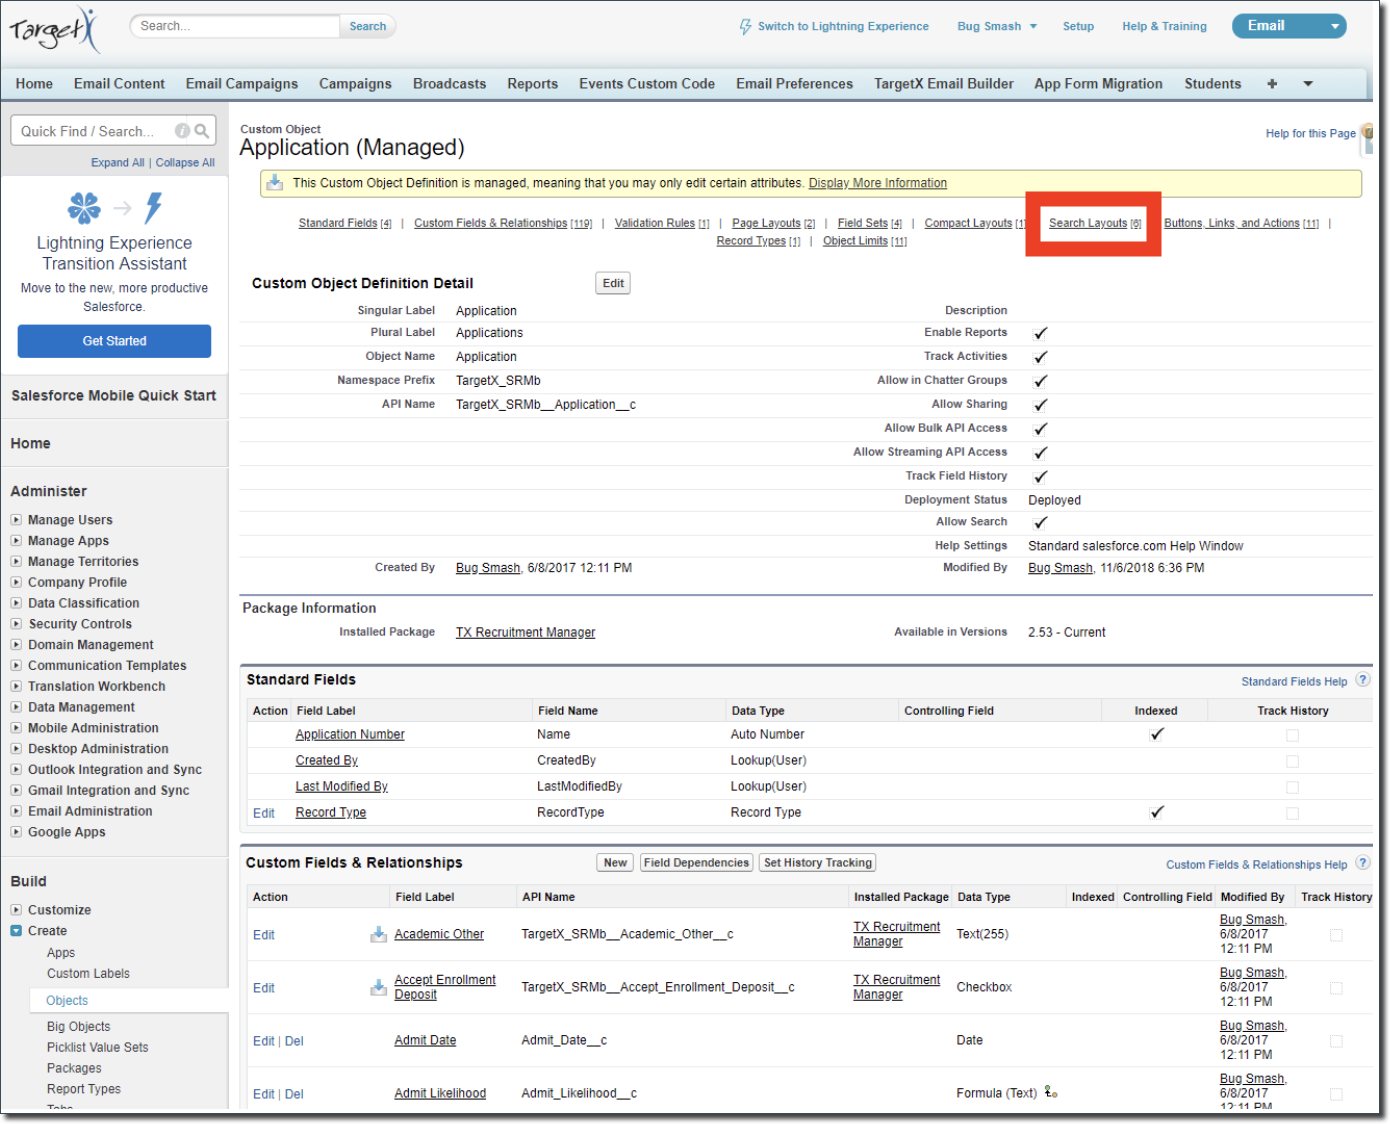
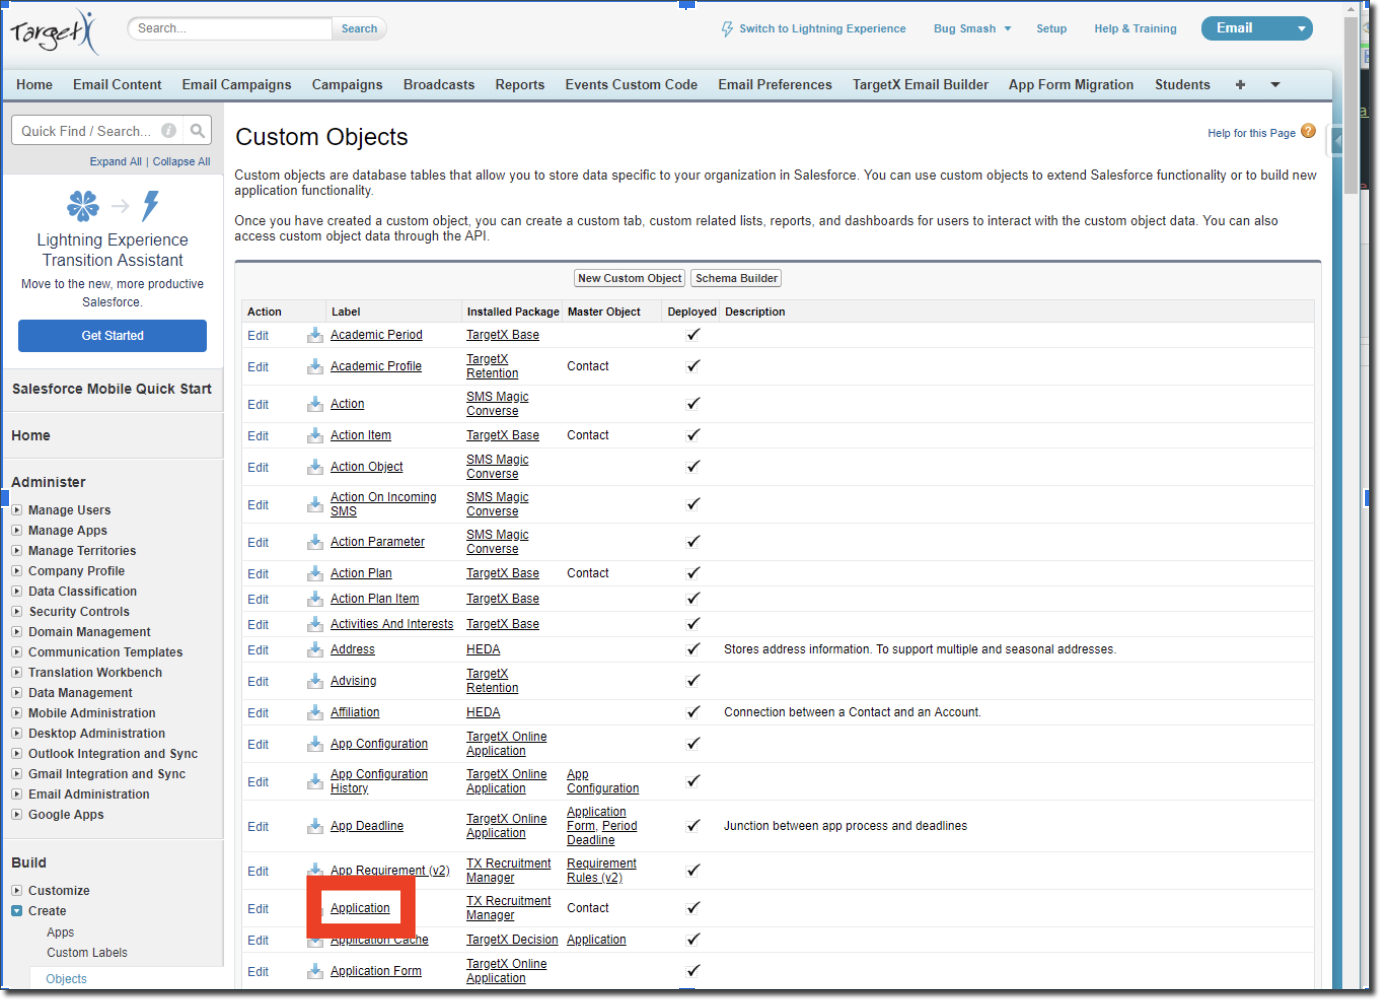
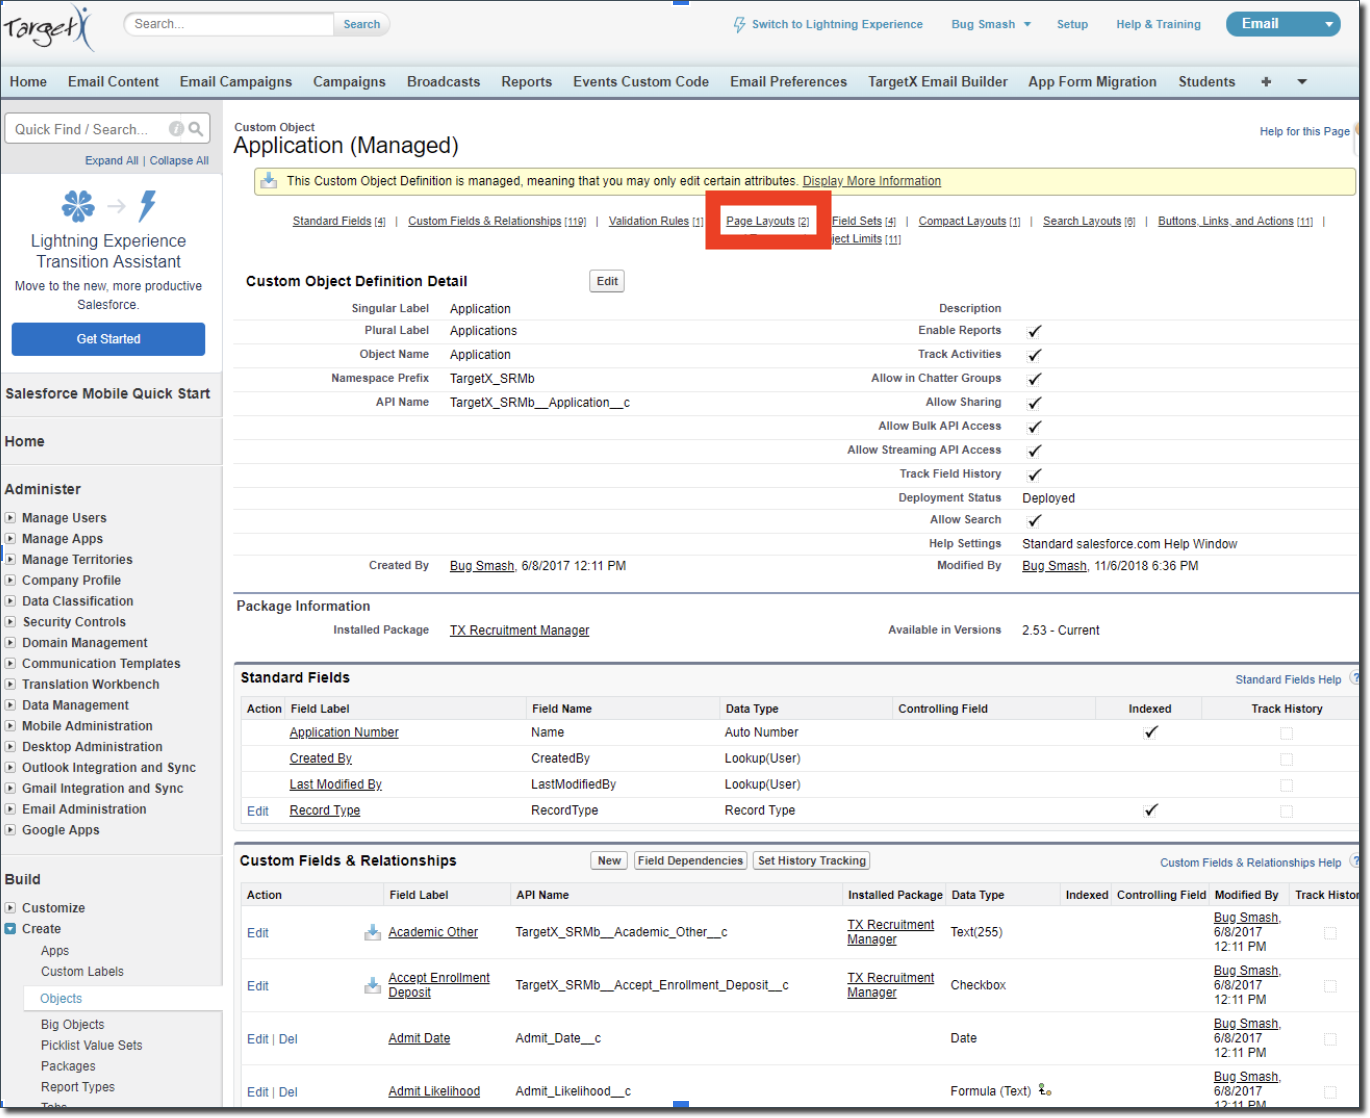
- For each object where the profile has at least Read access (example below for the TargetX packaged "Application" object)
- Review Search Layouts:
- Navigate to Setup > Object Manager > Application
- Click Search Layouts
- Review Search Layouts:
- Click Edit next to each search layout and remove sensitive fields from all search layouts.
- Create a minimal page layout for that object
- Navigate to Setup > Object Manager > Application
Note: These changes are global and internal users will be impacted.
- Click Page Layouts
- Click New in the Page Layouts list.
- Provide a meaningful name (e.g., "Communities").
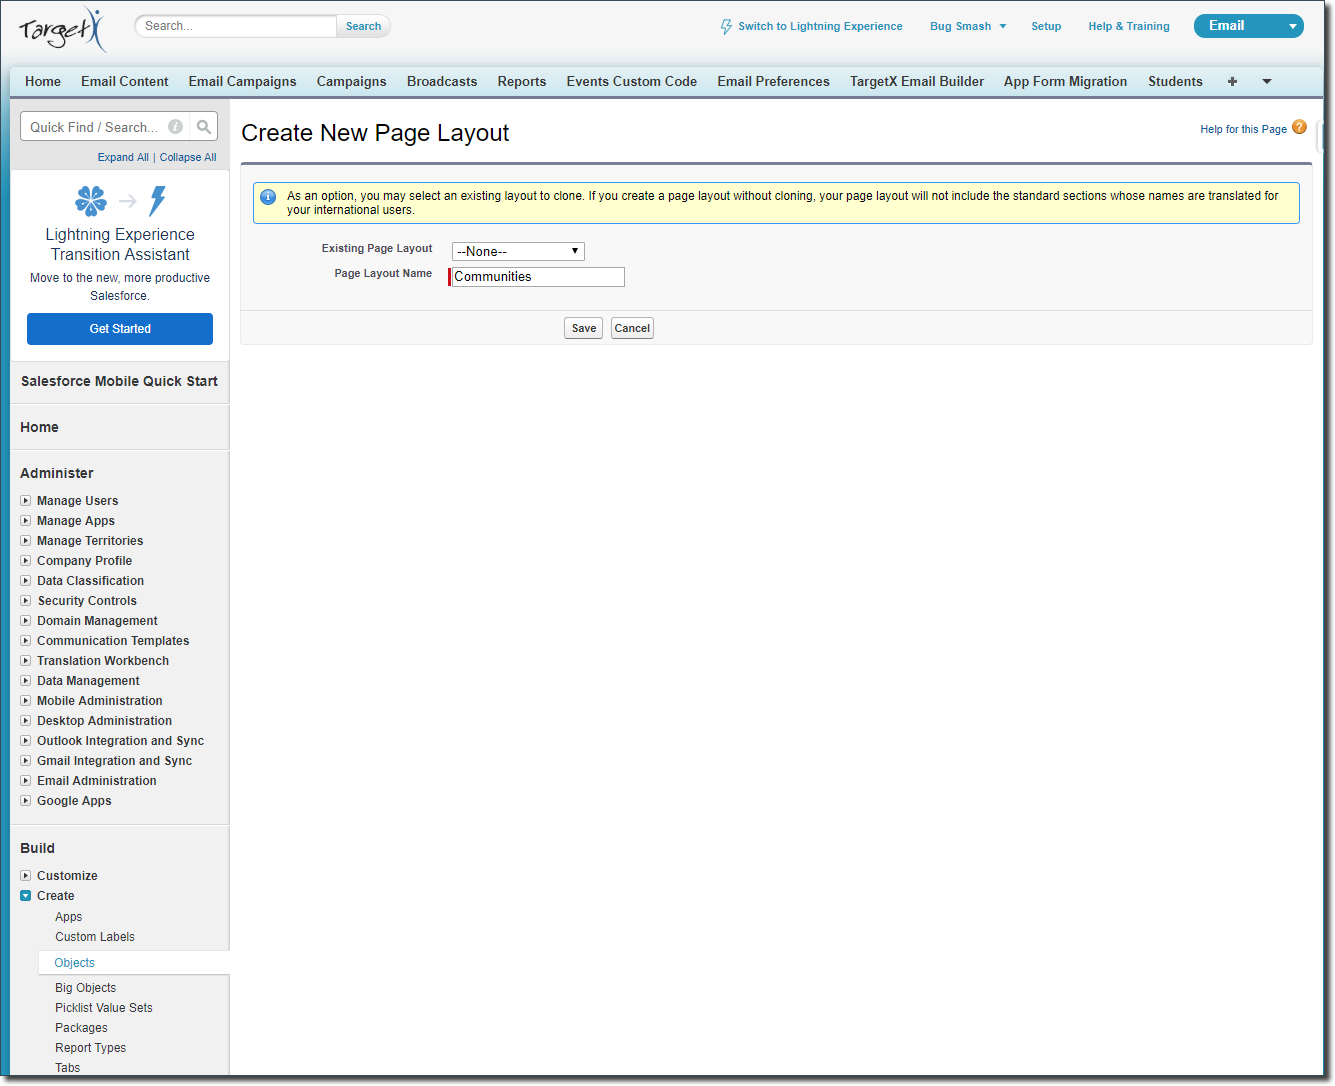
- Click Save
- Ensure all components have been removed from the layout (e.g., fields, related lists, buttons, etc.)
Note: At least one field must be present on each layout.

- Assign the layout to the Community Profile:
- Under Page, Layouts click Page Layout Assignment

- Click Edit Assignment
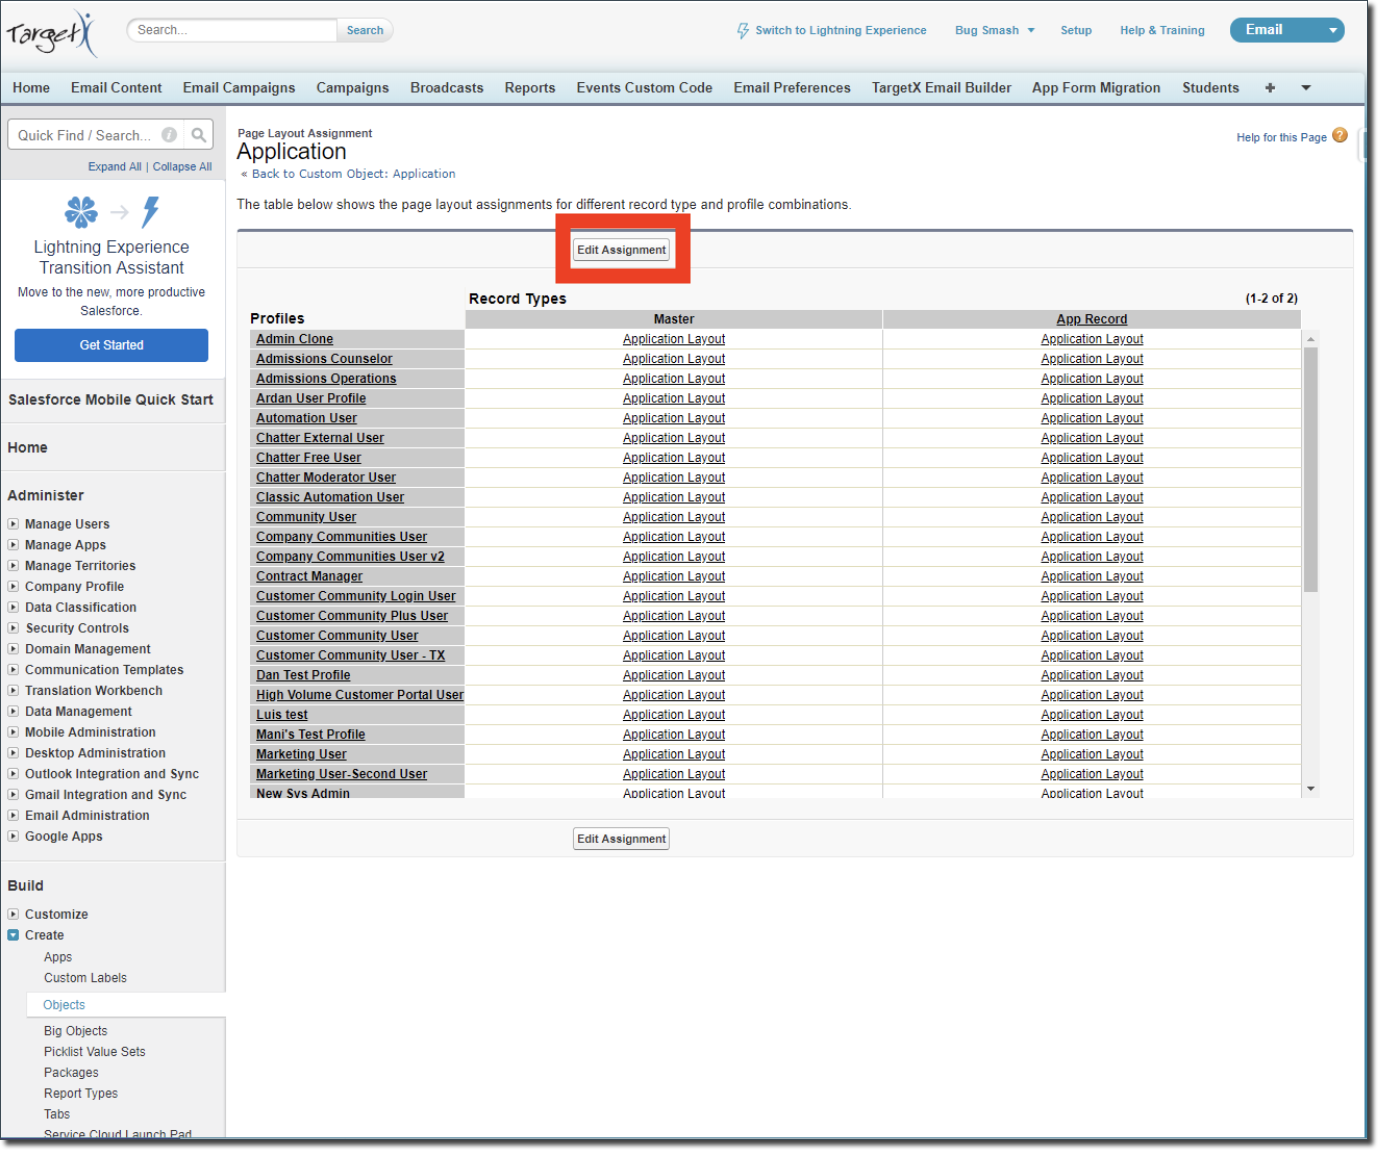
- Click the name of any Profiles where you want to update the layout:
- This will select all columns if Record Types are enabled
- Tip: you can use "Ctrl+Click" to select multiple profiles at once
- Next to Page Layout to Use select the Communities layout that was created.
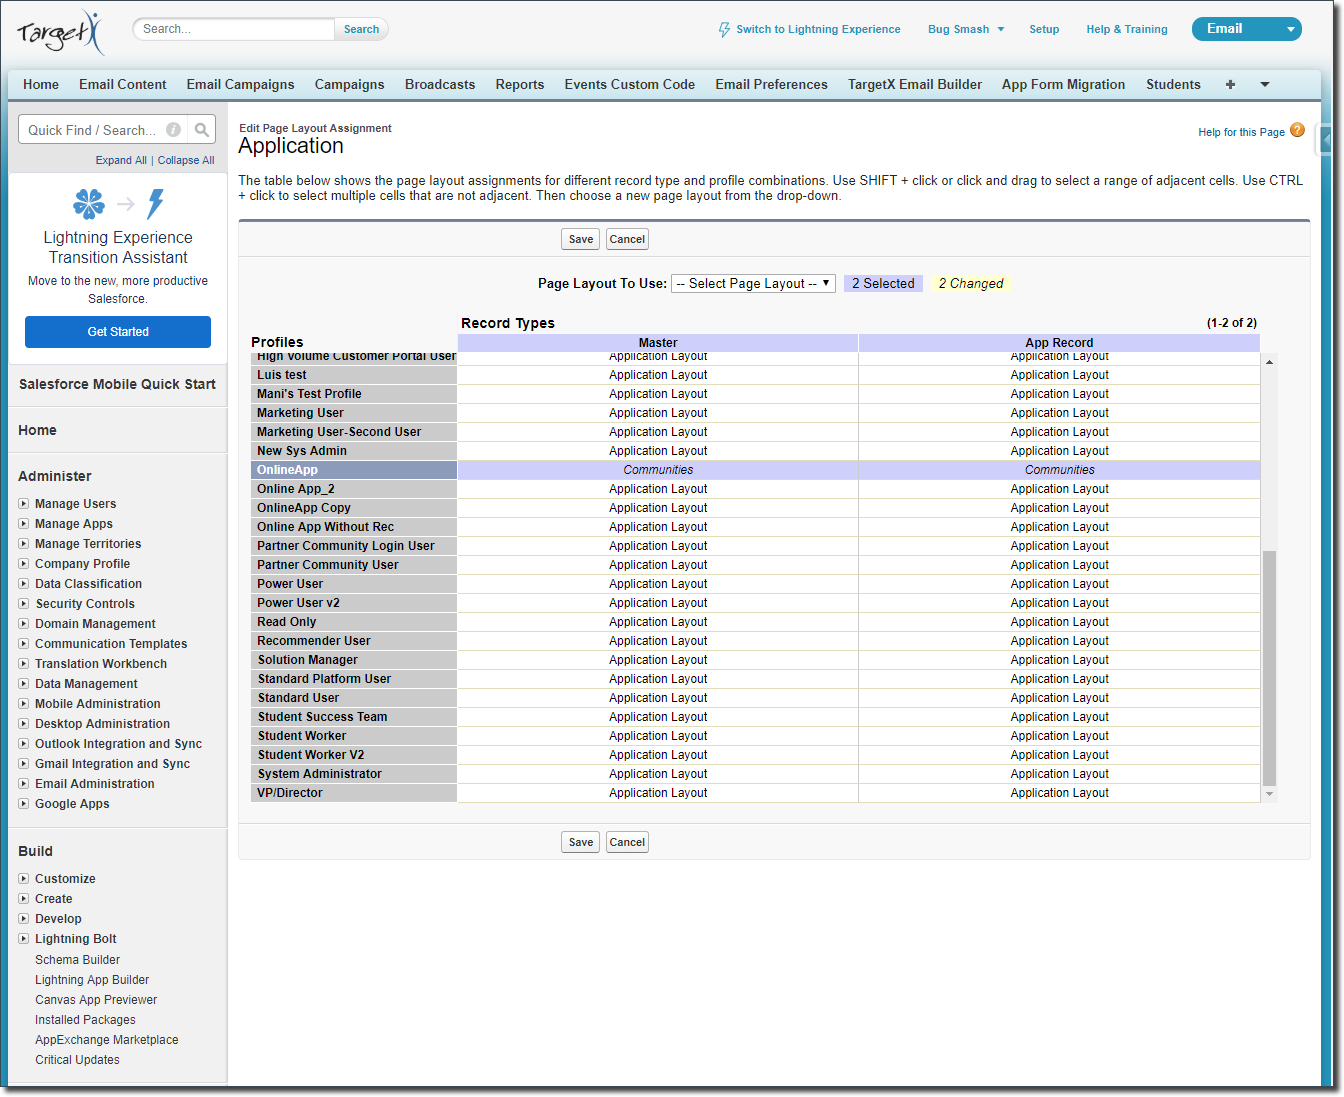
- Click Save
- Remove access to all List View layouts for that object
- Navigate to the list view layout for that object
- For each List view:
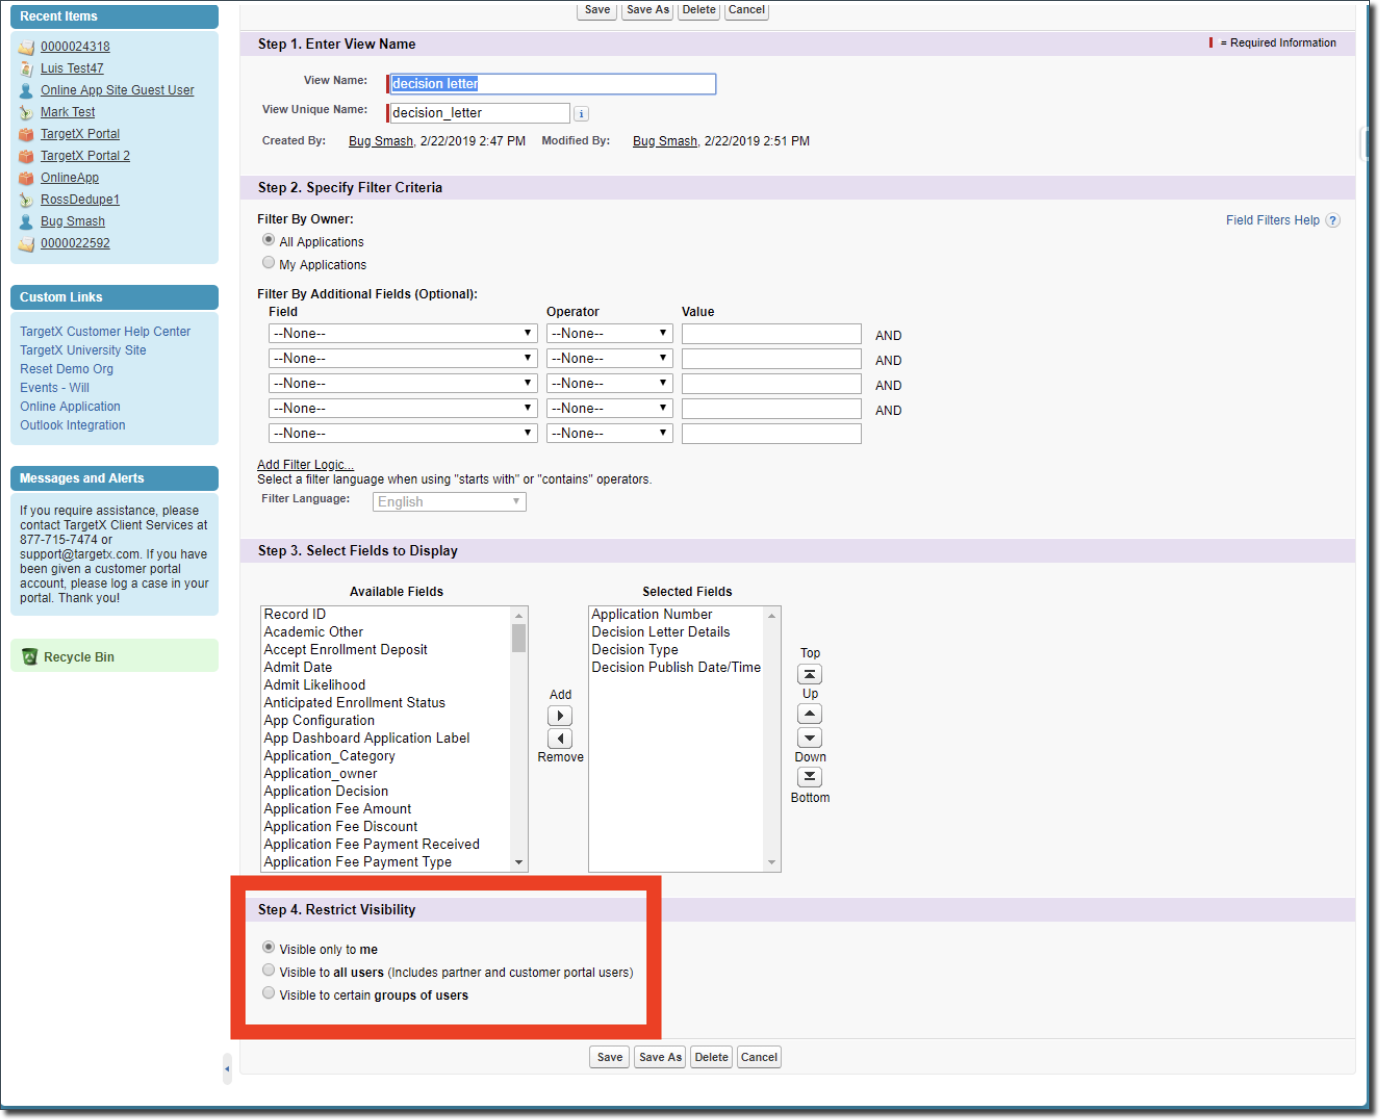
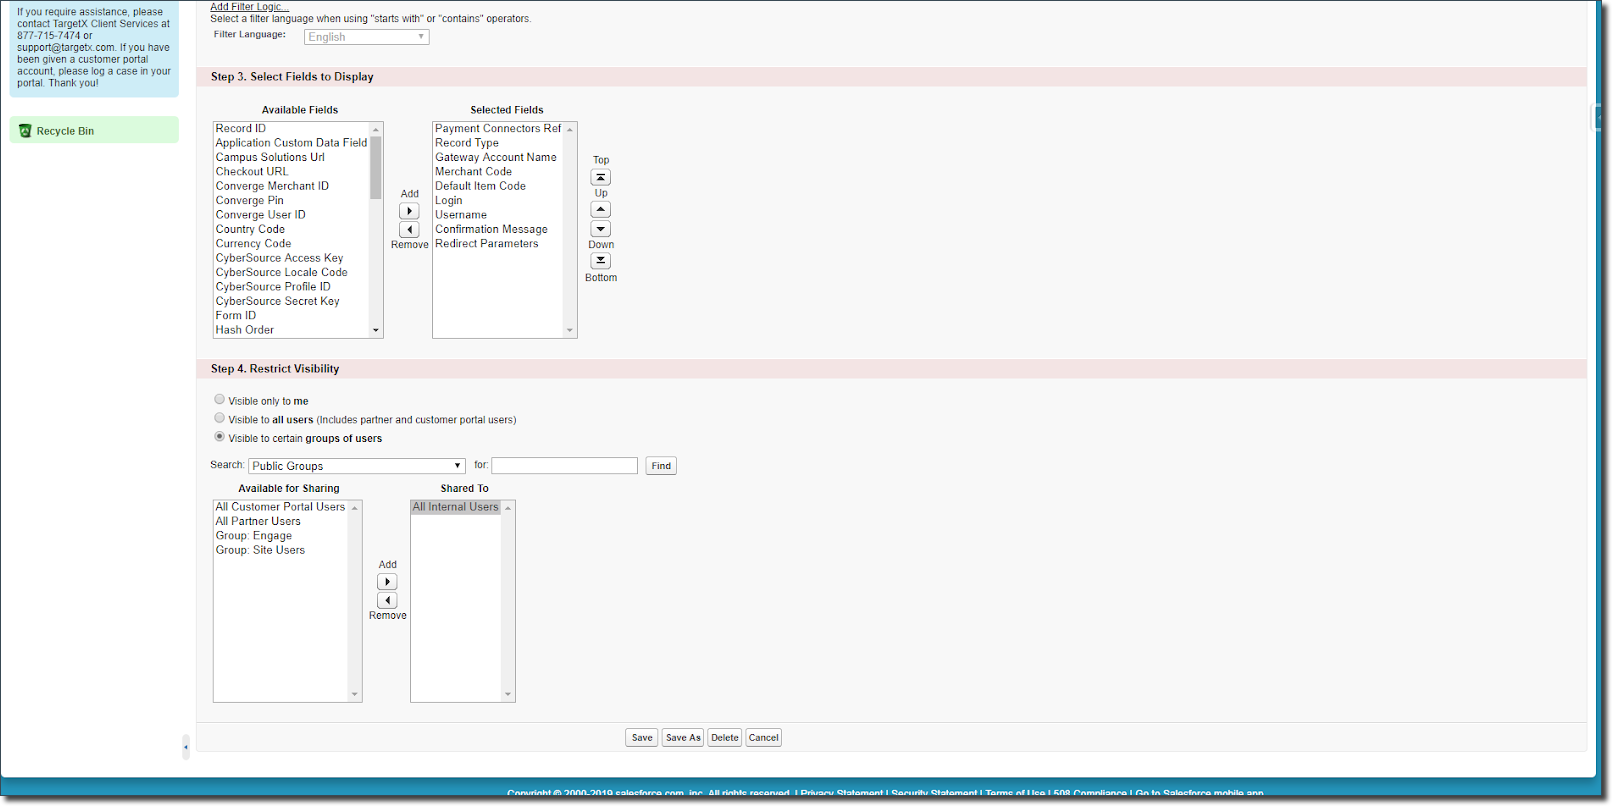
If the List View visibility is set to Visible to all users (including partner and customer portal users) you should complete the following steps:
- Click Edit
- Under Restrict Visibility, ensure that Visible to all users (including partner and customer portal users) is not selected.
- You can select Visible only to me or Visible to specific groups of users.
- Suppose you select Visible to specific groups of users. In that case, we recommend you choose either a public group you have previously created or the pre-delivered group All Internal Users if you want all internal users to continue seeing this list view.
- That is the final step. These steps should be repeated for all objects the profile has at least Read access.
Changes to client orgs to address potential vulnerabilities
On April 9, 2019, we proactively pushed changes to client orgs to address potential vulnerabilities described in a recent blog post. Specifically:
TargetX Communities for all clients were updated to disable standard Salesforce pages. This change was made directly to the Community Site metadata. If you have already performed these changes to your Communities site metadata, your changes will not be affected, and no further action is required. TargetX Community sites were identified by their “Community Home” page (indexPage) setting.
The logic used to apply this change was:
IF indexPage = “TX_CommunitiesLanding” AND allowStandardPortalPages = ‘true’
SET allowStandardPortalPages = “false”
In addition, these fields on the Application object had Field-Level Security (FLS) permissions updated for all Community User profiles:
|
Field API Name |
Changed to |
|---|---|
|
TargetX_Reader__Disable_Cache__c |
Hidden |
|
TargetX_SRMb__App_Submit_Letter_Sent_Date__c |
Hidden |
|
TargetX_SRMb__Application_Decision__c |
Read Only |
|
TargetX_SRMb__Application_Fee_Amount__c |
Hidden |
|
TargetX_SRMb__Application_Key__c |
Hidden |
|
TargetX_SRMb__Application_Submitted_Text__c |
Read Only |
|
TargetX_SRMb__ApplicationFYDate__c |
Hidden |
|
TargetX_SRMb__Authorized_for_Third_Party_Release__c |
Hidden |
|
TargetX_SRMb__CC_Approval_Number__c |
Hidden |
|
TargetX_SRMb__CC_Transaction_Approval__c |
Hidden |
|
TargetX_SRMb__Decision__c |
Hidden |
|
TargetX_SRMb__Decision_Display_Value__c |
Hidden |
|
TargetX_SRMb__Decision_Letter_Details__c |
Read Only |
|
TargetX_SRMb__Decision_Publish_Date_Time__c |
Read Only |
|
TargetX_SRMb__Deposit_Amount__c |
Read Only |
|
TargetX_SRMb__Deposit_Authorization_Number__c |
Hidden |
|
TargetX_SRMb__Deposit_Paid_Date__c |
Read Only |
|
TargetX_SRMb__Fee_Decision_By__c |
Hidden |
|
TargetX_SRMb__Fee_Waiver_Decision_Date__c |
Hidden |
|
TargetX_SRMb__Fee_Waiver_Decision_Reason__c |
Hidden |
|
TargetX_SRMb__FERPA_Waived__c |
Hidden |
|
TargetX_SRMb__Hidden_from_App_Dashboard__c |
Read OnlyLock |
|
TargetX_SRMb__Last_Rolled_Up__c |
Hidden |
|
TargetX_SRMb__Portal_Application_Label__c |
Read Only |
|
TargetX_SRMb__Show_Reply_to_Offer__c |
Read Only |
|
TargetX_SRMb__SRM_ETL_ID__c |
Hidden |
|
TargetX_SRMb__Start_Term_and_Year__c |
Read Only |