Interfacing with Common App
Displaying other applications (e.g. Common App) in the Applicant Dashboard and Student Portal
DISCLAIMER: This CSS tag is not supported or maintained by TargetX, and is meant as an example of how you may choose to use CSS within our products. Some or all of the customizations these tags provide may change or no longer apply to your instance at any time. If at any time the CSS impedes expected functionality in the TargetX product, our recommendation will be for you to remove the CSS to regain functionality.
The Applicant Dashboard and Portal are designed to display all application records associated with a contact, regardless of application source. There are a few considerations to keep in mind when choosing to display non-TargetX Applications (e.g. other third-party applications) in the Applicant Dashboard or Portal.
Note: If necessary, you can prevent applications from displaying in the Applicant Dashboard or Portal by checking the "Hidden from Dashboard" field on the Application record. Some institutions choose to do this after an application term ends or when applications are withdrawn, whereas others choose to show all applications for all time.
Preventing Students from Submitting Other Applications
By default, the application widget in the Applicant Dashboard and Portal will offer students the option to start a new application if you use the TargetX Online Application in your CRM. This can be hidden for students who apply via the Common Application, but remember that the method differs for the Applicant Dashboard and Portal.
- Hide "Start Application" on Applicant Dashboard
- If you currently use the TargetX Online Application for some students, you must create a separate Salesforce Community dedicated to non TargetX Online Application students to hide the "Start Application" button. This is because the feature is disabled by adding custom CSS that will be applied broadly to the Community site.
- To update the Community Theme:
- Navigate to the "+" to access all tabs
- Select Community Themes
- Click to Edit the theme used for your Online Application
- In the Custom CSS field, enter the following:
.new-app{
display:none;
}
- Hide "Start Application" on Portal
- The Application and Application with Checklist widgets in the Online Application offer the option to hide/show the Start Application button. You can use conditional logic to display the widget conditionally. Common Application students can see a widget that hides the "Start Application" button, while other students who need access can see the option.
- To configure the conditional display:
- Add a layout section to the Portal
- Select the Widget content of App or App/Checklist
- Disable the "Start Application" feature by toggling it to off (shown below)
- Add conditional logic to display the section based on application source or other available data points
- To configure the conditional display:
- The Application and Application with Checklist widgets in the Online Application offer the option to hide/show the Start Application button. You can use conditional logic to display the widget conditionally. Common Application students can see a widget that hides the "Start Application" button, while other students who need access can see the option.

Updating Application Display Label
When students view applications in the Applicant Dashboard or Portal, a custom App Dashboard Application Label can be set to provide information regarding the application type. In the example below, you can see Common Application marked on the corresponding application.

The value is stored in the TargetX_SRMb__Portal_Application_Label__c field on the Application Object. It is recommended that the value for the App Dashboard Application Label field be included in your data import file, mapped as a hardcoded value for each new application record.
This field can be updated manually or you can use a Flow to update this field with a concatenated value of the Program and Term to provide additional details.
Inviting Applicants to your Community Site
After students have applied via a third party application, you will want to invite them to sign-in to the community site where you display their application status and checklist items.
You should create a TargetX Email Campaign to send invitations to students. In the body of your email, please include a merge field displaying the student's email address in the CRM. This will be used as their username when directed to the community site. The student must also know to click Sign Up to set up their account vs Sign In. Please consider cautioning the student to notify the school if they have a duplicate account and which account they have associated with their third-party application.
Note: You may want to run de-duplication processes before sending emails to ensure you do not have multiple contact records with the same email address, as this may cause the student to match on the wrong record and not display any submitted applications.
Accepting Enrollment Deposits
Additional configuration is needed if you plan to accept Enrollment Deposits from third party applications.
Accepting Enrollment Deposits from other applications (e.g. Common App)
- Create a Master Application Form for this application, ex: Common App.
- Enter the following:
- Enrollment Deposit Amount
- Enrollment Deposit Connector
- Enrollment Deposit Amount
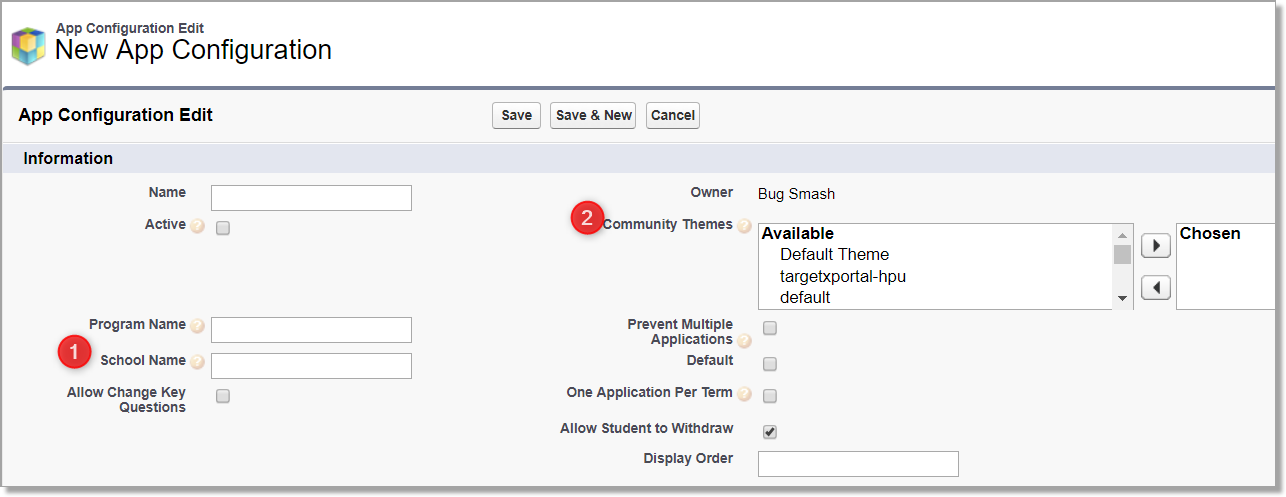
- If you already have an App Configuration record created for the TargetX Application, you don't need to create one. However, if you don't have an App Configuration created yet, then you need to create an App Configuration.
- You don't need to set Key Questions for this application, but you MUST populate:
- School
- Community Theme
- After the records are created, you then need to populate the following fields on the application record, either through a process in Salesforce or during your Data load of the application (recommended) with the Salesforce ID of the appropriate records:
- Application Process | TargetX_App_Application_Process_c
- App Configuration | TargetX_App_App_Configuration_c