Using Zoom with TargetX
Creating Zoom Webinars from Salesforce
The Zoom integration for Salesforce supports Zoom Webinars through campaigns. When a Webinar is created in Zoom, a campaign will automatically be created in Salesforce.
What You Will Need
- Zoom Account with Webinar License
- Salesforce Domain for Salesforce Lightning
Configure Zoom Webinar Settings
- From the App Launcher, navigate to Zoom Config.
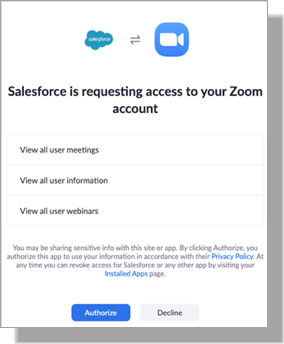
- To use the webinar integration with Salesforce, you will need to authorize Salesforce to receive your webinar information. In the Webinar Settings section, click each option to allow access:
- Click Authorize:
- Once access is authorized, you will be able to configure specific settings.
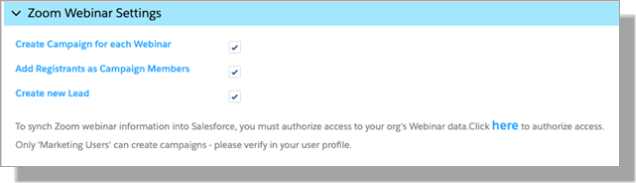
- You will see the Zoom Webinar Settings.
Here you can enable:
- Create a campaign for each webinar: When you create a Webinar on Zoom, a campaign will automatically be created with that title.
- Add registrants as campaign members: Once your webinar registrants register for your webinar, they will be added as campaign members in Salesforce.
- Create a new lead: Enable this setting to create a new lead for your registrants. (Note: If you do not use the Leads feature, you do not need to check this Field).
- Save your settings.
Verify the Integration & Managing your Zoom Webinar from the Campaign
Once you have authorized Zoom and Salesforce, you will want to ensure that Webinars properly trigger campaigns. Perform the following steps:
- Create a Webinar on the Zoom portal and set registration approval to approve manually.
Note: You can set this to approve automatically, and anyone registering for the event will be registered.
- Create two different registrants for the webinar as a test.
- Navigate to Salesforce and log in.
- Navigate to the Zoom Webinars page on Salesforce and verify that your webinar is listed.
Note: You may need to refresh the page to synchronize Zoom and Salesforce.
- Click the webinar and scroll down to Registrant Management.
- Click Pending Approval and verify that your two registrants are listed.
- Approve one registrant and deny the other.
- Your denied registrant will appear in the Blocked tab, while the approved registrant will appear in the Approved tab.
Once you have scheduled a Webinar, Zoom will trigger a campaign to be created using the Title of your Webinar. Once the campaign is created you can manage your webinar:
- Approve or deny registrants
- View your approved, blocked, pending registrants
- Add, edit, and remove panelists
Using Zoom with TargetX Appointment Scheduler
Once the User setup is completed, including page layouts, Users should have access to start a Zoom Meeting with any student instantly.
Notes:
- There are no changes to how a student schedules an appointment with a team member.
- As always, once students create the appointment, they will receive a confirmation email. That email will include the Zoom meeting information.
- The User will have the option to send an email to the Student before the launch of the meeting.
Zoom requires all previous, upcoming, and PMI meetings to need passwords to join meetings. This requires you to create a custom field, similar to the PMI, to be updated in the Classic Email Templates via Workflows.
To launch a scheduled meeting
- Sign in to Salesforce.
- Search for the Student you’ll be meeting (for example: Kat Zoom).
- At the time of the meeting, click Start Zoom Meeting.
- Based on the User preference setup, a new window will pop up with a draft email once you select Start Zoom Meeting.
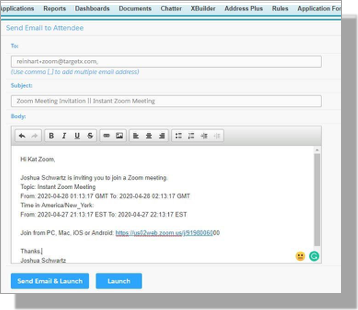
- The User can Send an Email & Launch or Launch meeting. Once the meeting is launched, the Zoom window will load as usual. Select Open Zoom if prompted.
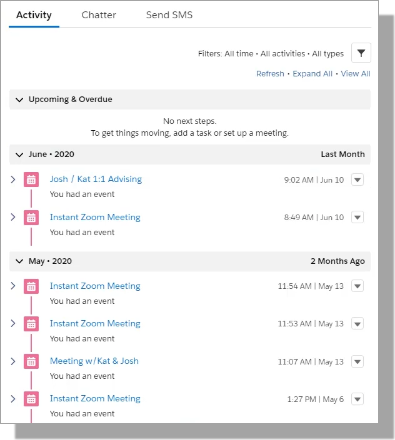
- Once the meeting is completed, the User can go back into the Student Contact, and the Zoom Meeting will appear under Activity History.

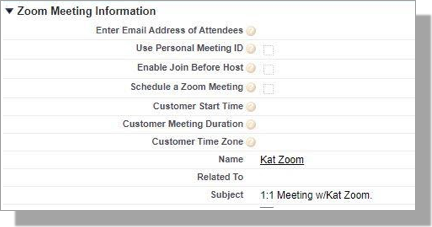
- You can click the Instant Zoom Meeting and, under Calendar Details, edit the Subject line if you’d like to be more specific on the title (example: 1:1 Meeting w/Kat Zoom).
- Users can also Create Follow-Up Tasks or Create Follow-up Events from the Activity History:

Creating Follow-Up Events allows the User to set up a follow-up appointment with a student if needed.
Using Zoom with TargetX Events
Configure Zoom by using this article. Admins can create a unique email template for each virtual Event that contains the ZOOM registration URL for Zoom Webinars. When the student registers for your Event, the confirmation email will have the information to join the ZOOM event.
Zoom requires all previous, upcoming, and PMI meetings to need passwords to join meetings. This requires you to create a custom field, similar to the PMI, to be updated in the Classic Email Templates via Workflows.
Step 1: Create a Zoom Webinar
- Navigate to the Zoom Webinars tab.
- Click New.
- Create a Zoom Webinar with Approval Type = No Registration Required
- Add the required information and Save.
Step 2: Create Email Templates
- Navigate to Setup and search for Classic Email Templates
- Select the Event Email Templates folder
- Click the Event Registration Confirmation template
- Click Clone
- Click Edit HTML version
- Add the Join URL link and any additional information you wish to provide.
- Save your changes.
- Repeat for any other Email templates you wish to include, such as Event Reminder.
Note: Remind the students to use the email they registered for the Event with. Zoom will match Contacts based on Email address.
Sample Email
<p>
Dear {!Contact.Name},</p>
<p>
Thanks for your registration!</p>
<p>
Since this Event is going to be a virtual event, you can join using the URL below.
Join Virtual Event: <add Join URL here>
For additional information as well as details about all your upcoming events, check out your personal events schedule <a href="http://<SITEURLHERE>/TargetX_Eventsb__Events_MyEvents?cid={!Contact.Id}">here</a>. </p>
As a reminder, please remember to login to the Virtual Event using the same email you registered with!
We look forward to seeing you soon!
<p>
Step 3: Create an Event
- Create an Event as you normally would.
- Select the Email Templates you created in Step 2 for the Event Confirmation Email and Event Reminder Email.
Note: Attendance to Zoom events can be viewed in the Student Contact, under Activity History (the Zoom Meeting will appear). Zoom attendance will NOT appear in the Contact Schedule Item.