Setting up the Zoom for Lightning app in your org
Install the Zoom for Lightning App in Salesforce
You can install the Zoom app in Salesforce AppExchange or Zoom Marketplace. Alternatively, you can install it using the following link:
https://appexchange.salesforce.com/appxListingDetail?listingId=a0N4V00000DZGLCUA5
1. Navigate to the Zoom Marketplace and sign in as an Admin.
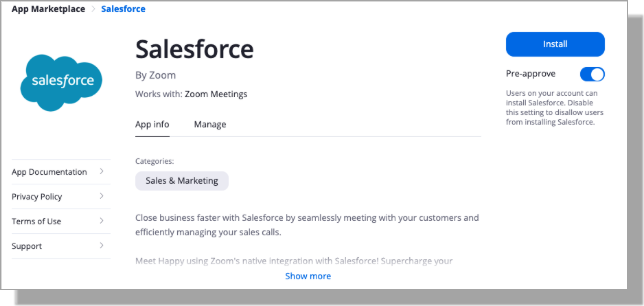
2. Search for Salesforce and click the app.
3. Pre-approve the app if necessary and click Visit site to install.
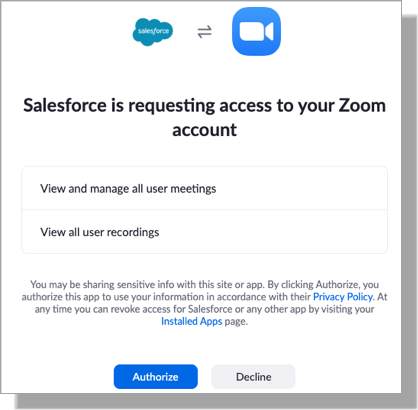
4. Verify the permissions the app requires and click Authorize:
5. You will be redirected to the listing in Salesforce AppExchange.
6. Click Get It Now:

7. Log in to your Salesforce admin account, if necessary.
If you are directed to the Trailblazer Login page, copy the link into your browser and load it on a tab where you are already logged in to Salesforce. 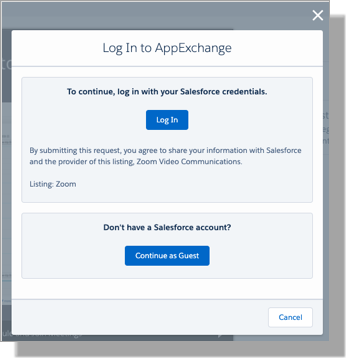
8. Select if you want to Install in production or Install in sandbox:
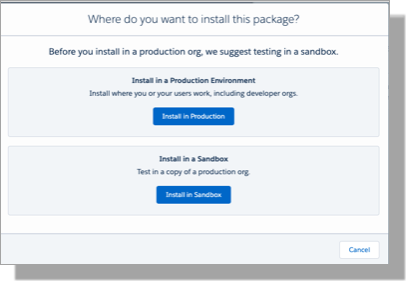
- Review the installation details and confirm that you have read and agree to the Terms and Conditions.
- Select Confirm and Install.
- On the following page, choose the option to Install for Admins Only.

12. Click Install.
13. When prompted, verify and Approve Third-Party Access. Check the Field and click Continue.

14. The Zoom App will then be installed. Once complete, verify that the Zoom App is installed on the Installed Packages page.

Configure the Zoom for Lightning app in Salesforce
For details on configuring the Zoom for Lightning app in Salesforce, see the Zoom support document Installing the Zoom for Salesforce Lightning app.
Event Page Layout Customization 
- Navigate to Setup and search for Object Manager.
- Click the Event object.
- Click Page Layouts.
- Click the dropdown next to the layout and click Edit.
- Click Buttons and move the Start Zoom Meeting to the layout.
- Click Quick Actions and move the Start Zoom Meeting to the layout.
- Create a new section.
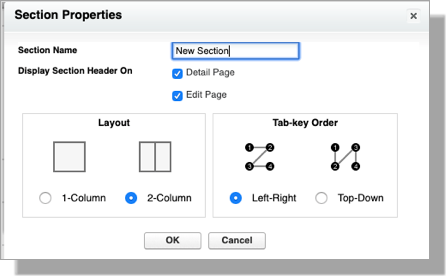
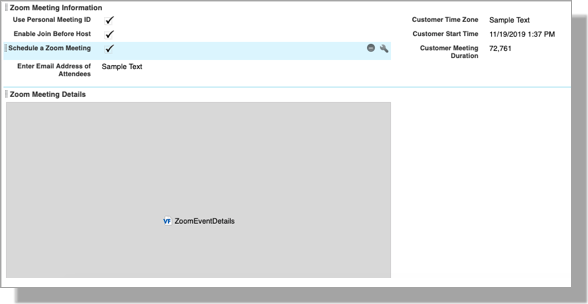
- Name the section: Zoom Meeting Information and add the following fields:
- Use Personal Meeting ID
- Enable Join Before Host
- Schedule a Zoom Meeting
- Enter the Email Addresses of Attendees
- If you want to use Timezone for the event, add the fields below.
- Customer Timezone
- Customer Start Time
- Customer Meeting Duration
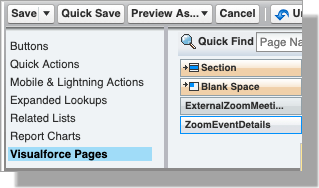
- Create a new section named Zoom Meeting Details.
- Select Visualforce Pages and Add ZoomEventDetail to this section.
- Configure the height to 400 and click Ok.
- Click Save.
Setting up Zoom with Appointment Scheduler
Setting up the Zoom Meetings with TargetX Appointment Scheduler requires additional fields to be populated. Follow the below steps in Salesforce Lightning. Zoom requires all previous, upcoming, and PMI meetings to need passwords to join meetings.
Field and Flow Setup
A. Create New User Fields
- Navigate to Setup and search for Object Manager.
- Select User.
Note: You must set up the User Object before moving forward.
- Select Fields and Relationships
- Click New to create a new field:
Step 1: Choose the Field Type
Data Type = Text
Click Next.
Step 2: Enter the Details
Field Label = Zoom PMI
Length = 15
Check Unique = Do not allow duplicate values
Click Next.
Step 3: Setting Field-Level Permissions
Field-Level Security for Profile, leave it as is.
Click Next.
Step 4: Add to page layouts
Add to page layouts, leave as is,
Click Save.
B. Create New Organization Event Fields
- Navigate to Object Manager
- Select Organization Event
- Select Fields and Relationships
- Click New to create a new field:
Step 1: Choose the Field Type
Data Type = Text
Click Next.
Step 2: Enter the Details
Field Label = Zoom PMI
Length = 15
Click Next.
Step 3: Establish field-level security
Field-Level Security for Profile, leave it as it is.
Click Next.
Step 4: Add to page layouts
Click Save.
C. Update Organization Event Field Set
- Navigate to Object Manager
- Select Organization Event
- Select Field Sets
- Select Event Details
- Drag the new Field you created above onto the Layout
- Click Save.
D. Create a Flow
Create a Flow that fires when the Organization Event record’s Owner is created or updated and configure it to update the Zoom PMI field with the Owner’s information.
E. Configure Users
You’ll need to complete these steps for each user utilizing Zoom:
- Go to Setup and search for Users.
- Click Users
- Find the user you’d like to utilize.
- Click Edit
- Add the Users Zoom PMI code (found on the Users Zoom account)
- Click Save.
F. Email Template Setup
Student Appointment Confirmation Email Template
Complete the following steps for a Salesforce Email Template:
- Navigate to Setup and search for Classic Email Templates.
- Under the Folder dropdown, select: Appointment Email Templates
- Click: Student Appointment Confirmation
- Click the Edit HTML Version button
- In HTML Email Content:
- In HTML Body, add Your Zoom URL (example: https://us02web.zom.us/)
- Under Available Merge Fields:
- Field Type = Organization Event Fields
- Field = Zoom PMI
- Copy the Merge Field Value and add it to the end of the Zoom URL.
Example: https://us02web.zoom.us/j/{!TargetX_Eventsb__OrgEvent__c.Zoom_Org_Event_PMI__c}
- Copy what you wrote in the HTML Version for later use.
- Click Save
- Click Edit Text Version
- Under Email Template, paste the previous Zoom URL from the above example into the document in HTML Preview.
- Click Save
Student Appointment Reminder Email Template
- Navigate to Setup and search for Classic Email Templates.
- Under the Folder dropdown, select: Appointment Email Templates.
- Click: Student Appointment Reminder.
- Click the Edit HTML Version button.
- In HTML Email Content:
- In HTML Body, add your Zoom URL (example: https://us02web.zom.us/)
- Under Available Merge Fields
- Select Field Type = Organization Event Fields
- Select Field = Zoom PMI
- Copy Merge Field Value and add to end of Zoom URL.
Example: https://us02web.zoom.us/j/{!TargetX_Eventsb__OrgEvent__c.Zoom_Org_Event_PMI__c}
- Copy what you wrote in the HTML Version for later use.
- Click Save.
- Click Edit Text Version.
- Under Email Template, paste the previous Zoom URL from the above example into the document in HTML Preview.
- Click Save.
G. Instant Meetings
For details on configuring the Zoom for Lightning app in Salesforce for Instant Meetings, see the Zoom support document Enabling Personal Meeting ID for instant meetings.