Using Custom Fields
Best Practices in Setting Up a Review Process
Video Overview
Overview
Custom Fields allow you to store information that your program needs but is not collected from the applicant in the CAS application.
Custom Fields are available when working with Lists, Exports, Scoring, and Email Templates as merge fields. You can also use Custom Fields to identify new and updated applicants.
Note that you should not use custom fields to store any sensitive applicant data, such as social security numbers (SSNs), as the information is not encrypted. As a best practice, SSNs should never be stored alongside personally identifiable information (PII), such as an applicant's name, birth date, or other application information. If you need to collect SSNs, we recommend that you store the information in a separate system, one that is vetted by the information technology security team at your organization. Alternatively, your CAS may provide you with an encrypted SSN document; if so, learn more about it and best practices in the Social Security Number (SSN) Documents Reference Guide.
Gaining Access to This Feature
The Custom Fields feature is available under the Management panel and access to this tool is controlled through Work Groups. You must have the:
- Configure Software permission to create and edit Custom Field templates.
- Modify Applicants' Custom Fields, Local GPAs, Prerequisites, and Requirements permission to update an applicant's Custom Field.
Creating Custom Fields
Once Custom Fields have been created, they appear in the Custom Fields panel of each Applicant Details page.
Once you save a Custom Field template, you cannot change the Custom Field Type selection, but you can deactivate the template and create a new one, if necessary.
- Using the Menu Bar, open the Management panel, then click Custom Fields.
- Click New Custom Field.
- Select the programs associated with the Custom Field. You can batch check/uncheck all programs.
- If desired, select Make this item available for all new programs that are added to WebAdMIT to automatically activate any programs added mid-cycle through the Configuration Portal. You will still need to manually activate any programs that existed before selecting this checkbox.
- Enter a label (name).
- Select a custom field type, including:
- Text Value: enter text, such as notes/comments, phone numbers, or identification numbers.
- Select From List: select an option from a customized drop-down containing multiple options.
- Date: select a date from a calendar picker.
- Yes/No Value: select Yes or No from a drop-down, where No is the default value.
- Numeric: enter numeric values that can be carried out two decimal places.
- Enter a description that provides an overview of the type of data to be collected in this field.
- Click Submit to save your template or Return to Custom Fields to discard your template.

Updating an Applicant's Custom Field
Once Custom Fields have been created, they can be updated for applicants:
- Individually from the Custom Fields panel on the Applicant Details page.
- In batch via Lists, Searches, or the Clipboard.
Each Applicant Details page contains a Custom Fields panel that populates with all the Custom Fields that have been created and enabled for the applicant. WebAdMIT keeps track of who made the most recent change to each Custom Field.
Updating a Custom Field Individually
- Navigate to the Applicant Details page.
- Go to the Custom Fields panel.
- Update the field as appropriate. You may need to use the tab key or click off the field to save your change. The row flashes green to indicate a saved change.

Updating Custom Fields in Batch
You can run a batch Custom Field update through the:
- Search features using the Search Actions button.
- Clipboard feature using the Clipboard Actions button.
- List Manager using the List Actions button.
You can exclude applicants from your change by unchecking them before initiating a batch update.
Follow the steps below to run a batch Custom Field update through the List Manager; you can follow similar steps for the Search and Clipboard features.
- Using the Menu Bar, open the Applicant Lists panel, then click List Manager.
- Click on a list name to run it.
- Click List Actions.
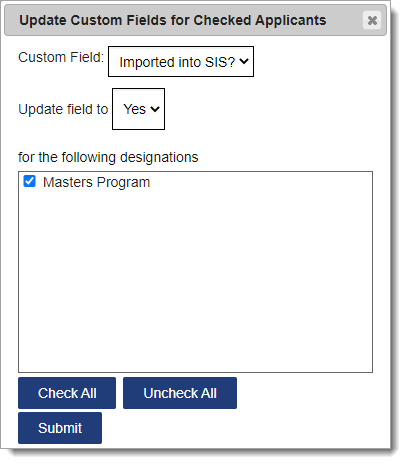
- Click Update Custom Fields for Checked Applicants.
- In the window, select the Custom Field from the drop-down.
- Update the field as appropriate.
- Select the designation(s) you'd like this change to impact.
- Click Submit.
Managing Custom Fields
To manage existing Custom Fields, click Custom Fields from the Menu Bar.
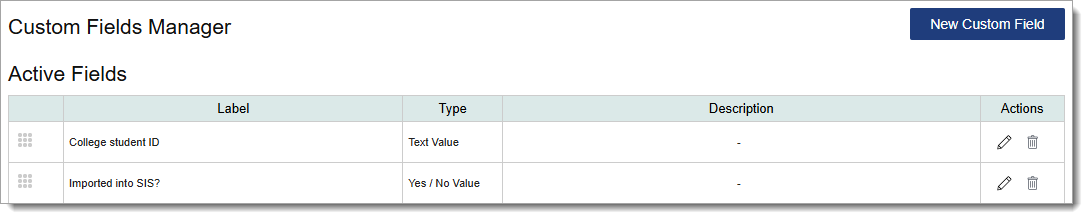
Reordering Custom Fields
Use the grip icon to drag and drop the Custom Field into the preferred order.
Editing Custom Fields
Use the pencil icon to edit an existing Custom Field template.
Deactivating Custom Fields
Use the trash icon to deactivate Custom Field templates.