Identifying New and Updated Applicants
This guide explains how to find applicants who have recently submitted their application to your program or have updated their application since applying. Included are suggestions of WebAdMIT tools and processes you can use to manage these applicants. If you have any questions, contact the Client Support Specialist Team.
Identifying New Applicants
A routine part of most admissions processes is identifying newly submitted applicants. Depending on your process, you may need to identify these applicants so you can perform specific actions such as exporting them to a file, sending them an email, assigning them to a reviewer, or moving them to a Ready for Review Local Status.
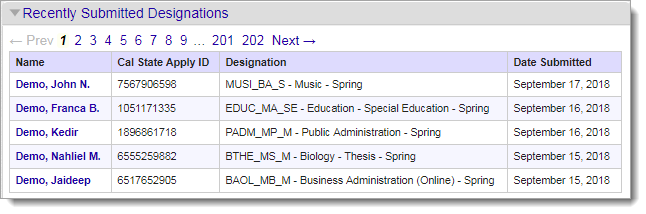
Dashboard: Recently Submitted Designations
WebAdMIT's Dashboard features a Recently Submitted Designations panel to help you identify new applicants. The applicants are listed in reverse chronological order with the most recent applicant appearing first. You can use the pagination at the top to move through the list.
Dashboard: Designations by Local Status
You can quickly identify newly submitted applicants under the Designations by Local Status panel.
- If your CAS provides you with a full view of In Progress applicants (i.e., you can view all applicant data before the applicant submits their application), these applicants appear in the None Local Status as soon as they add your program to their application.
- If your CAS allows partial view of In Progress applicants (i.e., you can view some applicant data before the applicant submits), these applicants appear in the None Local Status as soon as they submit their application.
Review the How Data Visibility is Impacted by Application Statuses page for more information on your In Progress applicant viewing rights.
As you work with In Progress applicants, you can choose to keep them in the default Local Status (i.e., None) or move them into other Local Statuses. Some programs choose to use additional Local Statuses to help keep track of In Progress applicant outreach initiatives. If you decide to move In Progress applicants into other Local Statuses, they remain in these Local Statuses when they submit their application (i.e., they will not return to None). Ensure you have a process in place to keep track of when these applicants submit their applications.
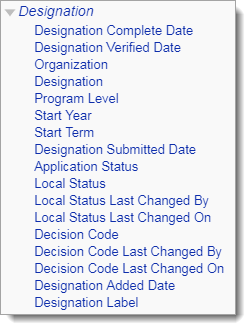
List Manager
You can use the List Manager to find recently submitted applicants. When creating a List, use the Designation field grouping to search by the date the applicant submitted their application (Designation Submitted Date), the date the application moved to the Complete status (Designation Complete Date), etc. Review the Date Field Reference Guide to help identify the most appropriate fields for your purposes. Additionally, review the Application Statuses Reference Guide for more information on application statuses.
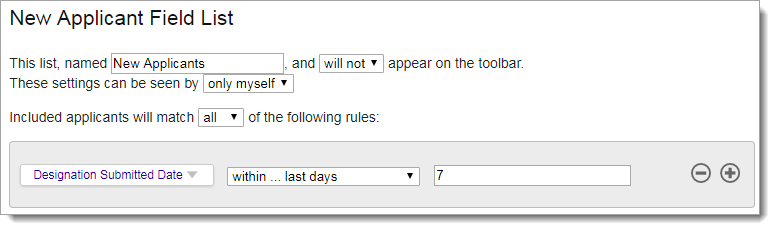
For example, you can use the List Manager to find applicants who submitted their application in the past seven days:
Managing New Applicants
Once you've identified your new applicants, you'll need to decide how to manage them. This process is entirely up to you, but many programs choose to use Local Statuses to keep track of admissions process actions. For example:
- If your first action is to email new applicants, create a Local Status called Initial Email Sent.
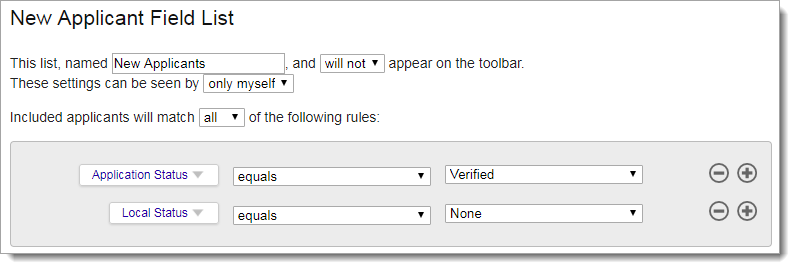
- Next, using the List Manager, build a "New Applicants" list to help identify applicants you have not yet worked with. You can search for applicants who have reached your desired Application Status (e.g., Verified) but have not yet been placed in a Local Status (i.e., the current Local Status is None). Remember: if you're placing In Progress applicants in Local Statuses, these applicants will not return to the None Local Status when they submit their application.
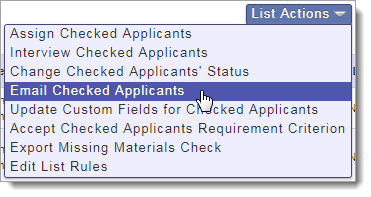
- Once the list populates, you can perform your first admissions action. In this example, the first action is to send the applicants an email. Use the List Actions drop-down to send the desired email to everyone in your New Applicants list.
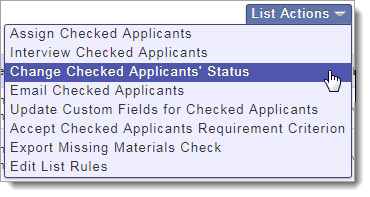
- Once you send the email, you should immediately update the Local Status for these applicants. Place them in the corresponding Local Status: Initial Email Sent.
- When you complete this action, the applicants automatically clear from your New Applicants list, as they no longer meet the Local Status equals None criterion. As more applicants arrive in your applicant pool, the list populates with applicants who meet the established criteria.
- Return to this list periodically and repeat steps 2–4.
Using the process outlined above – or a similar process – helps you identify new applicants and keep track of your applicants as you work through your review process. You can modify this process and create additional processes to suit your needs. For example, if you want to keep track of applicants according to when they arrived in your applicant pool, you can build lists based on Designation Submitted Date. Or, if you use Custom Fields to track applicant data or admissions actions, you can update these Custom Fields in bulk.
Recently Updated Applicants
After applicants apply to your program, they can go back into their application and make edits, such as adding more experiences and standardized tests, updating their mailing addresses, or submitting optional documents. Review the Application Locking Behavior guide for more information on which parts of the application are editable after submission.
Note: each CAS sets requirements for submitting and completing the application. Review the Application Statuses Reference Guide and your CAS's help center to determine which, if any, additional documents are required. Note that the following application materials can be submitted after an applicant submits their application:
- Transcripts
- Letters of evaluation (i.e., recommendations)
- Foreign evaluations
- Official test scores
Dashboard: Recently Updated Applicants
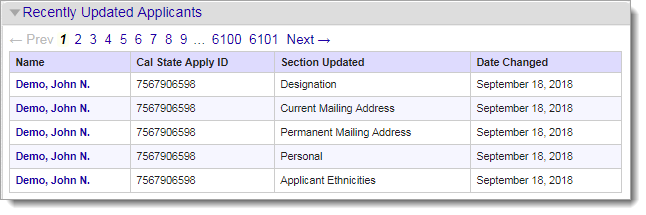
WebAdMIT's Dashboard features a Recently Updated Applicants panel to help you identify applicants who have updated their application after submitting. This panel includes a Section Updated column that identifies the associated update (e.g., Current Mailing Address). When an applicant first submits their application, they appear in this panel with all application sections listed under the Section Updated column.
Note that if you have full viewing rights for In Progress applicants, your In Progress applicants will be listed in this panel as well. See How Data Visibility is Impacted by Application Statuses for more information.
List Manager
You can use the List Manager to search for application updates that are most important to your admissions process. We highlight the most common application updates below and include an example admissions workflow.
Most of these application update fields are date-based; be sure to review the list operator options to effectively filter applicants before or after a certain date or within a time frame.
Application Last Changed On
The Application Last Changed On field is the last date that an applicant's information was transmitted from the CAS to WebAdMIT. This transmission occurs when:
- An applicant updates information in their application and clicks the Update My Application button,
- A document, such as a transcript or evaluation, or an official test score has been received by the CAS team, or
- An applicant's information needed to be retransmitted to ensure accuracy between the application and WebAdMIT (this is rare).
This is a generic field that includes all updates to any section of the application. This field is listed under the Applicant field grouping.
Letters of Evaluation Received
From the List Manager, you can search for letters of evaluation updates in the:
- Number of Evaluations Received field under the Applicant field grouping, and
- Reference Received Date field under the Evaluators field grouping.
If you require a certain number of evaluations to be completed before reviewing an applicant, you can use the Number of Evaluations Received field to search based on this number. You can also use Reference Received Date to find evaluations submitted before or after a certain date or within a time frame.
Transcript Received
Depending on how your CAS accepts official or unofficial transcripts, you can use the Transcript Received Date field under the Transcripts field grouping to filter by the date when:
- An official transcript was received by the CAS,
- A foreign evaluation was received by the CAS, or
- An applicant uploaded an unofficial transcript.
Note that if your CAS requires applicants to submit all official transcripts before moving into the Complete application status, you can instead use the Designation Complete Date field under the Designation field grouping. This helps you avoid searching by individual transcript received dates.
Official Test Score Received and Official Last Updated Date
If your program accepts official test scores through the CAS (e.g., GRE, MCAT, or TOEFL), then you can use the List Manager to search by the:
- Official Test Score Received field under the Official Test Score field grouping.
- Official Last Updated Date field under the Official Test Score field grouping.
Each field and grouping name has a unique name based on the test type, though all contain Official in both the field and grouping names.
The Official Test Score Received field is the date the CAS received the official test score. The Official Last Updated Date field is the date the official test score was added to WebAdMIT. While these two fields will typically have the same date, sometimes there may be a discrepancy. For example, if an applicant's name or date of birth does not match between their CAS application and the official test score report, the applicant must contact customer service in order to have their scores manually matched. In this example, the applicant's Official Test Score Received date is March 1, 2019 (when the CAS received the official test score) but their Official Last Updated Date is April 1, 2019 (when the applicant contacted customer service to match their test score to their application, which caused the score to be sent to WebAdMIT).
Note that most CASs do not require official test scores to be received before an applicant moves into the Complete or Verified application statuses. If this is a requirement for your program, you can use Local Statuses and Requirements to record and manage this data.
Managing Updated Applicants
Once you've identified your updated applicants, you'll need to decide how to manage the updates. This process is entirely up to you, but many programs choose to use Local Statuses to keep track of admissions process actions.
For example, assume you require three letters of evaluation and you created a Missing Materials Local Status to group applicants who are missing letters of evaluation. On a weekly basis, you want to determine which of these applicants have received all letters of evaluation (and are therefore no longer Missing Materials). You could:
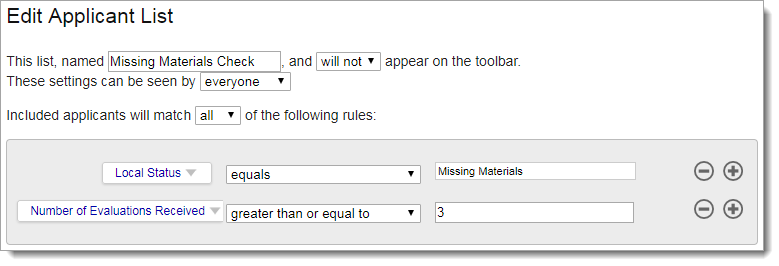
- Use the List Manager to build a "Missing Materials Check" list to help identify applicants who have three completed letters of evaluation and are currently in your Missing Materials Local Status.
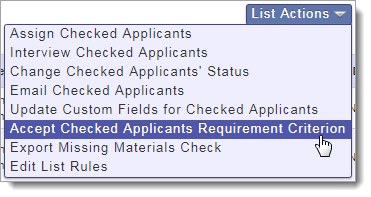
- If you've built Requirements to track specific materials that you require outside of the CAS application requirements (e.g., a specific number of evaluations, official test scores, foreign evaluations, etc.), then once the list populates, use the List Actions drop-down to update your 3 Letters of Evaluations Received Requirements criterion.
- Once you update the Requirement, you should immediately update the Local Status for these applicants. Place them in the Local Status that corresponds with your next admissions action, like Ready for Review.
- When you complete this action, the applicants will automatically be cleared from your Missing Materials list, as they no longer meet the Local Status equals Missing Materials criterion; however, the list continues to populate with applicants who meet the established criteria.
- Return to this list periodically and repeat steps 2–4.
If you use a generic Missing Materials Local Status and would like to search by multiple completion requirements, such as official test scores received and three letters of evaluation submitted, then you'll need to use both field and composite lists. For example:
- Create your first field list. Search by your Missing Materials Local Status.
- Create your second field list. Search by your completion requirements (i.e., official test scores received and three letters of evaluation submitted), using the "any of the following rules" value.
- Create your composite list. Search for applicants who appear in both of these lists, using the "all of the following rules" value.