Scoring Applicants
Best Practices in Setting Up a Review Process
Video Overview
Building Scoring Models
Reporting on Applicant Scores
Overview
Scoring Models provide a framework for how applicants are scored based on institutional rating policies. Some Scoring Models also use Point Tables that allow you to assign points based on customized point scales. This helps you normalize and assign scores in a standard manner.
Scoring Models are available when working with Lists, Exports, and Reports.
Gaining Access to This Feature
The Scoring feature is available under the Management panel and access to this tool is controlled through Work Groups. You must have the Configure Software permission to create and edit Scoring Models and Point Tables.
Creating Scoring Models
You can build as many Scoring models as needed. Scoring models cannot be combined together; instead, you must build a Scoring model that includes all the components you want. For example, you can create a Scoring model for pre-review criteria and rank your top applicants to begin your early review process. Then, you can create a separate Scoring model for an overall score that includes the same pre-review criteria, as well as any faculty/staff reviews and interviews, and then rank your top applicants for acceptance offers.
- Using the Menu Bar, open the Management panel, then click Scoring.
- Begin by creating a Scoring model.
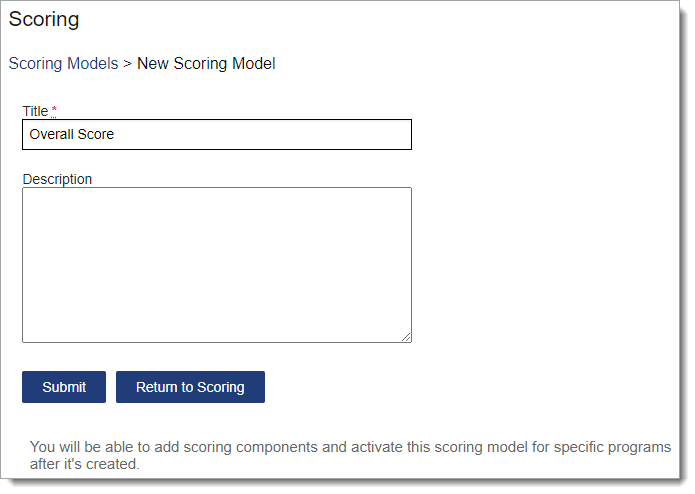
- Click New Scoring Model.
- Enter a name and description.
- Click Submit to save your template or Return to Scoring to discard your template.
- Once you create the Scoring model, then you can add scoring components under it.
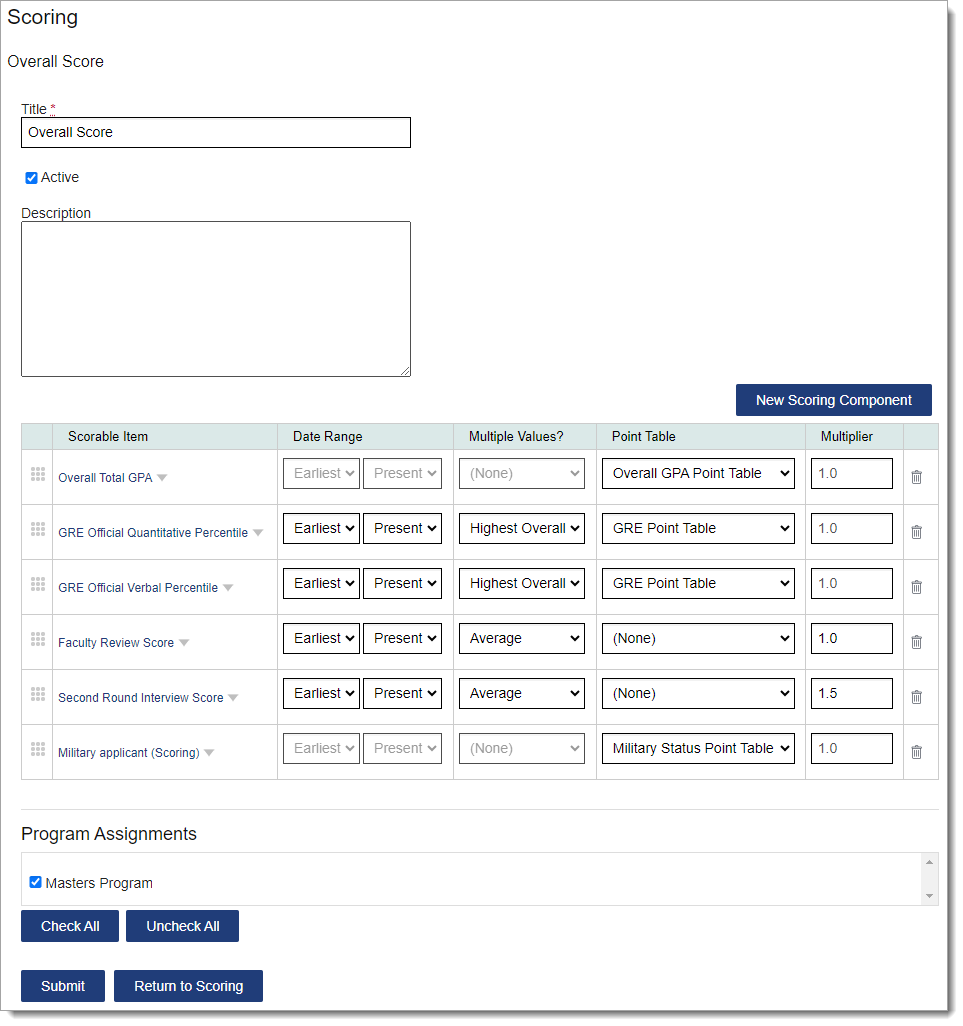
- Click Edit Model.
- Click New Scoring Component to add scorable items. Note that:
- Not all fields in the application are scorable. You can use a Custom Field to capture items that are not available as scoring components.
- If you select a scorable item that is text-based (e.g., Military Status), you must use a string Point Table to convert the text to scores.
- If necessary, adjust the date range.
- If necessary, determine how multiple values are scored. This is required for fields that can have more than one result (e.g., test scores, assignment scores, interview scores, etc.). See the Notes on Standardized Tests and Multiple Values section for more guidance on test scores. The options are:
- Average: the average score of the selected component.
- Highest Overall: the component taken from the test with the highest overall score (regardless of whether they scored higher on that selected component in another test).
- Maximum: the highest score obtained for the selected component.
- Most Recent: the most recent score for the selected component.
- Sum: the sum of all instances of the selected component.
- If necessary, select a Point Table or enter a multiplier. These options allow you to convert the value from the specified field to another value for weighting or normalizing.
- Select the programs associated with the Scoring Model.
- Click Submit to save your template or Return to Scoring to discard your template.
Notes on Standardized Tests and Multiple Values
When including standardized test scores in a Scoring Model, the highest score in different sections may not have been obtained in the same test. Review the scenarios below to help determine the best multiple value option to apply.
In this example, the applicant took the GRE test twice, with the scores below.
| Quantitative Result (Percentile) | Verbal Result (Percentile) | Overall Result | |
|---|---|---|---|
| GRE Test 1 | 83 | 90 | 173 |
| GRE Test 2 | 81 | 94 | 175 |
If you select Maximum for Quantitative and Verbal, your Scoring Model pulls Test 1 score (83) for Quantitative and Test 2 score (94) for Verbal. Selecting Maximum for each section creates a "superscore" that presents the best scores for each section, regardless of whether they were obtained during the same session.
- The Maximum option can also be used to simulate TOEFL MyBest™ Scores. MyBest Scores are the combination of an applicant’s best scores for each test section from all of their valid TOEFL scores in the last two years. If desired, you can create a Scoring Model exclusively for TOEFL MyBest Scores by selecting Maximum for each section of the test. The resulting overall score combines the maximum scores, resulting in a "superscore."
If you select Highest Overall for Quantitative and Verbal, your Scoring Model pulls Test 2 score (81) for Quantitative and Test 2 score (94) for Verbal. Selecting Highest Overall uses the score originating from the test with the highest overall result (175).
- For tests with a Highest Overall option, the Overall Result can either be a value from the test itself or a WebAdMIT custom-calculated data point (typically a summation of several test components). Review the Standardized Tests panel and use the Result Notes column and test details to help identify this. For example:
- GRE Overall Result = Quantitative Percentile + Verbal Percentile
- TOEFL Overall Result = IBT Score (for regular scores) or Sum of Highest Section Scores (for MyBest scores)
Creating Point Tables
Video Overview
Creating a Point Table
Point Tables allow you to normalize values and assign scores in a standard manner to all applicants. Once Point Tables have been added, a Scoring Model can be updated to incorporate it.
Once you save a Point Table template, you cannot change the Point Table Type selection, but you can deactivate the template and create a new one, if necessary. We recommend that you test Point Tables by applying them to your Scoring Model and then reviewing applicable applicants.
For string Point Tables, it's important to confirm that the text in the fields you're scoring on matches the text in your Point Table exactly. For example, the States & Territories Point Table template uses state abbreviations, so for it to work properly, you'll need to pair it with a State Code field instead of a full State Name field. If you build a string Point Table for a Custom Field, be sure to build the Custom Field with a Select From List or Yes/No Value custom field type; you can then standardize the input options in both the Custom Field and Point Table and ensure the Point Table works correctly.
- Using the Menu Bar, open the Management panel, then click Scoring.
- From the Scoring page, click the Point Tables tab.
- Begin by creating a Point Table.
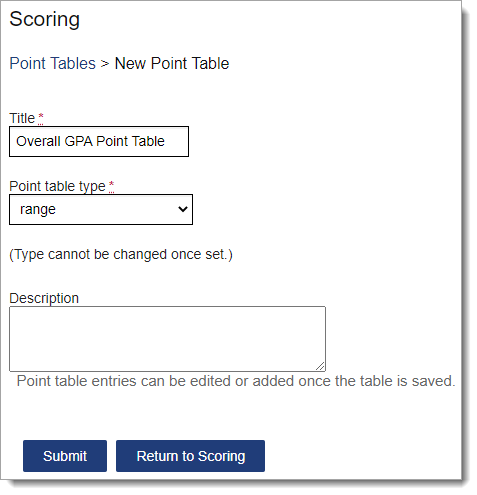
- Click New Point Table to create a custom template or click Copy Template to copy and customize a WebAdMIT default template.
- Enter a title.
- Select a Point Table type, including:
- Numeric: convert a number into another numeric value (e.g., 0.5 value is awarded 1 point, 1.5 value is awarded 2 points, etc.). This is useful when number conversions do not follow a standard multiplier value.
- Range: convert a range of numbers into a single numeric value (e.g., GPA values between 3.0 and 3.2 are awarded 5 points). This is useful for GPAs and test scores.
- String: convert text into a numeric value (e.g., Military Status “Active Duty” value is awarded 2 points).
- Enter a description.
- Click Submit to save your template or Return to Scoring to discard your template.
- Once you create the Point Table, then you can add the parameters.
- Click Edit Table.
- Click New Point Table Entry to add conditions.
- Click Submit to save your template or Return to Scoring to discard your template.

Viewing Applicant Scores
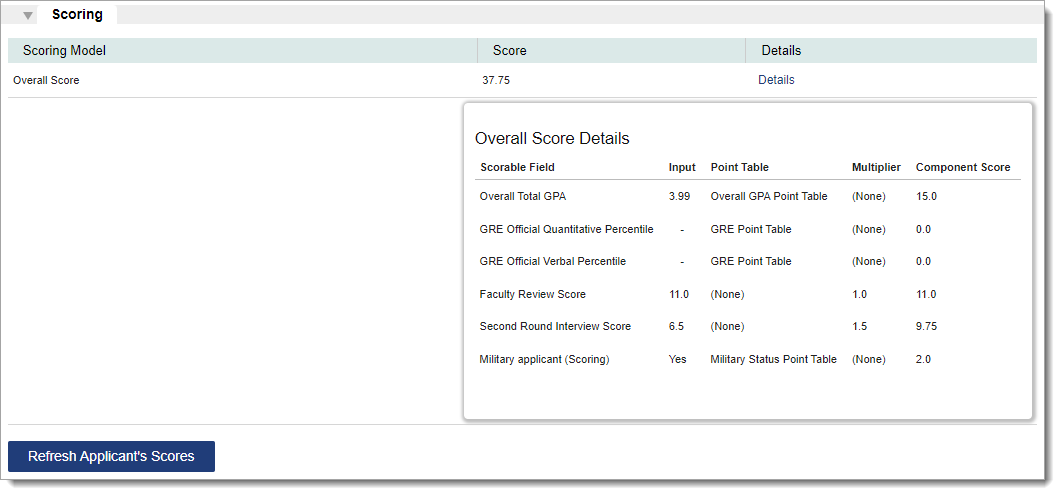
Once Scoring Models are created, each applicant will have a score calculated.
- To view scores, navigate to the Applicant Details page.
- Go to the Scoring panel.
- To view how the score was calculated, click Details.
- If recent changes to the applicant's score have not taken effect, click Refresh Applicant's Scores.
Managing Scoring Models and Point Tables
To manage existing Scoring Models and Point Tables, click Scoring from the Menu Bar.

Reordering Scoring Models and Point Tables
Use the grip icon to drag and drop the Scoring Model, scoring components, and Point Table into the preferred order.
Editing Scoring Models and Point Tables
Click Edit Model or Edit Table to edit an existing Scoring Model and Point Table.
Copying Scoring Models
Click Copy Model to copy an existing Scoring Model. This allows you to take the existing Scoring Model's settings and save them under a new name.
Copying Point Tables
Click Copy Table to copy a Point Table.
Deactivating Scoring Models and Point Tables
Click Inactivate Model or Inactivate Table to deactivate Scoring Models and Point Tables.