Using Local Statuses
Video Overview
Overview
Local Statuses allow you to categorize and track applicants throughout the application cycle. You can create as many Local Statuses as needed to match the different stages of your admissions process.
Optionally, Local Statuses can be matched to Decision Codes (AMCAS Admission Action Codes) so that when you change an applicant’s Local Status, WebAdMIT for AMCAS automatically updates the Decision Code. It isn't mandatory that each Local Status be linked to a Decision Code, but you can only set a Decision Code on an applicant by placing the applicant in a Local Status linked to the desired Decision Code.
AAMC uses two sets of business rules that dictate 1) which Decision Codes an applicant can be placed in based on their current Decision Code, and 2) which Decision Codes applicants can be placed in based on the program type they applied to. WebAdMIT for AMCAS honors these Action Sequence Rules when users attempt to change Local Statuses.
Gaining Access to This Feature
Creating Local Statuses
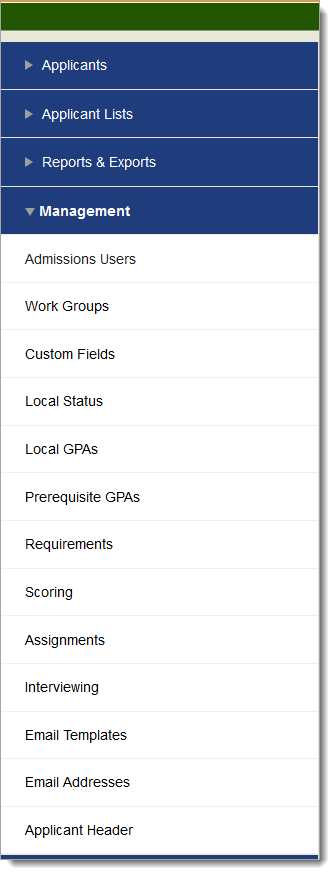
- Using the Menu Bar, open the Management panel, then click Local Status.
- Click New Local Status.
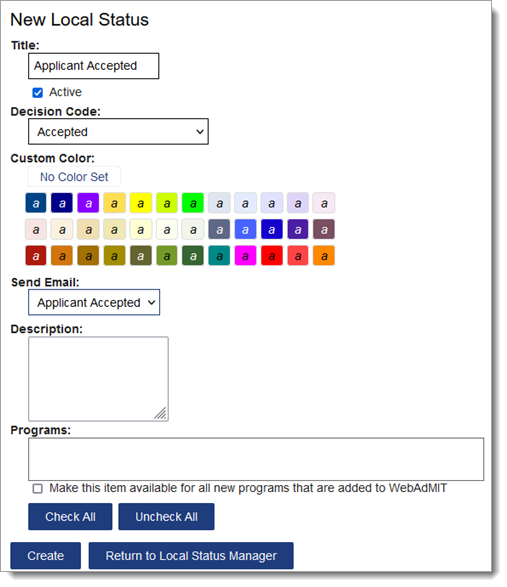
- Enter a name and select whether the status is active.
- Select the related Decision Code.
- Choose a color to visually represent your status.
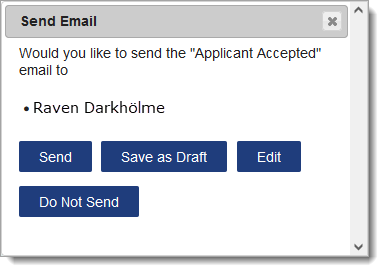
- Select an Email Template to link to this Local Status. When an applicant is moved into this Local Status, a dialog box prompts you to send, edit, save as a draft, or do not send the linked email template. Note that this option only appears when email templates exist.
- Enter a description, select the programs associated with this status, then click Submit.
Changing an Applicant's Local Status
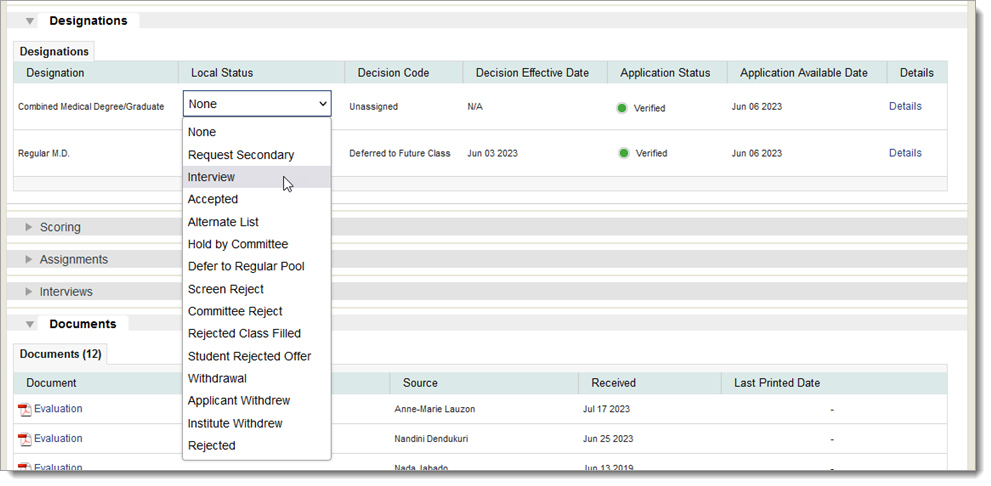
Once Local Statuses have been created, they can be assigned to applicants individually from the Designations panel on the Applicant Details page. They can also be assigned in batch via Lists, Searches, or the Clipboard. Local Statuses are created by a WebAdMIT Administrator, but anyone with the Change Local Statuses permission enabled in their Work Group can assign or update an applicant's Local Status.
If Local Statuses are linked to Decision Codes, changes to an applicant’s Local Status will automatically update their Decision Code.
The Local Status feature in WebAdMIT for AMCAS integrates with the AMCAS Admissions Actions Service. In accordance with this, AAMC uses two sets of business rules. These rules dictate:
- Which Decision Codes an applicant can be placed in based on their current Decision Code.
- Which Decision Codes applicants can be placed in based on the program type they applied to.
WebAdMIT for AMCAS honors these Action Sequence Rules when users attempt to change Local Statuses.
Updating an Applicant's Status Individually
To change an individual applicant’s status, navigate to the desired Applicant Details page and select the new Local Status from the Local Status drop-down. The available Local Statuses are only those that are linked to valid Decision Codes based on Action Sequence Rules (or those with no Decision Code linked.) Note that applicants in the Received Application Status cannot be placed in a Decision Code.
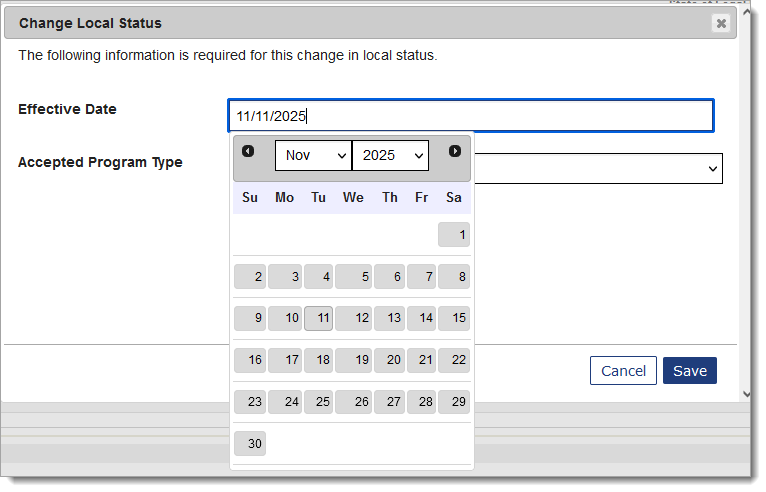
Where applicable, after selecting a Local Status, you’re presented with a window prompting you to select an Effective Date for the Decision Code change. For applicants being Accepted, you’re also required to select a Program Type.
If the new Local Status is associated with an email template, another window prompts you to select an action. Click Send to send the email to all applicants, excluding those who already received it.
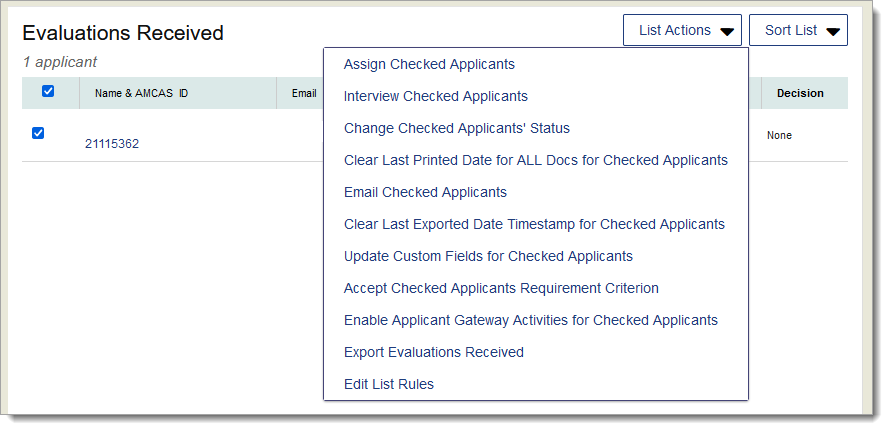
Updating Applicants' Statuses in Batch
Local Statuses can be changed in batch using List Actions, Search Actions, or Clipboard Actions. To make the Local Status Change, click Change Checked Applicants' Status. You may exclude applicants from your change by unchecking them prior to running the Batch Status Update. Note that applicants in the Received Application Status cannot be placed in a Decision Code. Attempting a batch Local Status change where this would occur results in an error.
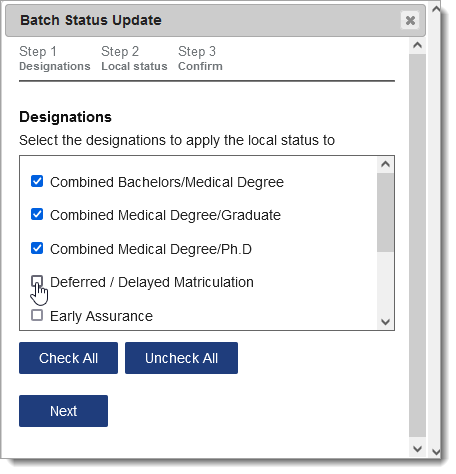
When using the Change Checked Applicants’ Status feature, a window appears to guide you through three steps.
- Select the programs this change applies to, then click Next. Among the checked applicants, only those who applied to programs you select here will have their Local Status changed.
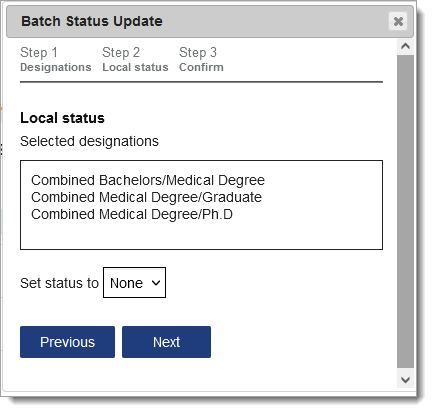
- Select your desired new Local Status and click Next. The available Local Statuses are only those linked to valid Decision Codes based on Action Sequence Rules. The options are also limited based on the Local Statuses that are enabled for the designations you selected in the previous step. The applicable applicants will be changed to the new Local Status you select here.
- Next, where applicable, complete the Required Additional Information area. An Effective Date is required for all decisions. When adding a Matriculated decision, the Accepted Program Type, Campus, and Projected Graduation Date are also required. This information only applies to applicants with a change in their decision. Click Save to confirm your changes.
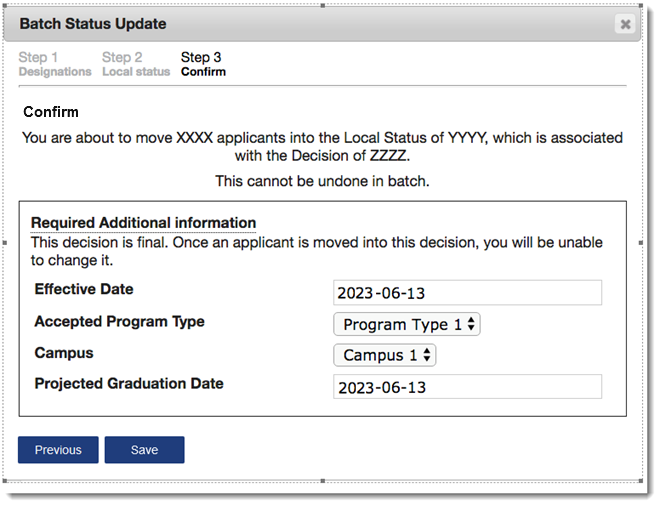
After clicking Save, you may be presented with a Batch Status Exceptions window. This identifies any applicants whose status could not be changed due to rules violations or invalid entries in the Required Additional Information area. Violations may occur when included applicants experience a change while you are completing the steps outlined above. Click Exit to close the window.
You may also run a Batch Status Update after completing a search by using the Search Actions button. The same options also appear in the Clipboard, when using the Clipboard Actions button.
Managing Local Statuses
To manage existing Local Statuses, click Local Status from the Menu Bar.
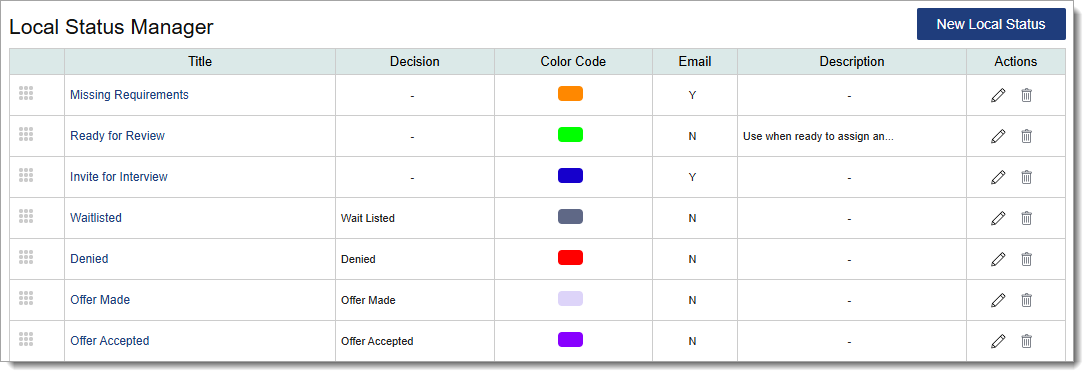
Reordering Local Statuses
Use the grip icon to drag and drop the Local Status into the preferred order.
Editing Local Statuses
Use the pencil icon to edit an existing Local Status template.
Deactivating Local Statuses
Use the trash icon to deactivate Local Status templates.