Managing Event Registration
Registering a Student
Students register for an event on their personalized URL (PURL) or through an SEM Form. On the occasion that a student can't register for an event using either of those channels, you can register them on their Student Record.
First, search for the student using the Student Search bar, then click the student's name to access their Student Record.
- Click the Registered Events tab.
- Click Register Student.
- Select the appropriate event and complete the prompts.
- Check Bypass Event Limits to override any registration limits. You may use Bypass Event Limits to:
- Register a student outside of the published registration period.
- Register a student for an event that has reached capacity.
- Register students for events that have already passed if you know they attended.
- Check Send any Auto Responders to generate confirmation emails. By default, no Auto Responders are sent to students who are manually registered, even if an Auto Responder is attached to an event. This does not affect any scheduled Event Campaign communication.
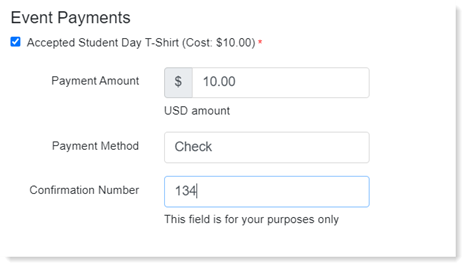
- Update event payments.
- If payments are enabled for an event registration, then payment details are asked for. Note that they are not required to be filled in, and assume that payment has been either waived or collected outside of EMP. Payment transactions manually recorded will still show up in the 'Payment Transactions' lists.
- If payments are enabled for an event registration, then payment details are asked for. Note that they are not required to be filled in, and assume that payment has been either waived or collected outside of EMP. Payment transactions manually recorded will still show up in the 'Payment Transactions' lists.
- Check Bypass Event Limits to override any registration limits. You may use Bypass Event Limits to:
- Click Signup.
Once a student registers for an event, they will automatically receive any communication created in the Event Campaign, excluding invitations.
Checking in Students
- Click Calendar and your event.
- Once the event details page appears, click View Signups.
- Search for students using the filters.
- Check the box under Attended. A check mark appears.
- If you click the box by accident, click the checkmark to un-check in the student.
As you check in attendees to your event, the Status Bar shows the number of students that are currently checked in. As students check in, the status bar updates in real-time.
Exporting Registration Lists
You may find it easier to print the registration list and check-in attendees to EMP after the event concludes. You can export your registration list using the Exports feature. For step-by-step instructions, visit Exporting Data.