Working with the API for Your Institution's WebAdMIT Users
This guide is for IT analysts assisting their institution's admission users in planning data integration with the WebAdMIT API.
Getting Started
On today's modern campus there is a myriad of systems that your data needs to live in for you to function as a university. For example, you might use:
- A student information system (SIS) like Banner, PeopleSoft, or Jenzabar to store your student records.
- A customer relationship management (CRM) system like Slate, TargetX, or Salesforce to market to prospective applicants, drive applicant volume, or both.
- A document management system like OnBase or Banner Document Management to archive applicant documents at the end of the cycle and retain them for a specific number of years.
When you join any of our CAS communities, all the applicant data you require can be collected via the CAS and made available to your existing systems through our easy-to-use WebAdMIT API.
Determining Your Data Movement Needs
Different institutions have different data movement needs. For example, some schools manage their entire application process inside our admissions platform—including reviewing, scoring, and communicating with applicants—and only need to move applicant data out of our platform and into another system at the end of a cycle for archiving. Other schools use a combination of our platform and additional systems to manage the admissions process. For these schools, the integration can take a bit more effort.
When thinking about integration, it’s important to start by asking three questions:
- Which applicants need to move to another system? For example, do you need to move all applicants or just those who are matriculated?
- What data points need to be included in the move? When thinking about the hundreds of applicant data points typically collected in an application, how much of that data needs to move to your other systems? If your use-case is at the end of the cycle and you're trying to create student records for your matriculants, you might only need a few data points from their application to create an applicant record. Conversely, if you need to do all your reviewing and scoring in a system other than ours, you're going to need to move a lot more data.
- When do they need to move? For example, do you need to continuously move all applicant data to power other processes on campus, or do you only need to move matriculated applicants to a different system at the end of the cycle? Your timing could be multiple times per day, once per cycle, or anything in between.
WebAdMIT’s Data Movement Tools
WebAdMIT includes three primary tools you can use for data integration:
- The List Manager: this tool allows you to create groups of applicants based on specific criteria. This is helpful if you only want to move select applicants and their data into your institution's SIS.
- The Export Manager: this tool allows you to extract data in highly configurable formats according to what the destination system requires (i.e., your SIS, CRM, etc.).
- The PDF Manager: this tool allows you to export documents in bulk, including transcripts, letters of recommendation, or even a full, printable version of the application. The PDF Manager also allows you to configure the file naming conventions for ease of indexing.
Creating an Export
Creating an export in WebAdMIT is a simple process that can be completed in four steps. You must have the Manage Lists, Reports, and Exports permission in your Work Group to do this.
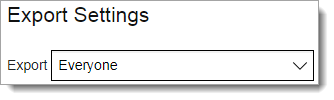
Step 1: Select Your Applicants
When creating an export, you’ll first need to decide whom you’re exporting. The default is everyone, which is your entire applicant pool for the CAS you are using, but you can also export a particular subset of the applicant pool. Using WebAdMIT’s List Manager, you can perform advanced searches using specific criteria. For example, you might search for all applicants whose data has changed in some way in the previous 24 hours (thereby providing you with a steady stream of new/updated applicants which can be brought into the destination system on a daily basis). Once your list is generated, it’s automatically saved and made available for you to select for the export.
Step 2: Select Your File Format, Name Your Export, and Configure the Settings
Next, you select the export’s file format. The Export Manager supports the following formats:
- Comma-separated, or CSV, file.
- Fixed-width file (.txt), where every column has a set column width.
- Excel file.
After you select your file format, you name your export and configure the export’s settings to ensure the data is structured as close as possible to the way your downstream system expects it.

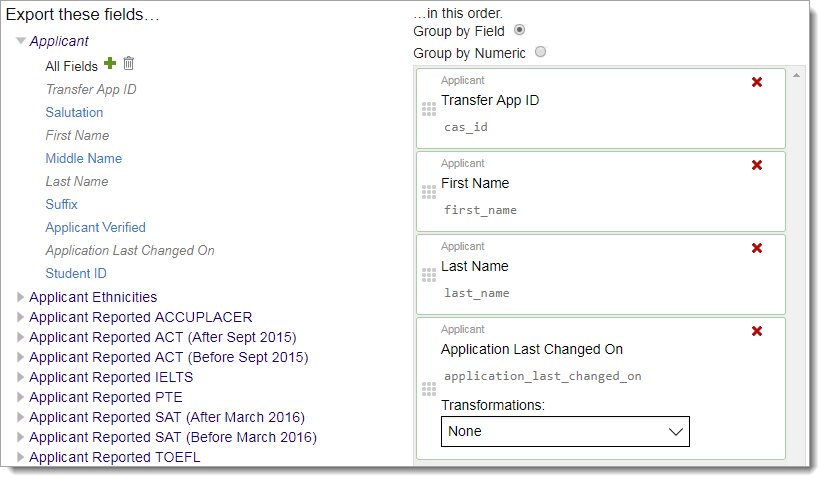
Step 3: Select the Fields You Want to Export
You can select as many data points as needed for the export. For example, you might choose to export everything, or only a few data points like the applicant’s CAS ID number, name, address, submission date, and overall GPA. The Export Manager gives you the flexibility to choose only the data points you need. Some fields even provide you with additional configuration options to make it even easier for your team to build the file. Additionally, you can drag and drop the fields to rearrange them in your preferred order.
Note: if your team manages an SIS or CRM, you’ll likely know the data points needed to create a student record in that system. Liaison recommends including the Program ID and Program ID (for WebAdMIT API) fields from the Designation field grouping, as this is unique to each applicant for each CAS and cycle.
Step 4: Create Your Export
When you’re done adding data points, you can save and run the export or save the customizations for future use.

Using the PDF Manager
In addition to student information systems, many campuses also use document management systems like OnBase, SharePoint, Banner ApplicationXtender, or a combination of these platforms. Your institution may use these systems to archive applicant transcripts, letters of recommendation, or even a full PDF version of the application.
Using our PDF Manager, you can save time and energy by batch downloading documents from WebAdMIT. Similar to the Export Manager, you can create a batch in four easy steps. You must have the Manage Lists, Reports, and Exports permission in your Work Group to do this.
Step 1: Select Your Applicants
Just like the Export Manager, you select the applicants for which you want to download documents.

Step 2: Name Your Download and Select Your Document Type
Next, you select the document type you want to include in the batch. Typically, schools choose to download the full application PDF since it combines into one package all of the applicant’s application data, letters of recommendation, document uploads, and any other application components.

Step 3: Name Your File
Your files likely need to be named in a certain way so that your document management system can handle them. For example, if you’re using a tool like Banner ApplicationXtender, your file name may need to include the Banner ID. The PDF Manager allows you to choose the necessary file name pattern to ensure your documents can be appropriately imported into your document management system.

Step 4: Save and Run the Download
Once you run the download, WebAdMIT will prepare the documents and output a zip file containing each file named according to the pattern you established.

Using the WebAdMIT API for Automation
While it's relatively simple to set up exports and batch download PDFs, you may wish to automate the process. For example, you might need to run an export every day that shows you all applicants whose data changed within the last day. Additionally, this data may need to be imported into another system on your campus. Alternatively, you might need to download documents once a month and move them to your document management system. Using our WebAdMIT API, you can simplify these processes and ensure the two systems "talk" to each other by creating commands to perform specific tasks (i.e., run this export/PDF download, tell me when it’s ready, give me the file to download).
By using the WebAdMIT API, you just "set it and forget it," meaning you'll never have to worry that an export or download isn’t occurring, or that it was downloaded to the wrong location. With our WebAdMIT API, it just works. Furthermore, because this WebAdMIT API can be called on demand, you decide when you want to run your exports and downloads (e.g., every day, or even every few hours).
Our WebAdMIT API follows all modern conventions, making this a seamless experience for you. Your team can use any programming language, as any framework is compatible with our REST-based API.
Writing Data to WebAdMIT
There may be times when you need to automatically write data back into WebAdMIT, as opposed to pulling data from WebAdMIT. For example, if you need to use the PDF Manager to download documents for upload into Banner ApplicationXtender, your file name will need to include the Banner ID. Or, you may need to export data to PeopleSoft to create a student ID. But how do you get those IDs back into WebAdMIT?
WebAdMIT allows you to create Custom Fields to record and store student IDs and other necessary information. You can use Custom Fields to store text values, list options, yes/no values, and numeric values, and you can add as many Custom Fields as needed. You can manually enter the necessary information and values into the Custom Fields when reviewing applications or you can automate the process using the WebAdMIT API. Similar to exports and document downloads, you can use the WebAdMIT API to create commands to perform specific tasks (i.e., input the Banner ID into a Custom Field, mark a custom field as Yes for an applicant, etc.), giving you the flexibility to automate data exchange.
If you implement the Custom Field API, Liaison recommends using the Program ID (for WebAdMIT API) field from the Designation field grouping, as this is unique to each applicant for each CAS and cycle, and is needed to write data to that applicant.
ERP/SIS Integration
Most higher education ERP and SIS systems have the ability to import external applicant data via configurable tools native to each system. The most common systems used by our university clients include Ellucian (Banner and Colleague), Oracle (PeopleSoft), and Jenzabar, among others.
Your team can use the data definitions in the data dictionary provided within WebAdMIT to configure the system’s tool to import CAS data. Alternatively, a school can contract with a third-party vendor to handle the data import processes for them, as these generally only need to be configured once (with subsequent light maintenance).
Institutions that have multiple schools or programs participating in a CAS can leverage expertise gained during the initial configuration of ERP or SIS tools, making subsequent integrations for additional programs hosted within a CAS much simpler.
Our Client Support Specialist Team has helped many universities in performing data integration between our systems and a variety of ERP or SIS systems, and they are more than happy to work with you and your IT staff. For institutions that would prefer a turnkey solution, Liaison works with SSD Technology Partners/ Axiom, who are specialists in performing Banner integrations of CAS data. They also have experience in a few other SIS integrations, including Colleague and PowerCampus. If you are interested in retaining SSD’s services, please contact Lisa Detwiler at ldetwiler@ssdel.com.
Resources
The combination of our WebAdMIT API features gives you the power to automate the moving of data out of our systems in preparation for importing to your other on-campus systems using modern standards, modern conventions, and powerful tools that simplify the process for your team. However, we realize data integration can seem overwhelming, so we’re always happy to support you through the process. As you explore your data integration options, take note of the following resources:
- If you're a developer and need programming assistance or documentation, review our Programming for WebAdMIT's API guide.
- Contact the Client Support Specialist Team.