Creating a Property That Displays as True or False Based on Multiple Evaluation Form Responses
Outcomes allows you to create Evaluation Forms (or review forms) to capture the results of your reviews. If you need applicants to receive a specific response from one or more reviewers, it may be useful to create a field that looks at all review form responses, and displays as "True" if the appropriate response has been submitted at least once. For example, if you ask each of your reviewers to recommend whether or not an applicant should be accepted, you can create a field that indicates that at least one reviewer has made this recommendation. Then you can display this field in appropriate areas e.g., the Application Summary, Sidebar, or Exports.
Using this advanced configuration, you can build a Calculated Property that uses JavaScript to determine if any reviewers have provided the response that you are looking for, even across separate programs, phases, or review forms. The field then updates to indicate your desired response was found.
To accomplish this, you'll need to:
- Build a Calculated Property to display this result.
- Use a JavaScript snippet that looks at the relevant review form responses.
- Update the variables in the JavaScript code to include values that are in your environment.
- Determine where to display the new property.
Note: if you simply want to combine responses from separate review forms, consider working with the Unify Responses from Different Questions to Appear in a Single Field article instead.
Building the Custom Property
For this configuration to work, you'll need to build a Custom Property that will contain your desired result. For example, if your review form asks reviewers if they recommend that the applicant be accepted, you can build a property called "Acceptance Recommended" that looks at the relevant review forms and determines if any reviewers have made this selection. To configure this:
- Start configuring a Custom Property. Select Calculated Property when choosing the type of property to create.
- Give the property a name. In the example above, "Acceptance Recommended" may be appropriate.
- In the Expression window, add the following code. Use the view source button to copy and paste from the window below.
{
  // Returns true if any of the selected fields has a value of "Yes"
  if((phases.first_evaluation)
          && (phases.first_evaluation.evaluations)
          && (phases.first_evaluation.evaluations.length > 0)
          && (phases.first_evaluation.evaluations[0].form)
          && (phases.first_evaluation.evaluations[0].form.field_name)
          && (phases.first_evaluation.evaluations[0].form.field_name == "Yes")){
    return true;
  }
  else if((phases.second_evaluation)
          && (phases.second_evaluation.evaluations)
          && (phases.second_evaluation.evaluations.length > 0)
          && (phases.second_evaluation.evaluations[0].form)
          && (phases.second_evaluation.evaluations[0].form.field_name)
          && (phases.second_evaluation.evaluations[0].form.field_name == "Yes")){
    return true;
  }
  else if((phases.third_evaluation)
          && (phases.third_evaluation.evaluations)
          && (phases.third_evaluation.evaluations.length > 0)
          && (phases.third_evaluation.evaluations[0].form)
          && (phases.third_evaluation.evaluations[0].form.field_name)
          && (phases.third_evaluation.evaluations[0].form.field_name == "Yes")){
    return true;
  }
}
Next, replace the variables in this code so that it will work in your environment.
Replacing the Variables
The code is configured to consider applicants who may be in different phases and have had different evaluation forms completed for them. In the sample code above, there are variables for three different phases. In your case, you may have fewer (or more) phases that should be considered. In either case, for this code to work in your environment, you'll need to replace the variables below with relevant data from your Outcomes instance.
- phases.first_evaluation - the highlighted portion of this variable is the key of the first phase that is being looked at. The evaluation form that you want your custom property to look at should be associated with this phase. Find the key from your environment and replace the variable accordingly. Use this same key to update all five lines where this variable appears (e.g., phases.first_evaluation.evaluations, phases.first_evaluation.evaluations.length > 0, and so on).
- phases.first_evaluation.evaluations[0].form.field_name - the highlighted portion of this variable references the specific question that you are targeting for this custom property. Find this by reviewing the applicable question on the evaluation form, and then replacing the variable with the key located there. This also applies to the phases.first_evaluation.evaluations[0].form.field_name == "Yes" line of code.
- phases.first_evaluation.evaluations[0].form.field_name == "Yes" - the highlighted portion of this variable references the response that is required from a reviewer in order for the final custom property to be considered true. In the case of this sample, the applicable question type has answer options of Yes and No. If necessary, replace Yes with the answer that applies in your scenario.
- phases.second_evaluation - the highlighted portion of this variable is the key of the next phase that is being looked at. The evaluation form that you want your custom property to look at should be associated with this phase. Find the key from your environment and replace the variable accordingly. Use this same key to update all five lines where this variable appears (e.g., phases.second_evaluation.evaluations, phases.second_evaluation.evaluations.length > 0, and so on).
- phases.second_evaluation.evaluations[0].form.field_name - the highlighted portion of this variable references the specific question that you are targeting for this custom property. Find this by reviewing the applicable question on the evaluation form, and then replacing the variable with the key located there. This also applies to the phases.second_evaluation.evaluations[0].form.field_name == "Yes" line of code.
- phases.second_evaluation.evaluations[0].form.field_name == "Yes" - the highlighted portion of this variable references the response that is required from a reviewer in order for the final custom property to be considered true. In the case of this sample, the applicable question type has answer options of Yes and No. If necessary, replace Yes with the answer that applies in your scenario.
- phases.third_evaluation - the highlighted portion of this variable is the key of the third phase that is being looked at. If your environment only needs two phases to be considered, you may remove the lines of code associated with phases.third_evaluation. The evaluation form that you want your custom property to look at should be associated with this phase. Find the key from your environment and replace the variable accordingly. Use this same key to update all five lines where this variable appears (e.g., phases.third_evaluation.evaluations, phases.third_evaluation.evaluations.length > 0, and so on).
- phases.third_evaluation.evaluations[0].form.field_name - the highlighted portion of this variable references the specific question that you are targeting for this custom property. Find this by reviewing the applicable question on the evaluation form, and then replacing the variable with the key located there. This also applies to the phases.third_evaluation.evaluations[0].form.field_name == "Yes" line of code.
- phases.third_evaluation.evaluations[0].form.field_name == "Yes" - the highlighted portion of this variable references the response that is required from a reviewer in order for the final custom property to be considered true. In the case of this sample, the applicable question type has answer options of Yes and No. If necessary, replace Yes with the answer that applies in your scenario.
If your environment has more than three phases that need to be considered, you'll need to add additional lines of code for each phase, as seen below. Paste these lines before the closing bracket in the existing code snippet. As with the first three phases, you'll need to replace the phase and form keys with those that match your phases and forms.
  }

  else if((phases.additional_evaluation)

          && (phases.additional_evaluation.evaluations)

          && (phases.additional_evaluation.evaluations.length > 0)

          && (phases.additional_evaluation.evaluations[0].form)

          && (phases.additional_evaluation.evaluations[0].form.field_name)

          && (phases.additional_evaluation.evaluations[0].form.field_name == "Yes")){

    return true;

  }
Finding the Keys to Use
To make this code work in your environment, you'll need to replace the keys in the example above with the appropriate keys from your forms. To find these keys:
- First, find the keys to use for the variables. For fields from a review form, Navigate to Phases in the Application Review section of the Settings menu.
- Note: if you're implementing this code on a field from an applicant form, navigate to Applicant Forms in the Application Setup section of the settings menu. Locate the form and its fields there, as described below (starting in step 5).
- Open the Phase that your Evaluation Form is associated with. Find the key at the top of the page. This is what you'll use in your JavaScript expression.

- Next, find the keys for your Evaluation Forms. To do this, go to Evaluation Forms in the Application Review section of the Settings menu.
- Click the Evaluation Form you want to work with.
- At the top of the page, you'll find the key for the form, and each question on the form has its key listed underneath it. The keys associated with the question that your custom property is considering is what you'll use to replace the form variables in the code.

- In the example above, the key for the applicable question is committee_decision. This question has answer options of "Accept" and "Deny". As a result, the code to use at the beginning of the JavaScript expression looks like this:
  if((phases.ready_for_faculty_review)

              && (phases.ready_for_faculty_review.evaluations)

              && (phases.ready_for_faculty_review.evaluations.length > 0)

              && (phases.ready_for_faculty_review.evaluations[0].form)

              && (phases.ready_for_faculty_review.evaluations[0].form.committee_decision)

              && (phases.ready_for_faculty_review.evaluations[0].form.committee_decision == "Accept")){

        return true;

      }
Working with the Custom Property
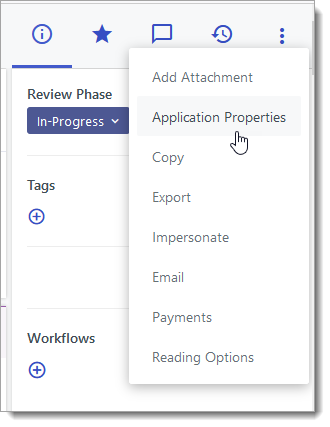
Once you've created the custom property and updated the applicable variables, the custom property appears in the Application Properties area of each application.
Also, you may choose to add the custom property in the following areas:
- In exports: find your custom property in the Available Fields area while configuring an export to include it there.
- On applications: you can add your property to the Application Summary or Sidebar.
- On the Applications Grid: you can customize your Applications Grid to add additional fields, including your custom property.
Maintaining the Code
At times, the variables that are needed for this code may change. That can happen, for example, if you create new phases or evaluation forms, or if key names are updated for a new cycle. When this happens, you'll need to follow the replacing the variable steps to identify where the variables are and replace them as needed.