Including Data from Transcript in Files Export Manifest File
When using the Files Export feature to export transcripts, Outcomes includes a manifest file that you can configure to contain metadata about the files you're exporting.

By default, there is no option to include document-specific metadata in this manifest file. Using this configuration, you can pull the transcript metadata into the manifest file of your Files Export.
This metadata includes:
- item.form.transcripts.college_name
- item.form.transcripts.ceeb_code
- item.form.transcripts.received_date
- item.form.transcripts.transcript_type
- item.form.transcripts.is_verified
- item.form.transcripts.transcript_required
- item.form.transcripts.is_foreign
- item.form.transcripts.is_evaluation
- item.form.transcripts.additional_transcript
- item.form.transcripts.bar_code
- item.form.transcripts.college_attended_id
You'll configure this by following these steps:
- Build a File Export with a JavaScript snippet in its filename.
- Adjust the manifest file to include fields in a specific order.
- Adjust manifest file fields with another JavaScript snippet that extracts metadata from the filename in step 1.
Build the File Export
Begin by creating a new export and selecting Files as your export type.
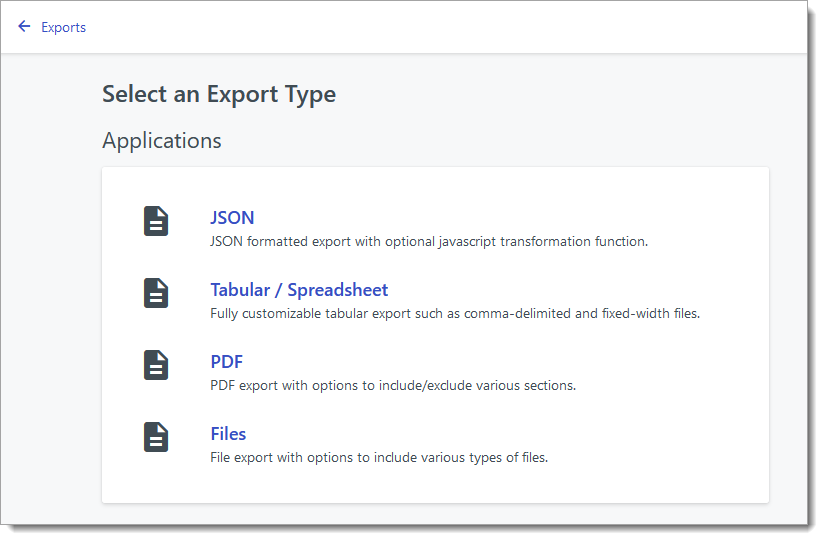
Give the export a name, and select College Transcripts as your included file source.

Add JavaScript Code to Filename of the Export
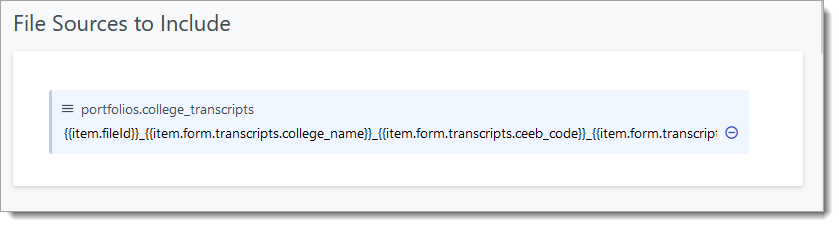
Once you've added College Transcripts as a file source, you'll need to update your selection by adding a JavaScript expression to the filename. This expression extracts the transcript metadata and places it in the name of the file that you're exporting.
In the {filename} field, add the following JavaScript expression. (Use the view source icon at the top right to copy the code snippet.)
{{item.fileId}}_{{item.form.transcripts.college_name}}_{{item.form.transcripts.ceeb_code}}_{{item.form.transcripts.college_attended_id}}_{{item.form.transcripts.transcript_type}}_{{item.form.transcripts.is_foreign}}_{{item.form.transcripts.received_date}}_{{item.form.transcripts.transcript_required}}_{{item.form.transcripts.is_evaluation}}_{{item.form.transcripts.additional_transcript}}_{{item.form.transcripts.bar_code}}_{{item.form.transcripts.is_verified}}
Configure Manifest File Fields
Once you've configured the File Sources to Include area, you can work with the Manifest File area to configure what metadata gets exported in that file.
To do this, click the plus sign under Add Manifest.

Next, name the Manifest file, and select the data points seen below in the Columns area. The columns should be entered in this exact order:

Add JavaScript Code to Manifest File Fields
Once you've added the columns to your manifest file, you'll need to add a JavaScript snippet to each field. The snippet will use the filename created above to extract the required data into the manifest file.
![]()
Click the expression icon on each field and paste the following JavaScript expression.
{
return (file.fileName.split(".")[0]).split("_")[0];
}
This expression needs to be modified for each field by adjusting the last number incrementally. The expression above captures the first item in the filename. To capture the second item, change the final 0 to a 1, as seen below.
{
return (file.fileName.split(".")[0]).split("_")[1];
}
For the third field, use this expression:
{
return (file.fileName.split(".")[0]).split("_")[2];
}
For the fourth field, use this expression:
{
return (file.fileName.split(".")[0]).split("_")[3];
}
Continue in this pattern until all fields are accounted for.