
Migrating an Export from Prelaunch to Production
As you transition from the prelaunch to production environment of Outcomes, you may need to bring over export configurations. For simple exports, manually recreating them may be the best solution. On occasion, though, some exports are too complex to recreate manually (e.g., if they include too many columns, translation tables, embedded JavaScript, or other custom configurations and buisness logic).
Review this guide to learn how to migrate these exports by working with JSON and API calls.
Getting Started
Make sure all of the following are true before starting:
- The export configuration has been fully tested in prelaunch.
- Any translation tables used by the export already exist in production with the exact same names.
- Any application properties referenced by the export already exist in production with the exact same names.
Maintaining consistent names for translation tables and application properties is essential to ensure that the migrated export functions correctly in the production environment.
Step 1: Downloading the Export Definition from Prelaunch
- Log in to the prelaunch Outcomes instance.
- Go to Settings > Import/Export > Application Exports and open the export you'd like to migrate to production.
- Copy the alphanumeric export ID from the URL.

- Open System > API Keys > Application API Swagger Definition.

- From the Swagger page, authorize to get access to the listed APIs. To authorize:
- Open your Outcomes instance and launch developer tools from your browser.
- Refresh your browser.
- In your developer tools, click the network tab to see network traffic.
- Click the traffic item that bears the name of your Outcomes instance.
- Copy the bearer token from your request headers.

- Navigate to the API swagger page and click Authorize.

- Paste the bearer token into the Value field and click Authorize.

- You should now have access to Outcomes APIs. In the ExportDefinition API, click GET /api/export-definition/{id}.
- Click Try It Out and enter the export ID from step 3.
- Click Execute.

- A successful API call shows in the response body with a code of 200 and the JSON of the response body.
- Download the JSON response and save it locally, naming it PL-ExportName.json.

- Remember the filename and folder you saved it in.
Step 2: Building Your Comparison Tables
In this step, you'll use Excel (or similar software) to create tables that map each prelaunch value to the corresponding production value. You'll use this information for reference during the next step, so these tables can all be stored in the same Excel file, or separated into different files (whichever option you prefer).
Translation Tables
Create the following table structure in Excel with these headers. The values shown here are examples only. Continue reading below to learn how to obtain the values to add for your environments.
|
Translation Table |
Prelaunch ID |
Production ID |
|---|---|---|
| Sample Translation Table 1 | 64c122fbfb8447003xamp1e | 64c122fbfb81pr0d3xamp1e |
| Sample Translation Table 2 | 64c122fbfb844703xamp1e2 | 64c122fbfb8pr0d3xamp1e2 |
| Sample Translation Table 3 | 64c122fbfb844703xamp1e3 | 64c122fbfb8pr0d3xamp1e3 |
To find the values to add to your spreadsheet:
- From your prelaunch Outcomes instance, navigate to Settings > Data Sources > Translation Tables.
- Add the translation table name to your Excel sheet.
- Open the translation table to view its configuration. The alphanumeric number at the end of the URL in your browser should be the translation table ID.

- Add the translation table ID to the Prelaunch ID column in your Excel sheet.
- Repeat the previous steps to add the production translation table ID to your Excel sheet.
- Complete the previous steps for each translation table used in the export, ensuring you have the name of each translation table, along with the matching translation table IDs from prelaunch and production.
Custom Question Field Keys and Form Keys
Using Excel, you can now create a table to log all the custom question field keys and form keys used anywhere in the export. The values shown here are examples only. Continue reading below to learn how to obtain the values to add for your environments.
Custom Question Field Keys:
|
Prelaunch Custom Question Field Key |
Production Custom Question Field Key |
|---|---|
| forms.casImport_cas_org_form_629067.cq_example_field968036913986917475 | forms.casImport_cas_org_form_629067.cq_prodexample_field9680369139865 |
| forms.casImport_cas_org_form_629067.cq_relative_name968036913986917475 | 6forms.casImport_cas_org_form_629067.cq_prodrelative_name968036913986 |
Form Keys:
|
Prelaunch Form Key |
Production Form Key |
|---|---|
| forms.casImport_cas_org_form_example_629067 | forms.casImport_cas_org_form_prodexample_629067 |
| forms.casImport_cas_org_form_example_629067 | forms.casImport_cas_org_form_prodexample_629067 |
The prelaunch field keys and form keys can be obtained from the export(s) in your prelaunch Outcomes instance by navigating to Settings > Import/Export > Field Dictionary. The corresponding production keys can be found by navigating to the same place in your production environment.
It is important to make a note of custom questions you may have used in your exports or in some form of JavaScript expression.
Season IDs
You'll also create a table to log your Season IDs. The values shown here are examples only. Continue reading below to learn how to obtain the values to add for your environments.
|
Prelaunch Season ID |
Production Season ID |
|---|---|
| 647a4b8ec9cd330003x4mp1e | 647a4b8ec9cd3pr0d3x4mp1e |
To obtain the Season IDs:
- Get access to the Outcomes APIs by following the steps under Downloading the Export Definition from Prelaunch, starting by accessing System > API Keys > Application API Swagger Definition.
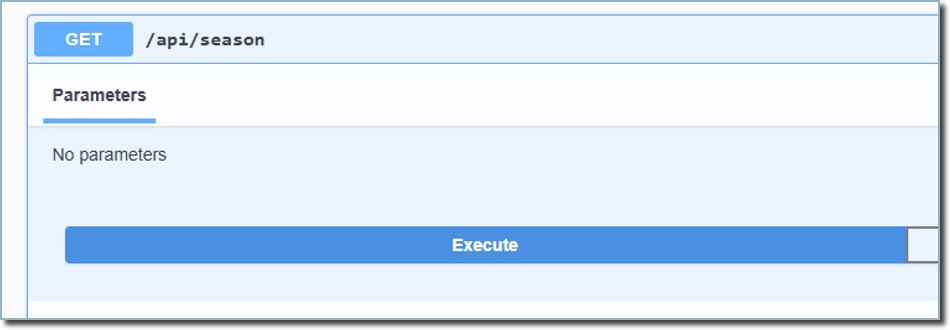
- From the Season section of the API page, execulte this API call:
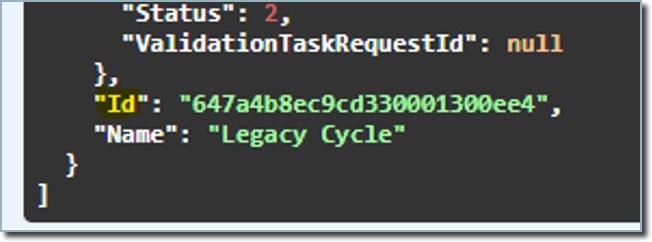
- A response code of 200 indicates success. In the response body, scroll to the bottom and copy the value listed for the parameter ID:
- Add the ID to the Prelaunch Season ID column of the table mentioned above.
- In the production environment, repeat steps 1-3 to obtain the season ID for production, and add that to the Production Season ID column of the table mentioned above.
Organization IDs
You'll also create a table to log your Organization IDs. The values shown here are examples only. Continue reading below to learn how to obtain the values to add for your environments.
|
Prelaunch Organization ID |
Production Organization ID |
|---|---|
| 647a4b8ec9cd330003x4mp1e | 647a4b8ec9cd3pr0d3x4mp1e |
To obtain the Organization IDs:
- Get access to the Outcomes APIs by following the steps under Downloading the Export Definition from Prelaunch, starting by accessing System > API Keys > Application API Swagger Definition.
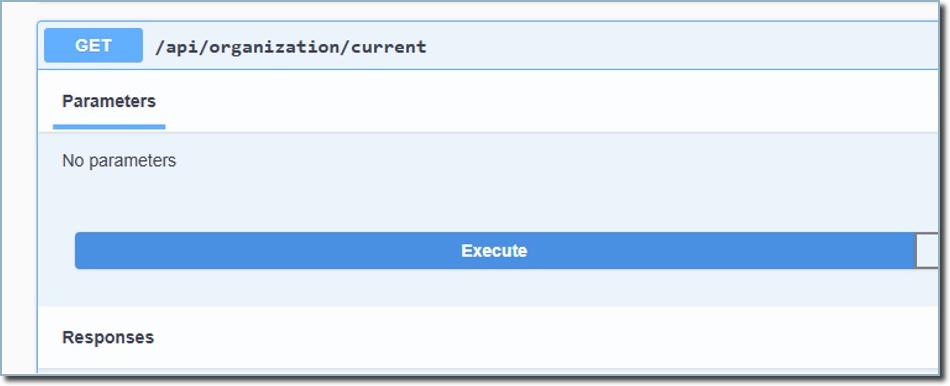
- From the Organization section of the API page, execulte this API call:
- A response code of 200 indicates success, and the response body should contain the Organization ID:

- Add the ID to the Prelaunch Organization ID column of the table mentioned above.
- In the production environment, repeat steps 1-3 to obtain the organization ID for production, and add that to the Production Organization ID column of the table mentioned above.
Step 3: Preparing the Production JSON
In this step, you'll prepare the JSON to add to your export configuration in production.
- Using a text editor like Notepad (or, preferably Notepad ++), open the prelaunch JSON file that you previously downloaded.
- Clear the export ID value on the second line, leaving the quotes.
- Optionally, update the export name on line 17 if needed.
- Perform a "find and replace" on the entire JSON. Have the comparison tables you created ready, as this will replace the prelaunch ID values with the production ID values.
- Execute the "find and replace" replacements in this order:
- Save the edited JSON file as Production JSON file.
Step 4: Creating the Export in Production
In this step, you'll create the final export to be used in the production environment.
- Log in to your production Outcomes instance and access the APIs by following the steps under Downloading the Export Definition from Prelaunch, starting by accessing System > API Keys > Application API Swagger Definition.
- Navigate to the ExportDefinition section.
- The following API call is used to create the export in production:

- Click Try it Out and replace the sample request body with the edited JSON from Preparing the Production JSON.
- Click Execute to run the API call.
- Confirm the API returns a successful response (status code of 200).
- From your production Outcomes instance, navigate to Settings > Import/Export > Application Exports.
- Verify that the prelaunch export now appears here in production.
- Open the export and review the columns to confirm no fields show errors.
- If a column indicates there was an error, rectify the issue directly in the production environment, rather than repeating the process.