
Working with Contact Exports
By exporting Contacts in Outcomes, you can extract applicant contact information in Spreadsheet or JSON formats. See Working with Applicant Exports to learn how to export Contacts.
Generating Contact Exports
If your institution has already configured at least one export template, you can use these templates to generate an on-demand export file. To do this:
- Go to the Contacts view.
- Filter to isolate your desired contacts, and select them using the checkboxes on the left. Use the checkbox at the top of the grid to select all the displayed applicants, or use individual checkboxes to select contacts one-by-one.
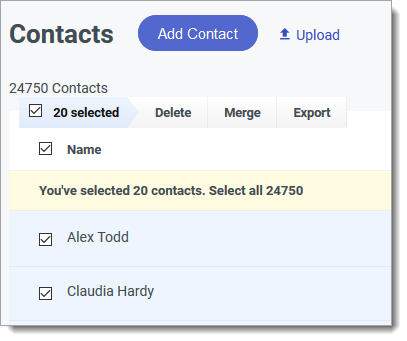
The filtered applicants are paginated, so using the Select All checkbox only selects the displayed applicants. To select the rest of the applicants that match your filters, click Select all X. - Select Export from the menu, and choose which Export type you'd like to generate. You can generate the file(s) in the default Tabular format, default JSON format, or one of your previously configured export formats.

- Next, select where you want the export to be sent. Click Generate near Download Directly to download the file directly to your device. To have the file sent to another destination, click the corresponding Generate button. The destinations listed here are those configured in the Export Destinations area of the Settings menu.
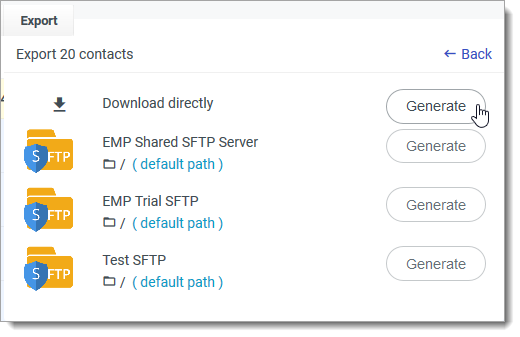
- The file now begins to generate. You can wait for confirmation that the export is finished, or you can dismiss the progress window and use the Downloads tab in the Activity section from the Settings Menu to return to your previous exports.
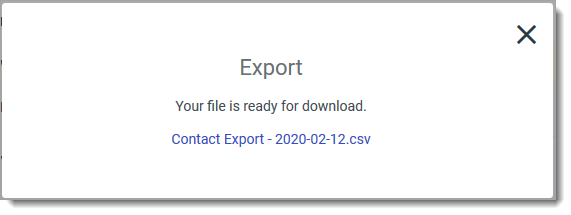
- From the Activity page, click Downloads, click the desired export, and download your file.
Configuring Contact Export Templates
To generate customized export files, you’ll first need to configure export templates. To create an export template:
- Go to the Import/Export section of the Settings menu and click Contact Exports.
- Review the existing exports, or click the plus sign to begin creating a new export file.
- Choose your Contact Type from the drop-down, then choose an export type. Available export types are:
- JSON: short for JavaScript Object Notation, this is a lightweight, data-interchange format using human-readable text. It is commonly used for transmitting data in web-applications.
- Tabular/Spreadsheet: this format offers files in .csv, .tsv, or .txt file types.
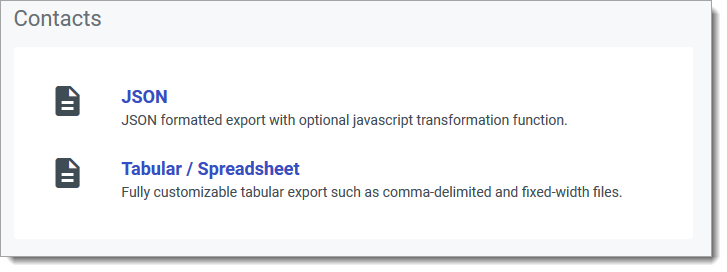
- Continue configuring the export using the instructions below, based on which export type you’ve selected.
Configuring JSON Contact Exports
Follow the steps above to select a JSON export. Then:
- Enter a name for the export file.
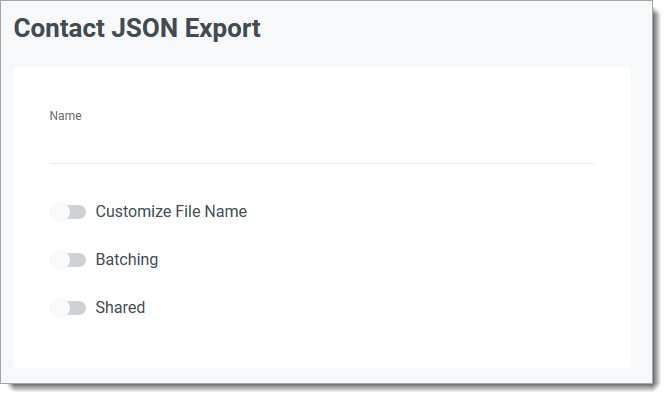
- If desired, select Customize File Name to create a file name with variable text. For example, you can include a date as a variable in the file name so that the date the export was generated is listed in the file name. See Variable Text Options below for more guidance.
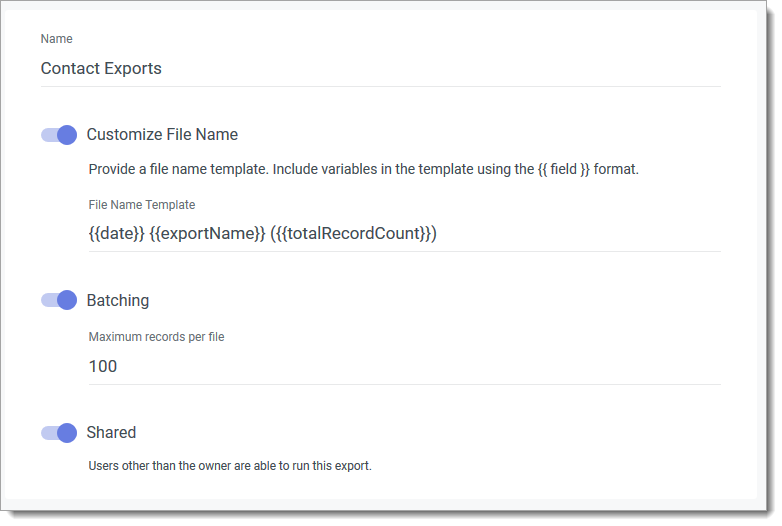
- If desired, select Batching to group records in the same .zip file.
- If applicable, select Shared so that other Outcomes users can run this export.
- Under the Output section, select if you want to export:
- Everything: all available fields in Outcomes will be included in the file.
- Selected Fields: you can select the fields to include in this export by clicking or dragging and dropping them.
- Custom: you can enter JavaScript code to transform your desired data.
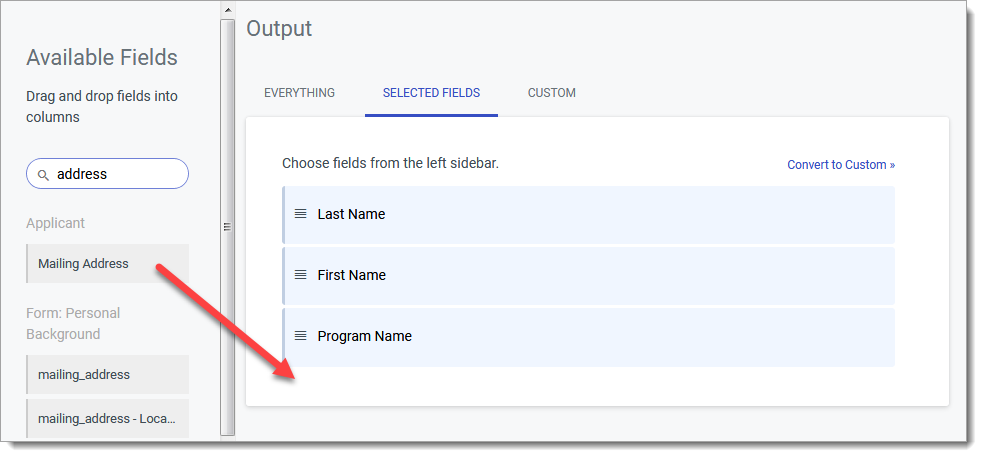
- If desired, click the translation table icon or field expression icon to further customize your export.

- Under the Schedule section, click the plus icon to add a schedule. You can set the frequency, add filters, and select the delivery method as needed.
- Click Create Export to save your template.
Configuring Tabular / Spreadsheet Contact Exports
To configure a tabular or spreadsheet export:
- After clicking Create Export on the Exports page, select Tabular / Spreadsheet.
- Name the export file, and select from the Comma Delimited, Tab Delimited, or Fixed Width style types.

- If desired, you can enable the Customize File Name option, allowing you to create a file name template with variable text. Note that this is an advanced feature requiring knowledge of database field names. See Variable Text Options below for more guidance.
- If desired, you can enable the Batching option, causing the software to group several records together in the same .zip file.
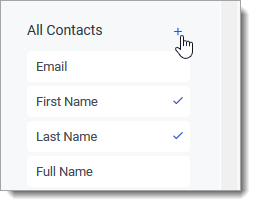
- In the Columns area, you can add fields to include in your export. To add fields, find them on the Available Fields panel and click to add them. You can also drag-and-drop them into your desired order.

- Click the plus sign near any section to add all of its fields. Selected fields appear with a checkmark.
- If you've created Translation Tables, you can click Choose a table icon to apply one of your tables. This allows you to convert the data output from this field into your preferred format.
- If desired, use the field expression icon to customize your export.
- In the Schedule area, if desired, click the plus sign to configure a schedule.
- When you’re done configuring the export, click Create Export.
Variable Text Options
You can include these variables in your export file name. For example, you can include a date as a variable in the file name so that the date the export was generated is listed in the file name.
Note that this is an advanced feature that requires knowledge of the database field names. Additionally, variables must be surrounded by double curly brackets.
- applicant.fullName
- applicant.familyName
- applicant.givenName
- program.name
- program.id
- minute
- hour
- date
- year
- month
- dayOfMonth
- totalRecordCount
- exportName
- fileRecordCount
- fileNumber
- fileCount
Reviewing Export History
Outcomes keeps a record of all exports you've completed in the software. To review the history:
- Click Activity on the Menu Bar.
- Click Downloads.
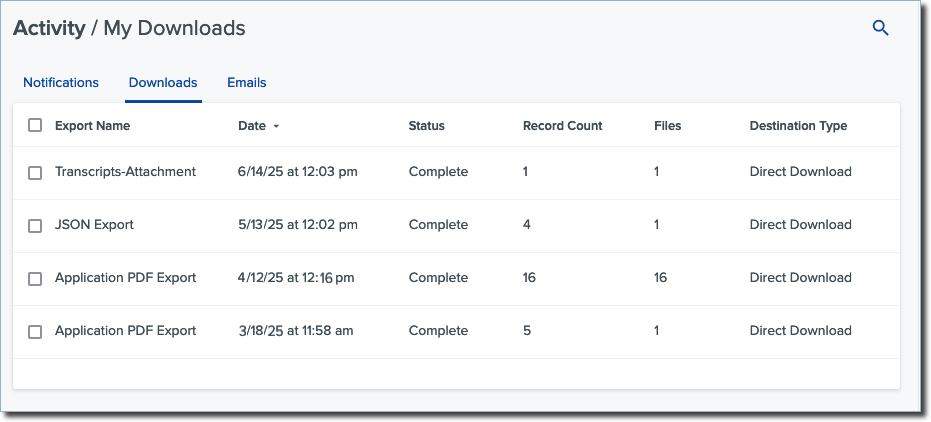
- Here, you'll see logs of your exports over the past 90 days.
To download another copy of an export, click its name. Note that this reproduces the export file as it was when it was exported, so any updates in the data since that time will not be reflected in the file.
Managing Exports
To manage existing exports:
- Using the Navigation Menu, click Settings.
- Under the Import/Export section, click Exports.
Editing Exports
Click the export name to make edits.
Copying Exports
Click the checkbox next to the export name, then click Copy.
Deleting Exports
Click the checkbox next to the export name, then click Delete.