Working with Your Outcomes-Based Student Portal
The Events feature in Outcomes allows you to create, review, and manage events related to your recruitment, admissions, enrollment, or other processes. Once you've begun publishing events, your registrants can view them using the Student Portal.
Navigating the Student Portal

- Welcome Image: configurable in your Student Portal settings, this image remains at the top left as visitors to your portal navigate to different pages. It also acts as a home page button when visitors click it.
- Dashboard Image and Dashboard Welcome Message: configurable in your Student Portal settings, these are what visitors see on the dashboard when they navigate to your Student Portal.
- Home page icon: visitors click here to return to the Student Portal Dashboard.
- Calendar icon: visitors click here to review, search, and filter your published events.
- Programs icon: visitors click here to review a list of all available programs.
- Applications icon: visitors click here to review a list of their current applications.
- Programs list: visitors can use this area to click through a list of available programs.
- Upcoming Events list: visitors can use this area to review your upcoming events.
- Help icon: visitors can click here to review contact information for support.
- Log In icon: this icon allows visitors to log in to the site, to see customized information, like the events they've signed up for.
- Contact Us panel: your contact information. To update the information listed here, modify the Support Phone Number, Support Email Address, and Organization Website URL on your Student Portal settings page.
- Social Media Contact Information: your social media information. The links here can be enabled and configured using the Social Link Information section of the Student Portal settings page.
Managing the Student Portal
You can adjust the content and appearance of your Student Portal. To work with these settings, click Student Portal in the Organization section of the Settings menu. Review the information below to learn how each setting impacts your Student Portal.

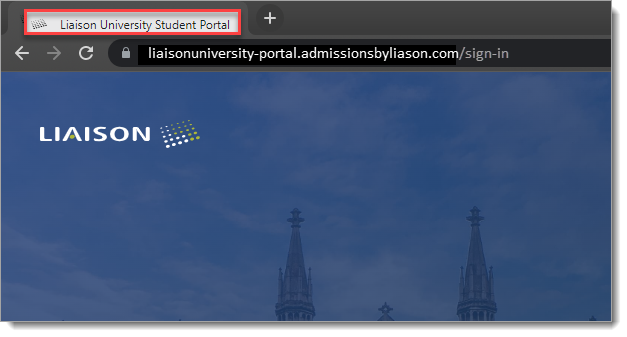
Web Address
To modify the web address of your Student Portal, use the Domain field. You can change this to a subdomain that your institution has directed to us (e.g., studentportal.yourschoolwebsite.edu), or any subdomain of .admissionsbyliaison.com or .liaisonoutcomes.com that is not currently in use.
Use the Browser Title field to adjust the text that appears as the page title for visitors to your Student Portal.
Modules
Use the Modules area to toggle on or off your Applications or Events modules. If either item is turned off, the corresponding feature will be unavailable for applicants to work with.

Contact Information

The Organization Display Name is the name that appears at the top left of your Student Portal Dashboard.

The Organization Website URL, Support Email Address, and Support Phone Number control what appears on the Contact Us panel of the Student Portal Dashboard.

Branding Messages

- Login Welcome Message: This controls the message that visitors to your Student Portal see when they click the log in icon, as seen below.

- Welcome Image: This controls the image that appears on your Log In page, as seen above.
- Dashboard Welcome Message: This controls the welcome message that appears on the Dashboard, as seen below.

- Dashboard Image: This controls the image that appears on the Dashboard of your Student Portal, as seen above.
Dashboard Banner Image Guidelines
When adding an image to appear on your Student Portal Dashboard, remember these guidelines:
- The image's orientation should be landscape.
- The aspect ratio should be 16:9.
- The recommended resolution range is from 1024×576 to 1920×1080.
- To accommodate different devices and screen sizes, the sides of your image may be cropped. For this reason, images where with a distant background (as seen above), or images where the focus is at the center (as seen below) may provide the best results.
How Images may be Cropped
Depending on the device that the Student Portal is viewed on, your dashboard image may display differently, as demonstrated below.
- On a mobile device

- On a tablet or desktop when your Student Portal Events are enabled

- On a desktop when your Student Portal Events are disabled

Branding Icons and Logos
![]()
- Favicon Image: a favicon is a small icon that serves as branding for your website and appears in areas such as a web browser's address bar or next to the site name in a bookmark list.

- Full Logo Image (Dark Logos): this logo appears at the top left of the Student Portal when there is a light-colored background.
- Compact Logo Image (Dark Logos): use this section to add a smaller version of your logo to appear on the Navigation Pane in the Student Portal.
- Full Logo Image (Light Logos): this logo appears at the top left of the Student Portal when there is a dark background.
- Compact Logo Image (Light Logos): use this section to add light-colored, smaller version of your logo to appear on the Navigation Pane in the Student Portal.
Colors
Use the Colors area to establish the colors you'd like to brand your Student Portal with. Enter the hex color codes that correspond with the branding colors of your choice. If the values you enter will result in a low color contrast between page elements, you'll see a WCAG (Web Content Accessibility Guidelines) warning informing you of this.
Click Reset to Default to reset the color to the Liaison default.

Social Link Information
Complete the Social Link Information area to add social media icons that link to the appropriate pages. Icons appear at the bottom right of the Student Portal homepage.

General
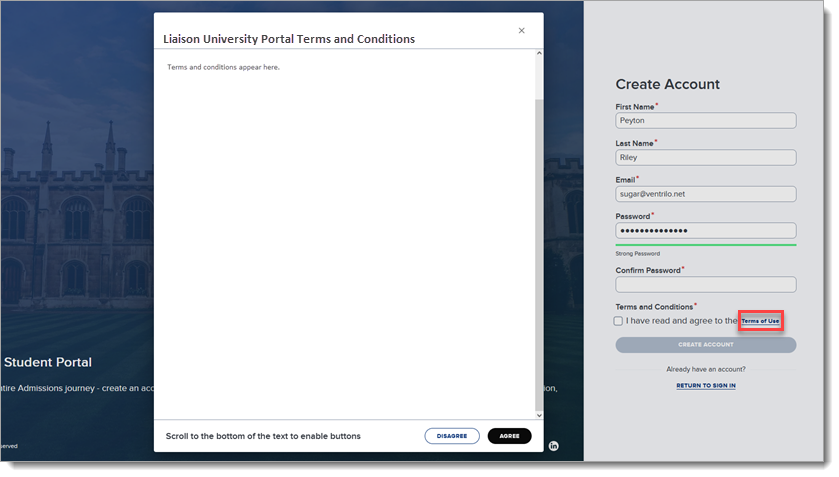
Edit your Terms and Conditions Message.
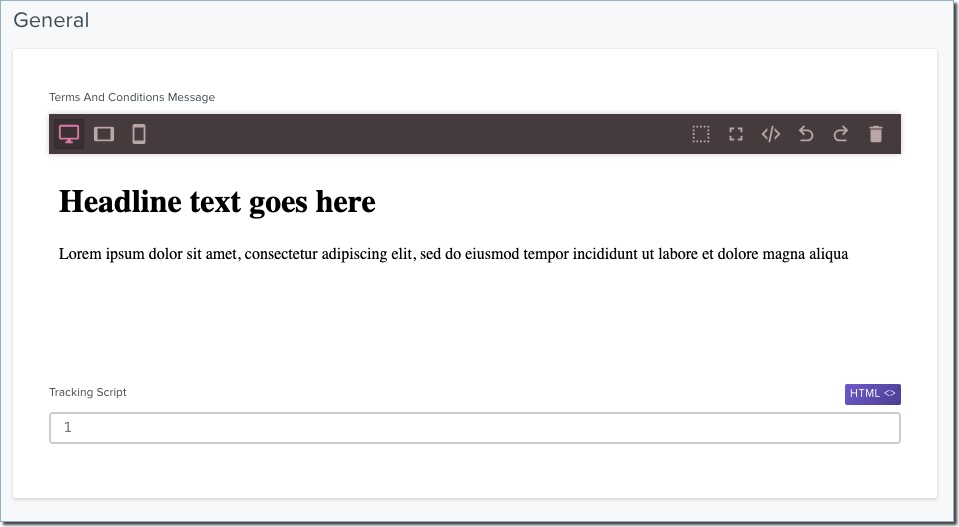
This controls what appears when visitors to your Student Portal click Terms of Use when creating an account on the log in page.
The Tracking Script field allows you to collect data about user interactions and behavior on your Student Portal. If you've set up Google Analytics, you can paste the code below to the Tracking Script field, causing this information to be tracked and sent for processing and reporting.
After dropping in the following code, replace YOUR ID HERE and YOUR-URL-HERE with the appropriate information from Google Analytics.
<script>
const inlineScript = document.createElement('script')
inlineScript.textContent = `
  window.dataLayer = window.dataLayer || [];
  function gtag(){dataLayer.push(arguments);}
  gtag('js', new Date());

  gtag('config', 'YOUR ID HERE');
`
document.head.insertBefore(inlineScript, document.head.firstChild)

// external script
const gtmScript = document.createElement('script')
gtmScript.src = 'YOUR-URL-HERE'
gtmScript.async = true
document.head.insertBefore(gtmScript, document.head.firstChild)

</script>
Programs Header
Use this section to configure what appears in the Programs area of the Student Portal as seen below.
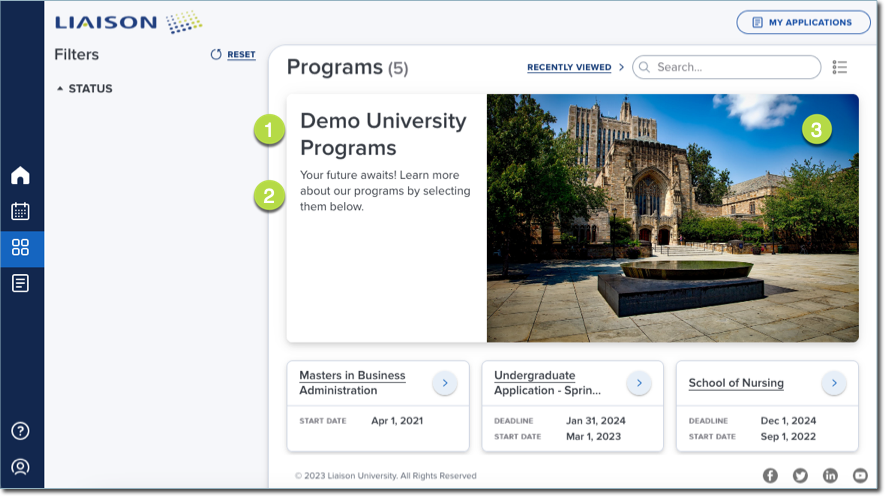
- Programs Header Title: the header text that appears on your Programs page.
- Programs Header Description: the text that appears under your Program Header Title.
- Program Header Image: the image that appears at the top of your Programs page.
Relationships
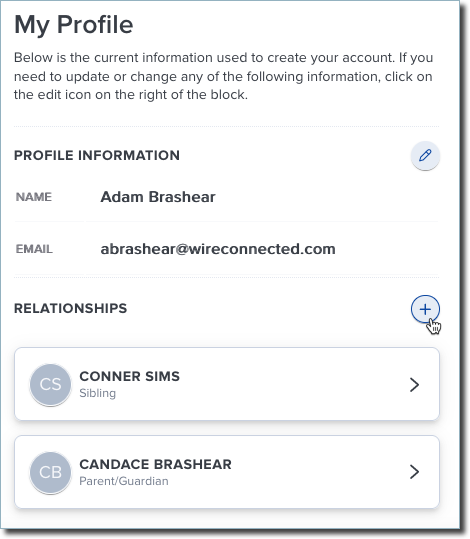
When an applicant has an account for your Student Portal, they can update their information on the My Profile page. In their profile, they have the option to add relationships. Here, they can enter the name and email address of another person (e.g., a parent or guardian) so that person becomes one of your contacts in Outcomes, allowing you to communicate with them.
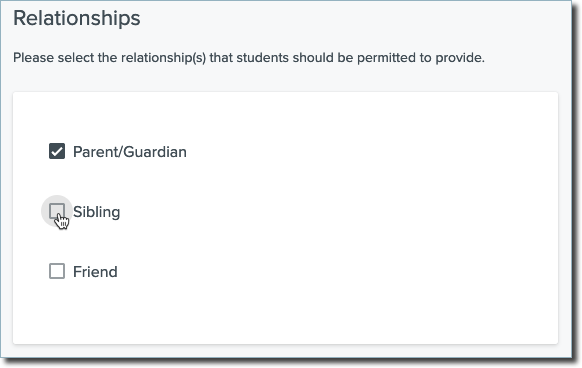
The Relationships area on the Student Portal Settings page allows you to enable what type of relationships an applicant can add. To configure relationships here, you'll first need to add Contact Relationships to your Applicant Contact Type. To do this:
- Go to Contact Types in the Contacts section of the Settings Menu.
- In the Contact Properties area, any property that is configured as a Contact Relationship with a Property Type of Applicant or Parent/Guardian is eligible to be added to your Student Portal. To create a new property that fulfills these requirements, click Add Property.
- Select Contact Relationship for the Property Type, and select a Contact Type of Student or Parent/Guardian.
- Add a Property label, e.g., "Sibling".
- Configure the other settings as desired and click Add then Save Changes to keep this property.
Once you've added this relationship, it will be available for you to enable in your Student Portal settings.
Configuring Activation Emails Sent to Students
When someone registers on your Student Portal, they receive an automated email with a link to activate their account. You can edit the layout and verbiage of these emails to meet your needs.
Updating the Verbiage of Your Activation Email
To update the text of the email that gets sent to new Student Portal registrants:
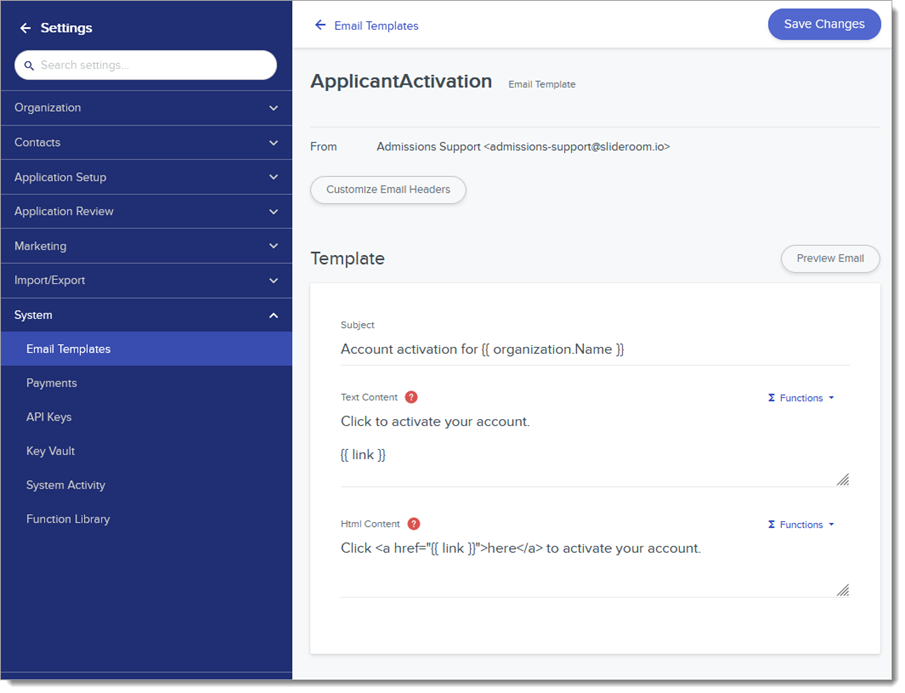
- Click Email Templates from the System section of the Settings Menu.
- Open the ApplicantActivation System Default email template.
- Edit the template as desired.
- Click Save Changes.
After updating this text, any new registrants will receive the updated version of your activation email.
Updating the Layout of your Activation Email
To update the layout of the email that gets sent to new Student Portal registrants:
- Click Email Templates from the System section of the Settings Menu.
- Open the OrganizationMaster System Default email template.
- Copy and paste the following HTML snippet (click the view source icon below):
<!DOCTYPE html>
<html>
<head>
  <meta content="UTF-8">
  <title></title>
</head>
<body>
  <div class="content" style="border-radius: 3px; box-shadow: 0 1px 3px #ddd; margin: 0 auto; font-family: Helvetica, sans-serif; max-width: 800px; background-color: #f7f8f9; border-top: 5px solid #ADDCOLORCODE;">

    {{{content}}}

    <div style="padding-bottom: 15px; padding-top:30px; color: #777;font-size: 75%; text-align: center;">
      <p><i>Copyright 2023 {{organization.name}} | All Rights Reserved.</i></p>
    </div>
  </div>
</body>
</html>
- Within the HTML code, you can make the needed adjustments. For example:
- to adjust the colors of the email layout, replace #ADDCOLOR with a hex code (or another valid color format) of the color you want to use.
- to adjust the font of the email, update the font-family property.
Helping Students with Their Student Portal Accounts
Students can log in to your Student Portal by navigating to your web address and creating an account. Once they create an account, your account activation email is sent to them.
Managing Pending Accounts
The Pending Accounts page keeps track of the accounts that have been created but not yet activated. From here, you can activate Student Portal accounts directly. Also, if students lose track of their activation email, you can access this page to review and resend activation emails. Once activated, students can log in using the email address and password they established.

Locked Accounts
Student Portal accounts become locked after a number of failed login attempts. Once this happens, students can click Forgot Password on the sign-in page to unlock their account and establish a new password.
Depending on how many times the student has entered an incorrect password, the account lock may be temporary. In this case, students can continue to use their existing password after the lock has expired. Temporary locks may last up to an hour. After an excessive amount of failed login attempts, accounts are locked until the student resets their password.