
Managing Your Outcomes-Based Inquiry Portal
Outcomes offers an Inquiry Portal, where you can design an interface for prospective applicants, advisors, and other contacts to interact with. This portal links to your Student Portal, where applicants are guided through their process.
Note that you may have an initial inqiury portal configuration. Where needed, use the guidance on this page to make routine updates, or contact our support team for more advanced changes.

Configuring Inquiry Forms
Inquiry Forms are used to request information from specific audiences in your Inquiry Portal. For questions whose responses should populate the contact record, create the corresponding contact properties first. This makes them available in the Contact Field Mapping menu. After creating a form, you can add it to your Inquiry Portal and use its direct link to share it with prospective contacts.
To create a new inquiry form:
- Go to the Contacts section of the Settings Menu and click Inquiry Forms.

- From here, you can review your existing forms. Click the plus sign to build a new inquiry form.
- Name the form and enter a key to associate with it.
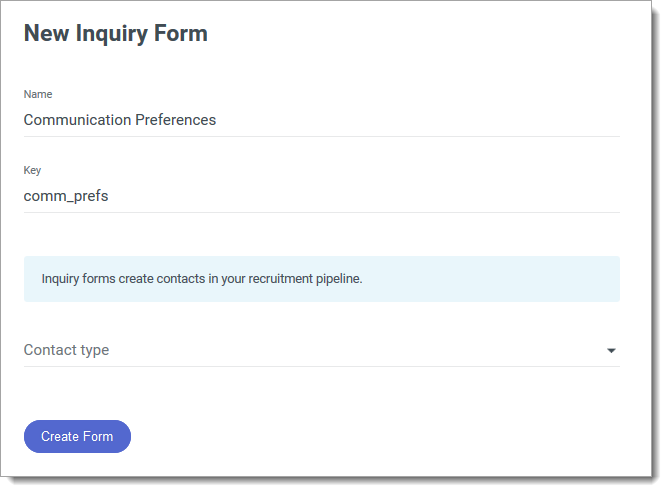
- Choose which contact type needs to complete this form. The contact types listed here are those created in the Contacts area of the Settings menu. Typically, prospective applicants should use the Applicant contact type so that inquiry and other applicant data remain on the same record. Other contact types should be selected when collecting information for a distinct audience, e.g., parents, counselors, or mentors.
- Click Create Form.
- You can now begin adding questions to your form. Inquiry forms are divided into different sections. Enter a name in the Section Title.

- Enter an introduction with instructions or information for references.
- To begin adding questions, click Add Question.
- On the Edit Question page, enter your question.
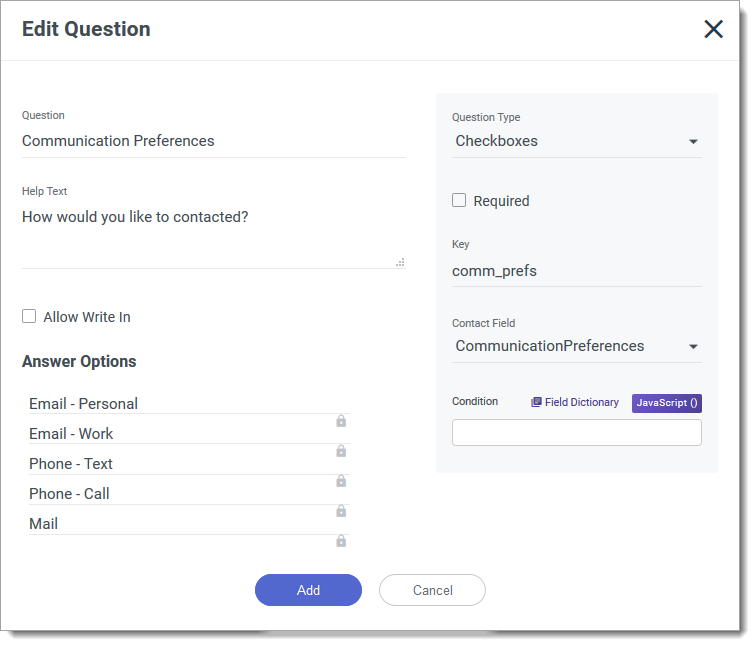
- Enter additional guidance in the Help Text field.
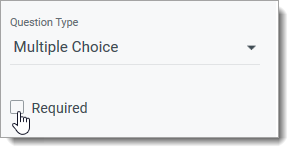
- Choose your desired Question Type. See Selecting Question Types for more details.
- Check the Required checkbox to make this a required question.
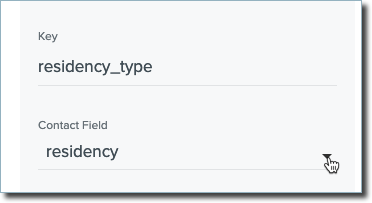
- Select a Contact Field to link the question to. If you make a selection here, the responses to this question are stored in the contact property of your choice. Mapping the questions in this way supports creating segments, reports, and other follow-up workflows with your contacts. If you have not yet created a contact property to correspond with this question, you can leave this unmapped and return to edit the form once the property is in place.
- If desired, enter a Javascript condition to modify the question.
- After completing your question, click Add.
- Continue adding questions as desired.
- Click Add Section to add a new section of questions. Clicking Add Section Table allows you to add a table for responders to complete. Select Expandable for Row Type to allow responders to add as many rows as they need, or select Named Rows to create a set number of rows and label each of them. Click Add Column to add a field for responders to fill in. For each column, select a Column Type (see Question Types, above.)

- Click Add Calculated Field to add a field to be used in calculating applicant data. Calculated Fields are used to combine and transform data fields from anywhere on the applicant record. They appear when reviewing applications, but are not displayed to applicants.
- To test the form and view it as a responder would, click Try it at the top right.
- When you’re done configuring the inqiury form, click Save Changes.
The forms you've created here can be used in your Inquiry Portal. When a visitor to your portal submits an inquiry form, Outcomes creates or updates the appropriate contact record, storing mapped responses in its contact properties.
Selecting Question Types
When adding questions to an inquiry form, you can choose from several types of questions. Review Contact Property Usage and Availability to learn more about how each question type can ultimately be used in Outcomes. The available types include:
- Text: allows responders to type in a text response. Selecting this option also requires setting the Max Length for a response. Use this option for questions requiring a short response.
- Paragraph Text: allows responders to type a paragraph-length reply.
- Multiple Choice: presents responders with multiple options to select from. When selecting this Question Type, enter each option individually in the Answer Option area, or add several answer options at once by clicking Paste Options and pasting the desired options in the text box. Each option must be separated by line breaks. Check the Allow Write In option to allow recommender to write in their own response.
- Drop Down: works the same as the Multiple Choice option, except answer options are presented to responders in a drop-down menu.
- Checkboxes: works the same as the Multiple Choice and Drop Down options, except multiple answer options can be selected.
- Date: allows responders to enter a date in response to the question.
- CEEB Code Lookup: allows responders to enter a school name.
- Email Address: allows responders to enter an email address.
- Phone Number: allows responders to enter a phone number.
- Web URL: allows responders to enter a URL.
- Number: allows responders to enter a numeric response. After selecting this option, set your number type to Decimal or Integer. Integers can only accept responses up to 9 digits long.
- Scale: allows responders to rate items on a scale of your choice. Scales can be up to 10. After selecting this option, choose your Scale range and how label will display.
- Scale Group: allows responders to rate multiple criteria using the same numeric scale. For example, ask potential applicants to rate how crucial different factors were in driving their interest in your program, on a scale from "Not Important" to "Very Important".
- Address: allows responders to answer with an address.
- Name: allows responders to answer with a name.
- Concealed: allows for the responder's answer to be encrypted. Only users with the appropriate permissions can decrypt and view the responses.
Configuring Forms with Conditional Questions
Updating Inquiry Forms
You can edit existing inquiry forms by returning to the Contacts section of the Settings Menu and clicking Inquiry Forms.
- From here, you can review your existing forms. Click the form you'd like to edit.
- Make your desired changes as described above.
- Click Save Changes to keep your edits.
Note that when updating multiple-choice options on inquiry form questions, you'll need to remap the question to its contact property for the changes to take effect. To do this:
- Begin editing the inquiry form as described above.
- Find the question you'd like to update and click the edit pencil.
- From here, you can overwrite existing answer options, or add new options by clicking the Add Answer Option field.
- Once you've made your changes, click the Contact Field dropdown and select [Not Mapped].
- Now remap the field by reselecting the appropriate contact field.
- Click Update to save your changes to the field.
- Click Save Changes to keep your edits to the form.
Configuring Your Inquiry Portal
To configure your Inquiry Portal:
- Navigate to the Settings Menu and click Inquiry Portal in the Portals section. A preview of your portal appears on the right.
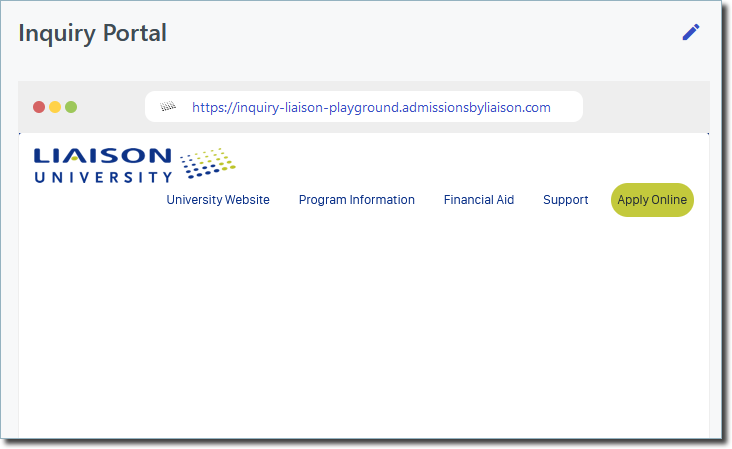
- Click the edit pencil to begin configuring your portal.
- From the Inquiry Portal Settings page, you can review and update your configuration.

- Domain: the web address visitors use to access your Inquiry Portal.
- Browser Title: the text that appears at the top of the browser when a user navigates to your Inquiry Portal.
- Favicon URL: the web address of your favicon. A favicon is an icon associated with your institution that displays to your portal's users in different areas, e.g., near their browser's address bar, or as the icon when your portal is bookmarked.
- Support Email Address: the email address users are directed to when they need assistance.
- Inquiry Forms: select an existing inquiry form to make available through the portal. For each form, create a unique permalink to generate a direct URL you can share on webpages, in communications, and at events.
- Use the HTML area to modify your portal's appearance. For example, you may decide to add your institution's logo, brand colors, contact details, or URL links.

There are several sections you can configure:- Header HTML
- Home HTML
- Confirmation HTML
- Footer HTML
- Custom Content CSS
- Global CSS Override
- Click PREVIEW to see what the portal looks like with your current configurations.
- When you're done making edits, click Save Changes.
Adding Forms and Using Permalinks
After you select an inquiry form in the Inquiry Forms area, you're asked to create a unique permalink for that form. The permalink becomes part of the form’s URL, allowing you to create a direct link that you can share with prospective contacts. Use descriptive permalinks to distinguish where a form will be used. For example, you might use "request-info" for a general website inquiry form, "open-house" for an event form, or "mba-program" for a program-specific form.
To add a form to your Inquiry Portal:
- In Inquiry Portal Settings, locate the Inquiry Forms area.
- Click Add Inquiry Form.
- Select the inquiry form that you want visitors to complete.
- Enter a unique permalink for the form, as described above.
- Click Save Changes.
- Copy the generated form URL and add it to the appropriate webpage, email, QR code, or event material.
You can add the same inquiry form more than once and assign each instance a different permalink. This lets you use one form across multiple webpages, programs, events, or campaigns while maintaining separate links for each placement.