Working with Contact Conversations
In Outcomes, you can communicate with applicants and other contacts in several ways. Using the Quick Messages or Campaigns features in the Marketing module, you can send text messages directly to your contacts. Once you've started a text message thread, you can use the Conversations feature to review the thread's message history, send new messages, or assign the conversation to other internal Outcomes users.
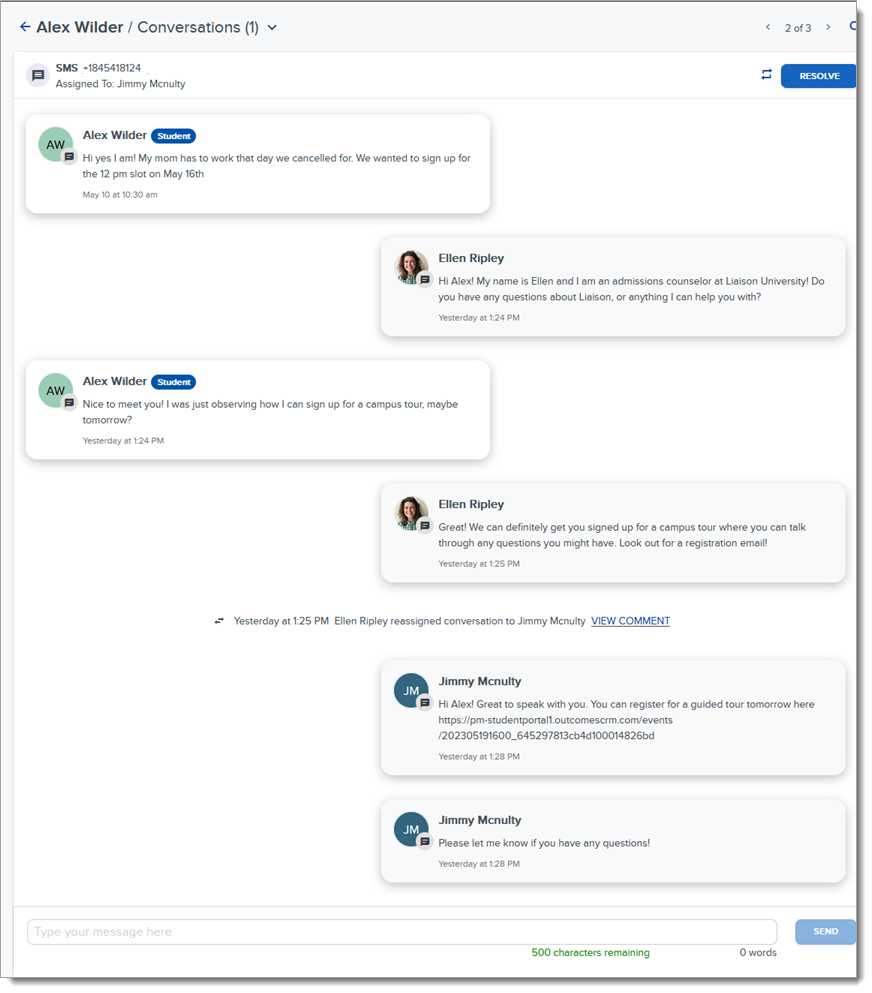
A Sample Conversation Thread
Accessing the Conversations Module
To get to the Conversations module, click Conversations in the Menu Bar.
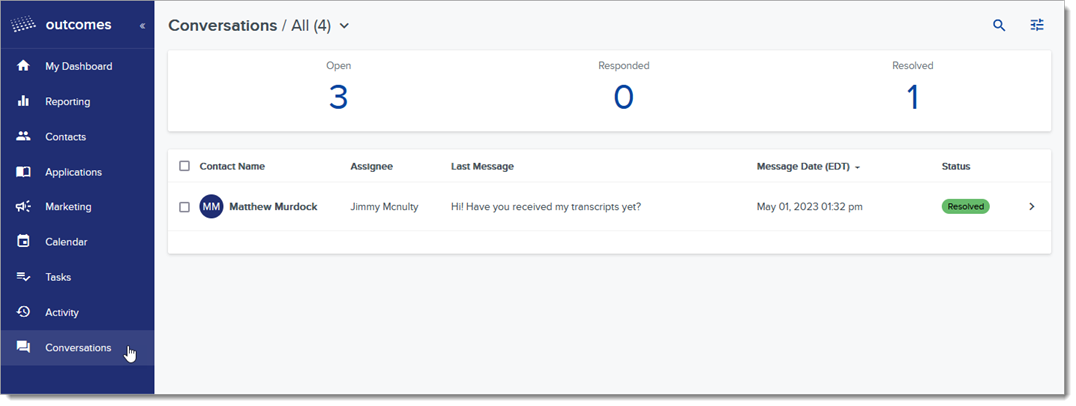
From here, you'll see all conversations that are allowed by your permissions. If your role has the View All Conversations permission enabled, you'll see all your program's conversations. Use the dropdown at the top of the page to switch between All conversations and My conversations. Use the Search and Filter features to isolate specific conversations.
Starting a Conversation
Conversations help you stay connected to your contacts through text messages. To start a conversation, send a text message to one or more of your contacts using Quick Messages or Campaigns.
A thread appears in the Conversations view and the Conversations Tab of their contact record once either of the following happens:
- You send a text message.
- Anyone sends a text message to your Outcomes phone number from a phone number associated with one of your contacts.
Contacts have the option of opting out or back into text communications.
Assigning a Conversation
If auto-assign is enabled, the conversation is assigned to the appropriate user as soon as a conversation is opened via either of these methods. Assigning a conversation changes who can send further messages in this conversation based on users' permissions. It also changes who receives notifications about updates to the conversation.
To access the Conversations view, click Conversations in the Menu Bar.

From a conversation, you can:
- Review the text messages that have been exchanged.
- Type a response to the contact using the text field at the bottom of the page. Click Send to send your message to their mobile device.
- Click the reassign icon to assign the conversation to another person at your institution.
- Click Resolve to end the conversation. Once you resolve a conversation, it displays in the Resolved status. Resolved conversations can later be reopened (either by clicking Reopen at the top of the conversation or if the contact sends another message).
- If the contact has communicated to you using more than one mobile number, these text threads are separated into different conversations. Click the dropdown at the top right to switch to the other conversation.
Managing Conversations
Before you work with Conversations, you should:
- See that your Text and Voice settings are configured.
- Ensure that the relevant Roles have been given access to the appropriate Conversations permissions. These permissions include Manage Assigned Conversations, View All Conversations, and Manage All Conversations.
- Confirm that your Conversation Settings under Marketing in the Settings Menu are configured correctly.
To access an individual contact's conversations, navigate to their contact record and click the Conversations tab. To access all conversations, click the Conversations icon in the Menu Bar to get to the Conversations module.
From the Conversations module, you can review your existing conversations and handle several tasks including:
- Search: use the search icon to search for conversations based on contact name or words in the conversation.
- Filter: use the filter icon to refine the list of conversations, including filtering for the conversation's status, assigned users, or dates. Click Apply to activate your filters, or click Clear to remove them.
- Reassign: use the checkboxes on the left and click Reassign to select conversations to be reassigned individually or in batch. Reassigning a conversation changes who can send further messages in this conversation based on users' permissions. It also changes who receives notifications about updates to the conversation.
- Resolve: use the checkboxes on the left and click Resolve to select conversations to be resolved individually or in batch. Once you resolve a conversation, it displays in the Resolved status. Still, it can later be reopened (either by clicking Reopen at the top of the conversation, or if the contact sends another message).

Auto-assigning Conversations
By default, conversations remain unassigned until someone with appropriate permissions assigns them. To have conversations assigned automatically once they are opened, you'll need to:
- Configure a Routing Table that indicates how your assignments should be prioritized.
- Add a User Relationship to your Contact Type that employs this Routing Table.
- Go to Conversations in the Marketing section of the Settings Menu and enable the Allow auto-assignment option.
Opt-ins and Opt-Outs
When a contact chooses to opt in to your communication, they grant explicit permission for you to send them emails, texts, or other messages. Conversely, when a contact opts out, they decline or withdraw this permission to receive communication.
As a best practice, it's a good idea to include an opt-in question on inquiry forms and applications. For new contacts who did not engage with you first, it's best to include an opt-in with your initial communication, along with an explanation of what you'll send them after they've opted in.
Later, contacts can opt out (or back in again) using the methods described below.
Opting Out of Text Messages
Contacts can opt out of receiving text communication by texting any of the following:
- STOP
- UNSUBSCRIBE
- CANCEL
Opting In to Text Messages
If a contact has opted out of receiving your communication via text, they can opt back in by texting any of the following:
- START
- SUBSCRIBE
- UNSTOP