Managing Reviews
In Outcomes, the standard way of assigning applications involves three steps:
- Creating Evaluation Forms to provide a place for reviewers to enter their results.
- Configuring Phases to establish which reviewers will be assigned and which evaluation forms they will use.
- Changing applications' phases to assign them.
Once that is done, your process may involve these steps:
- Reviewers complete their reviews.
- You score applications based on these reviews.
- You make scores more prominent on each application or create segments based on these scores.
Assigning applications using this process has several benefits, including the ability for assignees to enter their responses in the Evaluation tab, the ability to create PDF files with evaluation results, and the ability for assignees to be notified of their assignments. For a simpler process, though, you may wish to assign applications using Tags or Tasks instead.
Managing Evaluation Forms
The Application Review section of the Settings menu allows you to create and modify evaluation forms, also known as review forms. These are forms that reviewers will complete specific to each application's current phase.
Creating Evaluation Forms
To create a new evaluation form:
- Go to the Application Review section of the Settings Menu and click Evaluation Forms.
- From here, you can review your existing forms. Click the plus sign to build a new form.
- Name the form and enter a key to associate with the form.

- Evaluation forms are divided into different sections. Enter a name under Section Title.

- Enter an introduction with instructions or information for references.
- To begin adding questions, click Add Question.
- On the Edit Question page, enter your question.

- Enter additional guidance in the Help Text field.
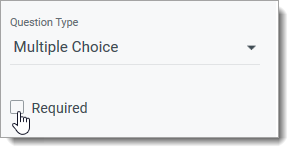
- Choose your desired Question Type.
Question Types are as follows:
- Text: allows evaluators to type in a text response. Selecting this option also requires setting the Max Length for a response. Use this option for questions requiring a short response.
- Paragraph Text: allows evaluators to type a paragraph-length reply.
- Multiple Choice: presents evaluators with multiple options to select from. When selecting this Question Type, enter each option individually in the Answer Option area, or add several answer options at once by clicking Paste Options and pasting the desired options in the text box. Each option must be separated by line breaks. Check the Allow Write In option to allow the recommender to write in their own response.
- Drop Down: works the same as the Multiple Choice option, except answer options are presented to evaluators in a drop-down menu.
- Checkboxes: works the same as the Multiple Choice and Drop Down options, except multiple answer options can be selected.
- File Attachment: requests that evaluators upload a file in response to the question.
- Date: allows evaluators to enter a date in responses to the question.
- CEEB Code Lookup: allows evaluators to respond with a school name.
- Email Address: allows evaluators to respond with an email address.
- Phone Number: allows evaluators to respond with a phone number.
- Web URL: allows evaluators to respond with a URL.
- Number: allows evaluators to enter a numeric response. After selecting this option, set your number type to Decimal or Integer. Integers can only accept responses up to 9 digits long.
- Scale: allows evaluators to rate the applicants on a scale of your choice. Scales can be up to 10. After selecting this option, choose your Scale range and how label will display.
- Table: allows evaluators to respond by completing a table. For example, entering their contact information.
- Address: allows evaluators to respond with an address.
- Name: allows evaluators to respond with a name.
- Concealed: allows for the evaluator’s response to be encrypted. Only users with the appropriate permissions can decrypt and view the responses.
- Check the Required checkbox to make this a required question.
- If desired, you use the Condition Builder to make this question visible only under specific circumstances. See Configuring Forms with Conditional Questions, below.
- After completing your question, click Add.
- Continue adding questions as desired.
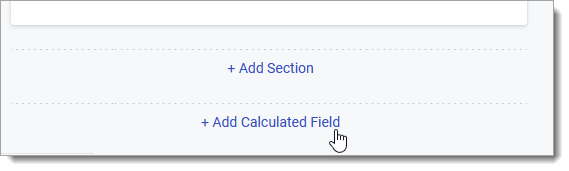
- Click Add Section to add a new section of questions. Including several sections is useful for organizing longer frms.

- Click Add Calculated Field to add a field to be used in calculating applicant data. For more information, see Scoring Applications.
- When you’re done configuring the evaluation form, click Save Changes.
Configuring Calculated Fields on an Evaluation Form
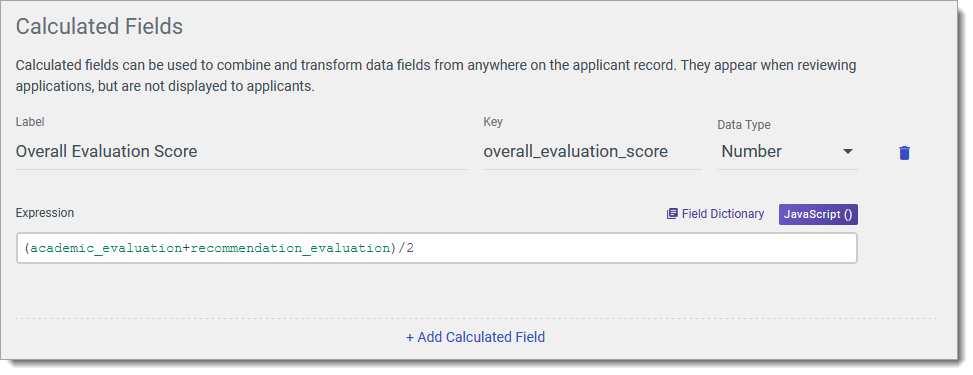
When configuring evaluation forms, you can add Calculated Fields that will use JavaScript expressions to make a calculation based on applicant data. For example, you can use this to bring in test scores or other information to develop an applicant score.
Once this is configured, you can add the resulting scores to the Application Grid, the Application Summary, filters, or exports.
To configure this, click Add Calculated Field.
When working in this area, remember:
- This is an advanced feature, as the calculated fields here can only be added with JavaScript expressions.
- These Calculated Fields are separate from Phase Calculated Fields, which are used to make calculations solely based on items within the evaluation forms.
- The Field Dictionary is a comprehensive list of application-related fields. Using this, you can determine which field names you need to use in your expressions and what type of data you can expect in each field.
- The available Data Types for these calculated fields are:
- Boolean: These are fields that can be set to True or False (Yes or No).
- Number: These are fields to be populated with a numeric value.
- String: These are fields to be populated with text values.
- Date: These are fields to be populated with a date.
If you've added a calculated field to an evaluation form, once the corresponding reviews are complete, you can see the results of your Calculated Fields by clicking Completed Reviews on the application's Information Pane.
To test the form and view it as a reviewer would, click Try it.
Configuring Forms with Conditional Questions
In some cases, you may want to create forms containing questions that are only visible under certain circumstances. For example, if one of the questions on your evaluation form asks if the applicant has any gaps in their clinical experience, you may want to create a conditional question to collect more details about those gaps. This conditional question would only appear if the answer is "Yes" to the question that asks if the applicant has any clinical experience gaps.

To create a conditional question:
- You'll first need at least one question that serves as the condition for your conditional question. In the example above, the question Does the applicant have any gaps in clinical experience? serves as the condition that determines whether the question Does the applicant provide a reason for the gap? appears.
- Next, add your conditional question. While configuring the conditional question, click Open Condition Builder on the right.

- From the Condition Builder, click Choose Field to select the field that you're using as a condition. Then, configure your condition. If necessary, click +condition to use more than one condition. If you've added more than one question in the Condition Builder, remember to select All of or Any of to indicate whether all (or just one) of the conditions need to be true for the conditional question to appear.
- Click Update to save your condition.
- Back on the Create Question page, once you're done configuring your question, click Add. Click Save Changes to save your form.
Note: if your forms have multiple sections, you can also make entire sections conditional. To do so, click the three dots icon at the top of the section, click Open Condition Builder, and follow the steps described above to configure your conditions.
Linking Evaluation Forms to Phases
Once you have created your evaluation form, you can associate it with one or more phases. Once an applicant is assigned to that phase, the evaluation form is linked to them, and the assigned reviewers can complete their review using your evaluation form.
To link an evaluation form to a phase:
- Navigate to Phases in the Application Review section of the Settings menu and click the edit pencil.
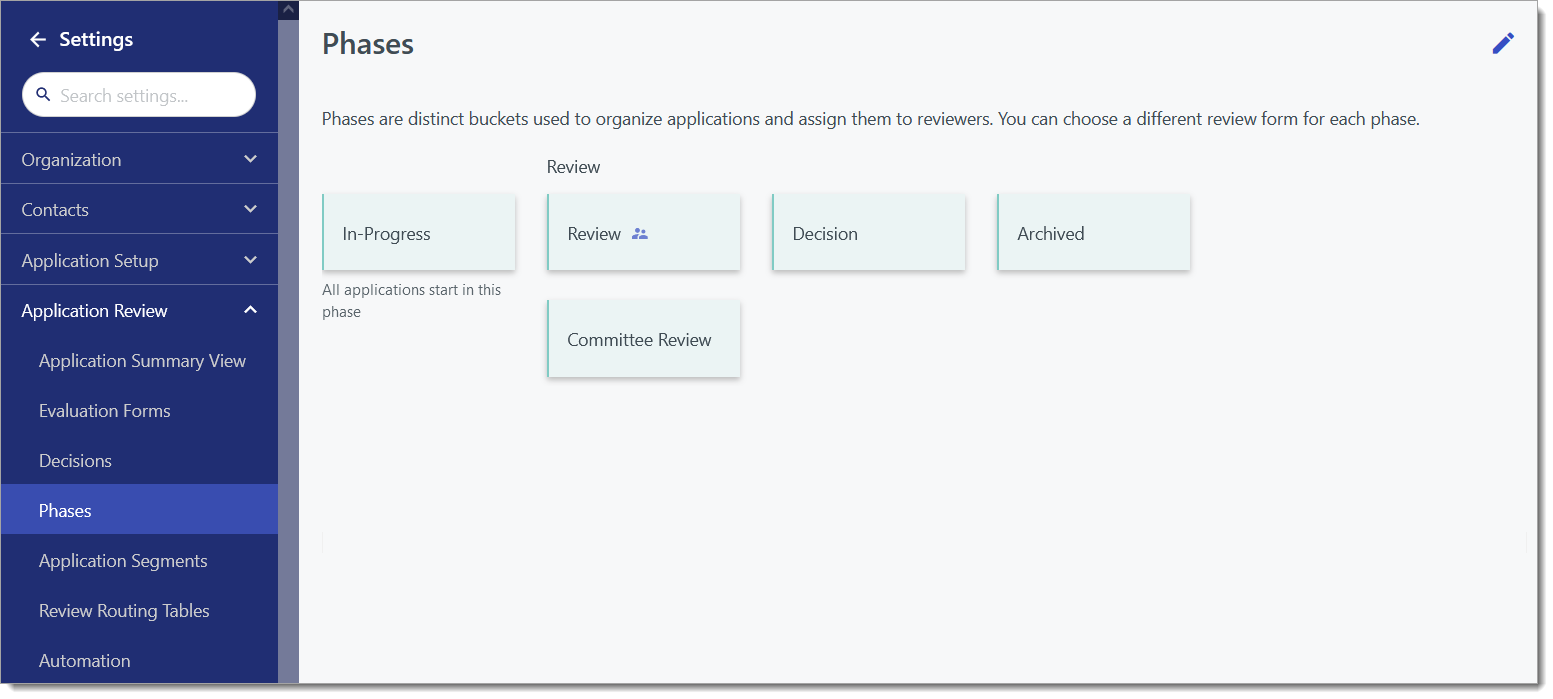
- From here, you can create a new phase, or select your desired existing phase.
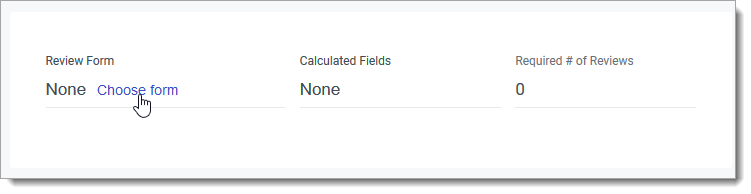
- In the Review Form area, click Choose Form to select a form. If a form is already associated with this phase, you can click Edit to select a new form.
- Select your desired evaluation form from the list.
- If you add a review form here, you can configure how this form should be assigned to reviewers. The form you select will appear on the Review Tab when reviewing an application, allowing a reviewer to record the results of their review. Where desired, you can select fields from this review form to add as Calculated Fields. This allows you to calculate the Average, Sum, or Median score awarded to an application by your reviewers for that field. You can also set a number of required reviews to track when this application has been sufficiently reviewed.
- Click Add (or Update) when you're done configuring your Phase.
- From the Manage Phases page, click Save Changes to keep your updated Phase settings.
Assigning Applications for Review Based on their Phase
If you apply a review form while configuring a Phase, you can use the Assignments area to assign the form to specific users or Review Teams using the Distribute to options. Also in this area, you can select Distribute Using a Routing Table. If you've created Review Routing Tables, this allows you to apply the assignments you established in your routing table. With any of these options, once an applicant is placed in this Phase, the associated reviewers are assigned to the applicant and allowed to complete the associated review form.
- Click +Add Assignments to configure how applications in this Phase will be assigned.
- From the Assign by Segment window, click Choose Segment to isolate the applications to be assigned based on their segment. Where applicable, you may choose All Submitted Applications as your Segment. Note that the applications you assign are visible to all the users and teams you indicate, regardless of which applications their role gives them access to.

- When completing the Assignments area, select what will be done with applicants in this phase who don't fall into any of the segments you've selected. If you decide to leave them unassigned, you can assign them directly from the application.

- When you're done configuring your assignments, click Add.
Once you've set up automatic assignments, the assignments will happen automatically when an application is placed in a review phase. You can also run the assignment rules on demand. There are two ways of doing so:
- From the Phases page: a Run Rules button appears on the Phases page for any phase that is associated with an evaluation form. When you click this button, the assignment rules that you established in the phase are applied immediately. If no assignment rules are in place, existing assignments that were added automatically are cleared.

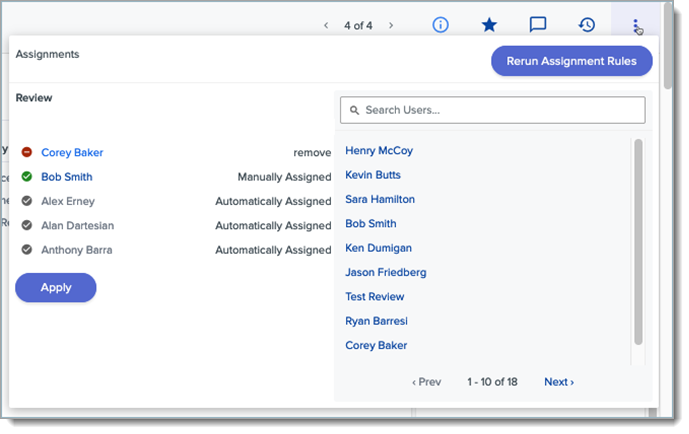
- From Application Records: a Rerun Assignment Rules button appears in the Assignments window (accessible via the three-dots menu) on application records that are currently in a phase with an associated evaluation form. When you click this button, any assignment rules that impact the application record you are working with are applied immediately.
Working with Review Routing Tables
Review Routing Tables allow you to assign applications for review to users based on your rules for each phase. For example, if you have reviewers that focus on applicants from specific regions, you can apply a routing table that assigns applications to your reviewers based on the applicants' state or zip code. To create a routing table:
- Click Review Routing Tables in the Application Review section of the Settings Menu.
- From here, you can review your existing routing tables. Click the plus icon to create a new routing table.
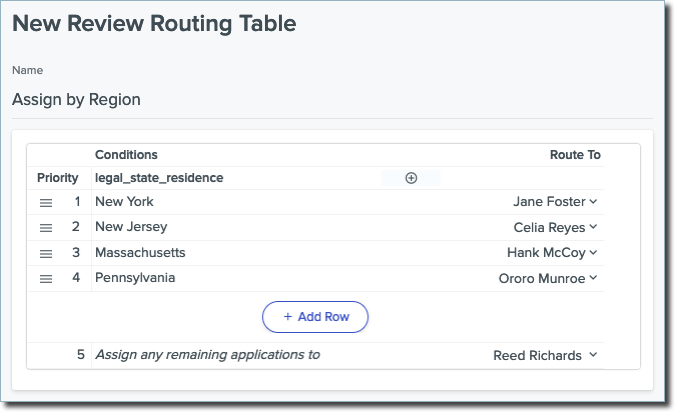
- On the New Review Routing Table page, enter a name for your routing table.
- From the grid that appears, click the plus sign to select the property or condition that you'd like to base your routing on. For example, if you want applicants from specific states to be assigned to certain reviewers, you might choose to select Legal State of Residence as the property you'll base your routing on.
- After selecting the property, click the top line to add a condition you want to link to an internal user. For example, where Legal State of Residence is available, you can set applicants with a Legal State of Residence of New York to be assigned to one of your users. Note that for conditions to match, you'll need to type them exactly as they appear on the application records. Consult the Field Dictionary to confirm that the format you're entering your condition in matches what you can expect for each related property. Click Done to add the condition.
- In the Route To column, select the internal user the application should be assigned to if the condition you specified is met.
- If needed, you can further isolate applications that meet this condition by clicking the plus sign again to add another condition. For example, if you want to assign specific zip codes within a state to one user, you could click the plus sign again, select Postal Code, and enter "11000 TO 12000" so that only applications within these zip codes will be routed to the selected user.
- Continue adding conditions and associate them with users as needed. If multiple conditions can be routed to the same user, you can separate them by commas in the Edit Condition window. For instance, in the example above, your condition can be New York, New Hamphsire, Vermont.
- If there are possible options that are unaccounted for (e.g., states that you didn't list as a condition), use the Assign any remaining applications to line to determine who the leftover applications should be assigned to.
Once you've configured routing tables, you can apply them while configuring your reviews.
Assigning Evaluation Forms to Reviewers Directly
Using Phases, you can link evaluation forms to applicants and reviewers. Applicants in a Phase with an associated evaluation form, but left unassigned through the configuration of their Phase can be assigned directly to a reviewer.
To do this:
- Navigate to the application you want to assign.
- Open the More Options menu and select Assign.
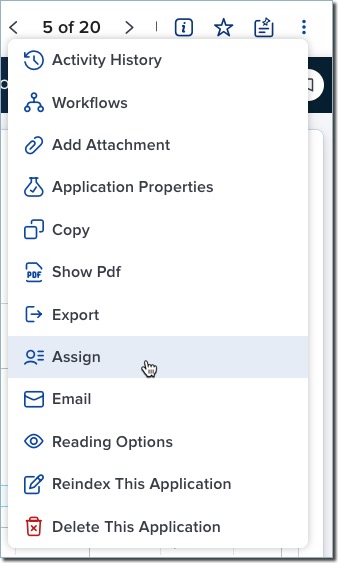
- Select your desired reviewers and click Assign In...
For this option to be available, the application needs to be in a Phase that is associated with an evaluation form.
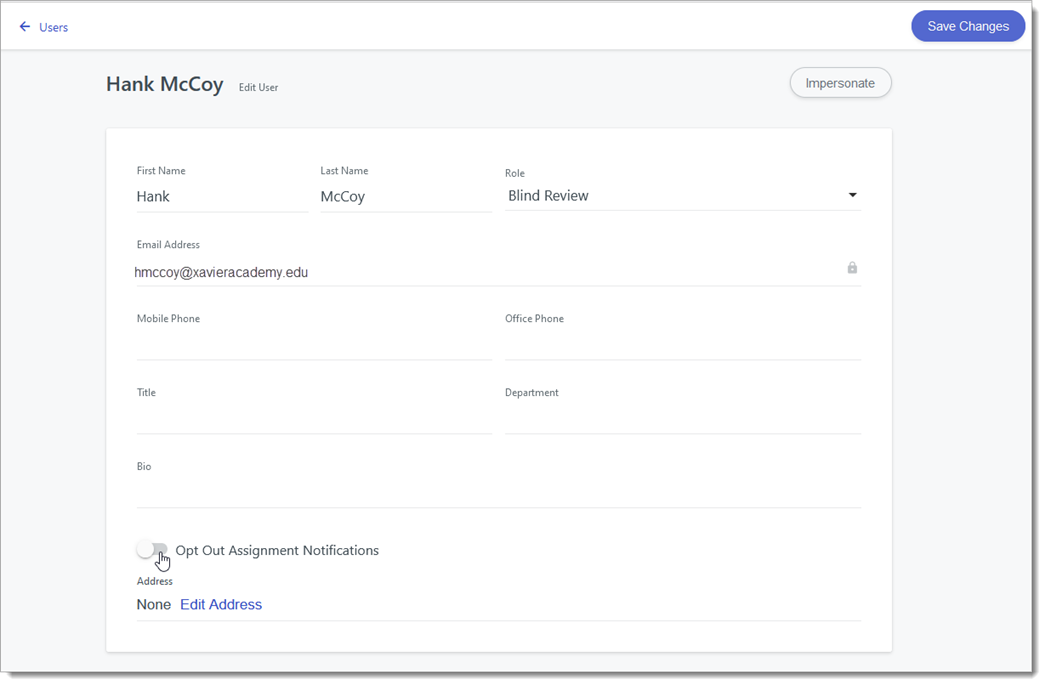
Disabling Assignment Notification Emails
By default, any reviewer who is assigned an application through the evaluation forms process will also receive a daily email notification. The Assignment Summary Notification emails help reviewers stay up-to-date on their progress in completing their reviews.
Administrators can disable these notifications by going to the Users section and adjusting the Opt Out Assignment Notifications toggle.
Working with Phase Calculated Fields
When building an evaluation form to use in reviewing applications, you may include fields that require reviewers to provide a numeric response (e.g., number or scale.) If you wish to make calculations based on these fields, you can create Phase Calculated Fields. For example, you can create a phase calculated field to take an average of how reviewers rated an applicant's Personal Statement.
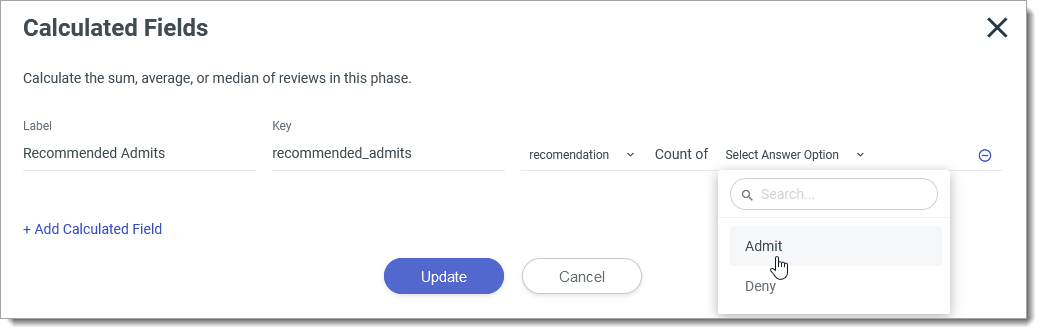
Phase Calculated Fields can also be configured to count the number of reviewers who responded in a specific way. For example, if your evaluation form has a Multiple Choice question with options including Yes, No, and Unsure, you can create a Calculated Field that tallies how many reviewers selected Yes. For more advanced calculations, you may consider working with Evaluation Calculated Fields or Custom Properties, both of which are designed using JavaScript expressions.
Creating Phase Calculated Fields
To add a Phase Calculated Field, you'll first need to have created an evaluation form that contains the fields you wish to use in your calculation. Then:
- Create a new Phase or edit the Phase where the evaluation form should be used.
- Add your evaluation form in the Review Form area, then click Add under Calculated Fields.

- Click Add Calculated Field on the window that appears.

- Use the Select Field drop-down to choose a field to use in your calculation. The fields shown in the drop-down are those that are in your selected evaluation form.
- Use the Label field to write a label for the Calculated Field. This is how it appears in other areas of the software (e.g., when adding the field to the Application Summary or when using it as a filter). Use the Key field to write a key. This is how the data is stored in the background of the software.

- Use the last drop-down to select what type of calculation you wish to use. If you're working with a numeric field, you can calculate its Sum, Average, or Median. If you're working with multiple choice fields, you can calculate the total number of times any option was selected by a reviewer.
- If desired, click Add Calculated Field to create another Calculated Field.
- When you're done adding fields, click Update.
- Click Update again to save your changes to the Phase.
Using Phase Calculated Fields
Once you've created Calculated Fields, you can use them in several areas. For example, you can add add a filter on the Application Grid to find all applications that have above or below a specific value for one of your Calculated Fields.
To add a filter using a calculated field:
- Navigate to the Applications View and click Add Filter.
- Click Phase Calculated Field.
- Select the Phase, Calculated Field, Operator, and Value.

- Click APPLY to update the Application Grid with applications that match your query. In the example above, only applicants with an average Interview Score of greater than 10 will appear on the grid.
Finding Review Results
Once reviews have been completed, you can find their results in several areas.
- Navigate to an application, open the reviews pane and and click All Reviews.

- Click any review to see its results.
- You can also find the results of an Evaluation Calculated Field in the Evaluations section of a PDF export.

Managing Review Teams
As an administrator, you can establish teams that will work together to complete reviews or tasks. For example, if you conduct reviews or interviews and you have separate groups of colleagues who handle these, you can organize them together in a team. Teams can be used in assigning reviews, distributing tasks, or establishing Workspaces.
To create a team:
- Navigate to the Organization section of the Settings Menu and click Teams.
- From the Teams page, you can review and edit existing Teams. Click the plus sign at the top right to create a new team.
- On the New Team page, give the Team a name. If you have several teams, you can create and assign categories to group your teams (e.g., Interviewer Teams, or Reviewer Teams).

- Select which existing users should be managers or members of this team. Managers you establish here do not have additional permissions and are not included in any assignments that are distributed to the team. You may also save your team without adding any members, as they can be added later from the Teams page or directly from each person's Users page.
- Click Create Team.
You can edit existing teams from the Teams page by clicking the name of the team. You can delete or categorize teams by clicking the checkbox to the left of them, and selecting the desired option at the top of the grid.