Creating an Interview Session and Schedule
Video Overview
Session Types
A session is a period during which you conduct interviews (e.g., a full day, half-day, etc.). When you create a session, you select the session type: standard or basic. You then add key information, such as the date, start time, number of applicants you plan to interview during the session, etc. You can also add scoring questions at any time before the interview day.
Choose a standard session if you plan to run your entire interview day within ResidencyCAS, including:
- Sending interview invitations.
- Building your schedule.
- Hosting interviews either through:
- The Interview Portal’s built-in video platform (Zoom), or
- External tools like Microsoft Teams, WebEx, etc. (but still using ResidencyCAS to manage the full flow).
- Scoring and ranking candidates.
Standard sessions are best for programs that want a centralized, end-to-end solution within ResidencyCAS.
Choose a basic session if you're only using ResidencyCAS for a portion of the process, specifically:
Basic sessions are best for programs with more complex or custom scheduling needs. These programs may prefer to handle scheduling and interview execution outside of ResidencyCAS, but still want to use it for invites and scoring.
Multiple Sessions
If your program offers multiple interview sessions, note the following:
- Interviewers can participate in two different sessions on the same day, but only if the sessions don’t overlap. For example, a 9–11 AM session and a 1–4 PM session are fine. However, booking an interviewer for two sessions that occur at the same time (e.g., two 9–11 AM sessions) will result in an error, as it should. This applies to both basic and standard sessions.
- Applicants can confirm two different interviews on the same day (e.g., one in the morning and one in the afternoon). However, the system displays a clear warning, reminding them that it’s their responsibility to avoid scheduling conflicts.
- Applicants cannot select two sessions from the same program when they are self-scheduling. When a program offers multiple sessions, applicants can choose only one. Although they may be able to specify a second-choice session or join waitlists for other sessions, they cannot confirm attendance at two sessions for the same program at once. After the applicant confirms their first session, they must be placed back in the Invited and Ready for Scheduling status to select an additional session. This allows your program to conduct follow-up interviews with applicants.
Create a Session
Step 1: Add a New Session
- From the left menu, click Sessions, then click + New Session at the top right.

- Select the Session Type from the drop-down.

To duplicate a session and its linked meeting rooms, click the Duplicate Session button in the top-right corner of the session details page.

Step 2: Configure Session Settings
Depending on how you want to run your interview, adjust the settings to match your session format.
| Setting | Description |
|---|---|
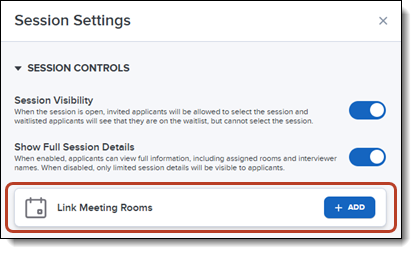
| Session Visibility |
Refers to whether applicants can see the session in their version of the Interview Portal. When you enable this option, applicants who log in to the Interview Portal can see and select the session. Note: we recommend leaving this option disabled until after you've configured everything and are ready to invite applicants to interview. To enable later, open the session and use the gear icon in the top-right corner to adjust this setting. |
| Show Full Session Details |
Refers to whether applicants can see the interviewer and interview room names. When you enable this option, applicants will see this information as soon as the session becomes visible to them. When disabled, applicants won't see the interviewer or interview room names at any time. |
| Link Meeting Rooms | Use this to associate specific meeting rooms with each session. When meeting rooms are linked and automatic assignments are enabled, all applicants assigned to the session will be invited to the linked meeting rooms. When self-scheduling, applicants will see the session along with the linked meeting rooms when selecting an interview day. |
| Session Details |
Note: by default, self-scheduling is enabled for your program, but can be disabled. |
| Session Scoring |
This establishes the range for scoring, whether you’re using a single overall score for the applicant or calculating an overall score from itemized ratings. Setting the range here ensures that, despite different scoring practices (e.g., some rooms using single scores, others using itemized scoring), scores remain consistent across all interview rooms. |
| Applicant Distribution |
Click Setup next to Applicant Distribution.
Once you've configured everything, click Save. |
|
Example of Completed Session Settings
|
Example of Standard Session Applicant Distribution
|
Example of Basic Session Applicant Distribution
|


Step 3: Room Setup
Once you've configured your session settings, follow the steps below to set up your rooms by adding interviewers, scoring, and, if you're using a standard session, a schedule. These steps can be done immediately or at a later time.
- Click the pencil icon next to the first room.

- Click the Details tab to:
- Edit the room name.
- Add interviewers – you can add interviewers now or at any time prior to the interviews.
- Add interviewer instructions.
- Select the application PDF you want to make accessible to interviewers.
- Add an external video call link (e.g., a Zoom link). If you add a link, the interviews will take place on that platform when applicants and interviewers join the room. If you do not add a link, the interviews will occur using the Interview Portal's native video conferencing platform.

- Click the Schedule tab to add the Interview Duration and the Review Duration, which will be used for all multiple/rotating interview rooms. After you enter the durations, click Apply to generate the schedule. After the schedule has been generated, you can add breaks and additional time slots to the right of the interview start times.
Note: this is only available for rooms created in a standard session.

-
In the Scoring tab, configure your scoring system. You can enable Single Score (an overall score for the applicant) or Itemized Score (a set of competencies or questions that are individually scored). If using the itemized score, you can select an existing scoring form from your library or create a new one. If you want to apply this form in other rooms, enable the Apply this scoring form to multiple rooms option and select the applicable rooms.
Note: the session scoring range you set earlier in the process applies to both options. For instance, if the range is set to 1–10, you can enter a single score within that range. If using itemized scores, the average of individual 1–5 ratings will be scaled up to match the 1–10 range.

- Once you've configured the Details, Schedule, and Scoring for the first room, click Save & Continue to move to the next room.
- When finished, click Save & Exit, then Save once more to lock everything in.
Linking Meeting Rooms to a Session
When creating or editing a session, you can link meeting rooms to it. This feature can automatically assign applicants within that session to the designated meeting rooms. Furthermore, it includes the meeting rooms in the interview day’s schedule, visible to applicants during the self-scheduling process.
- In the Session’s Settings, click + ADD to link a meeting room.
- On the following page, choose the corresponding meeting room from the drop-down. This process can also be applied when creating meeting rooms. If your meeting rooms have not yet been created, you can link them during their setup.
- Click Save to link the meeting room to the session.
Editing Linked Meeting Room's Applicant Assignments
Once a meeting room is linked to a session, you can modify its applicant assignments.
- In the Session's Settings, click the pencil icon to edit the linked meeting room.

- Click + Applicants to edit the assigned applicants.
- Depending on whether all applicants assigned to the session should be automatically invited to the meeting room, toggle the Automatically Assign Applicants button to ON or OFF. When toggled OFF, you can manually assign applicants to the Meeting Room by selecting available applicants.

- Click Save when you are finished selecting your assigned applicants.
Finalize Your Interview Day
Once applicants accept their interview invitations and sign up for sessions, you can monitor how the sessions fill, make adjustments as needed, and finalize the interview schedule, which sets the times and pairings of applicants with their interviewers. Depending on the session type and its settings, the schedule is either created automatically or generated when you click Create Schedule.
You have full control over the schedule and can make adjustments as needed. For example, you can:
- Move applicants by clicking and dragging them.
- Remove, replace, or switch an applicant using the Manage Applicants menu (three dots) next to their name.
- Use the pencil icon in the top-right corner of any room to add/remove interviewers, adjust times, and add breaks.
- Clear the schedule entirely.
- Manually build the schedule.
- If using Applicant Cohorts, change an applicant's assigned cohort.