Filtering Applicants
SlideRoom allows you to filter your applicants to isolate a subset of your choice. For example, you can find all applicants from a specific location, all applicants with a completed reference, or all applicants above a certain rating.
Creating Filters
To add a filter:
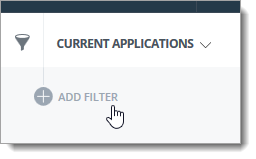
- Go to the Applicants View and click ADD FILTER from the menu on the left.
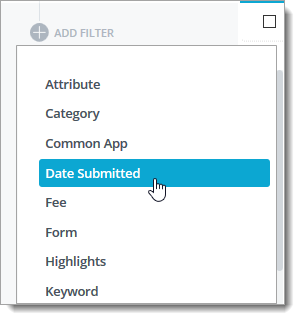
- From the menu that appears, click the data point you'd like to use in your filter.
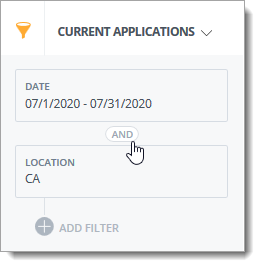
- Complete the filter by establishing your conditions and clicking APPLY.
- Continue to add filters by clicking ADD FILTER and repeating this process.
- If you've added more than one filter, use the AND/OR toggle to adjust whether the matching applicants must meet any of your conditions or all of your conditions.
- The applicants who match your criteria appear in the Applicants window.
- To save your filters for quick access, click SAVE at the bottom of the page. This creates a Saved View.

- Enter a name for your Saved View and click SAVE.
Working with Saved Views
Saved Views are sets of filters you've saved in SlideRoom for easy access. You can create a Saved View by building filters from the Applicants view as described above.
Accessing Saved Views
To access your Saved Views:
- Return to the Applicants view and click SAVED VIEWS on the bottom left.
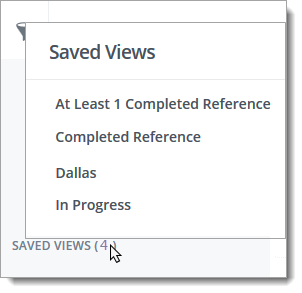
- Select your desired Saved View. The filters associated with this Saved View reappear on the left, and all applicants matching these filters appear in the Applicants window.
- Close this view and return to the standard Applicants view by clicking the X at the top of the left pane.
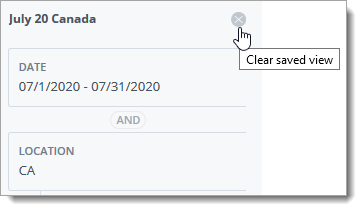
Modifying Saved Views
Once you open a Saved View, you can modify it as desired by clicking ADD FILTER, or by hovering your mouse over an existing filter and clicking the Remove Filter button.

You can save the modified view by clicking SAVE, or click SAVE AS to save the view without adjusting the previously existing Saved View.
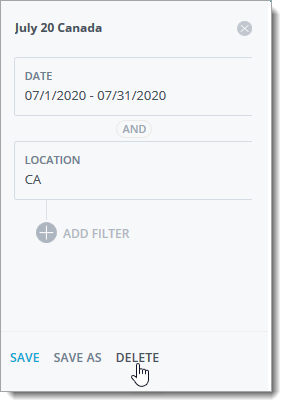
To delete a Saved View, open it and click DELETE at the bottom of the left pane.
Assigning Saved Views
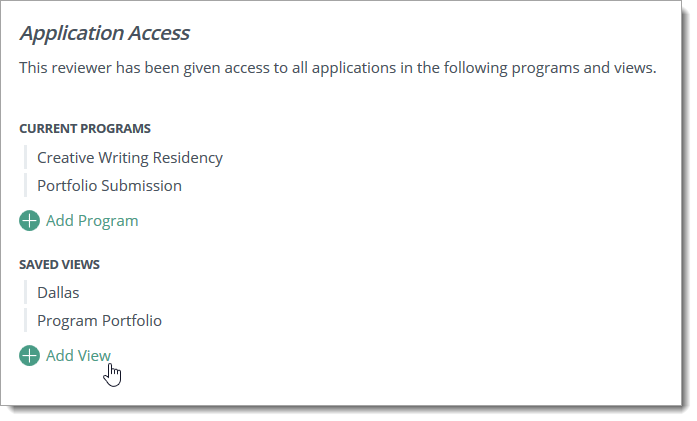
SlideRoom allows you to grant reviewers access to your Saved Views.
To assign a Saved View:
- Navigate to the Users view.
- Click on an existing user, or click +NEW USER to create a new user.
- From the Application Access area, click Add View and select your desired Saved View. A confirmation message appears to inform you the applicants have been assigned to this reviewer.
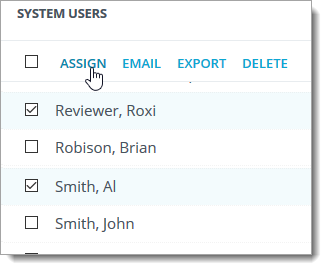
You can also assign Saved Views to multiple users in batch. To do this:
- Navigate to the Users View.
- Check your desired users and click ASSIGN at the top of the grid.
- From the menu that appears, click SAVED VIEWS, then select which of your Saved Views you'd like to assign to the selected user(s).