Managing Engage Meetings
Introduction
The Engage tool is used to schedule and manage walk-in appointments for students. Advisors can customize their Engage meetings based on a student's specific requirements, utilizing meeting reason information and the student's Personal Information, all readily accessible. This article is intended for advisors to learn how to:
- Access Engage.
- Start a new Engage session.
- Manage Engage appointments in the Appointment calendar.
- Add Notes during the Engage session.
- Review completed meetings.
- Add multiple students to an Engage meeting.
Accessing Engage
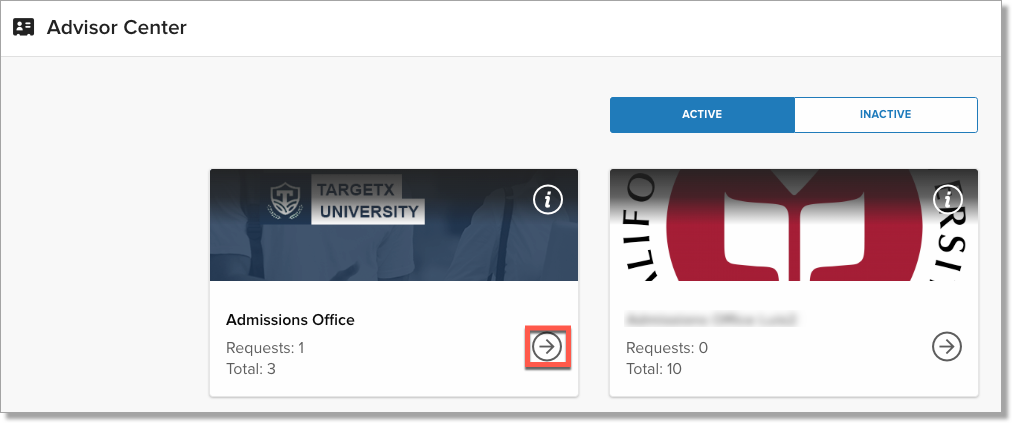
As an advisor, you must log in to Salesforce to access Engage. Your System Administrator can provide the appropriate credentials for your institution. Your Administrator will have assigned you to one or more rooms. Select the room to access by clicking the :
Starting an Engage session
Students are added to the Engage queue either by checking in, or students can be added by a user with the appropriate permissions. Depending on your institution's policies, you might also be able to add students to your queue. To start a session, click Pick Up from the Queue tab:

Managing Your Student Meetings
After logging in to Engage and accessing your meeting rooms, you can view counts on:
- Queue - includes all students currently waiting.
- My Meetings - meetings you have completed (including No Show) and meetings in the queue where someone has requested you.
- Completed - all completed meetings in the room, regardless of who ran them.
Note: completed meetings will be removed from the Room Queue tabs at the end of each day.
- Log in to Salesforce and access the Engage tab.
- If you are assigned to only 1 room, your Appointment Calendar will display.
- If you are assigned to multiple rooms, any rooms in which you are listed as an 'Advisor in Room' will display. Select the
icon for the room you wish to access.
- Update your Status by clicking the Available/Unavailable toggle:

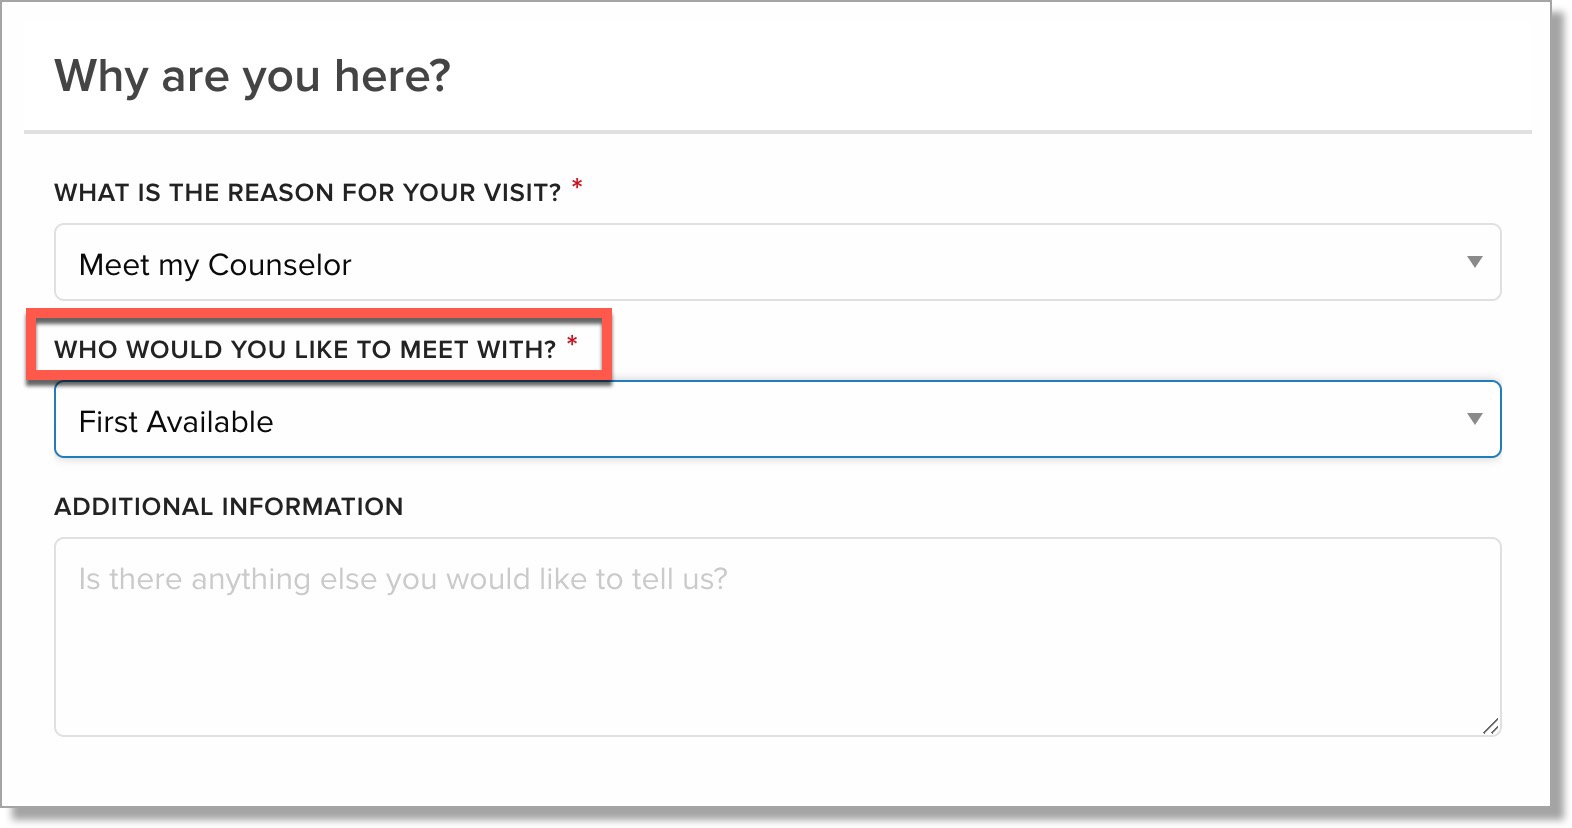
- If you are listed as Available, your name will be displayed in the 'Who would you like to meet with?' picklist during check-in:
- Clicking the Queue tab will display your queue.
-
Select a student from the list by clicking Pick Up. You can send a Custom SMS message to the student and in cases where you are having a Virtual meeting, you can also include the Meeting URL; Click Send or Cancel.
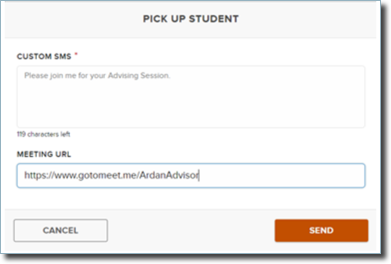
Note: if you're entering a Meeting URL, include HTTPS:// or HTTP:// at the beginning of your link. Otherwise, Engage won't recognize it as a valid URL.
- Select the Start Session button. The Duration of the meeting and the number of additional students Waiting will display in the bottom left of the window.
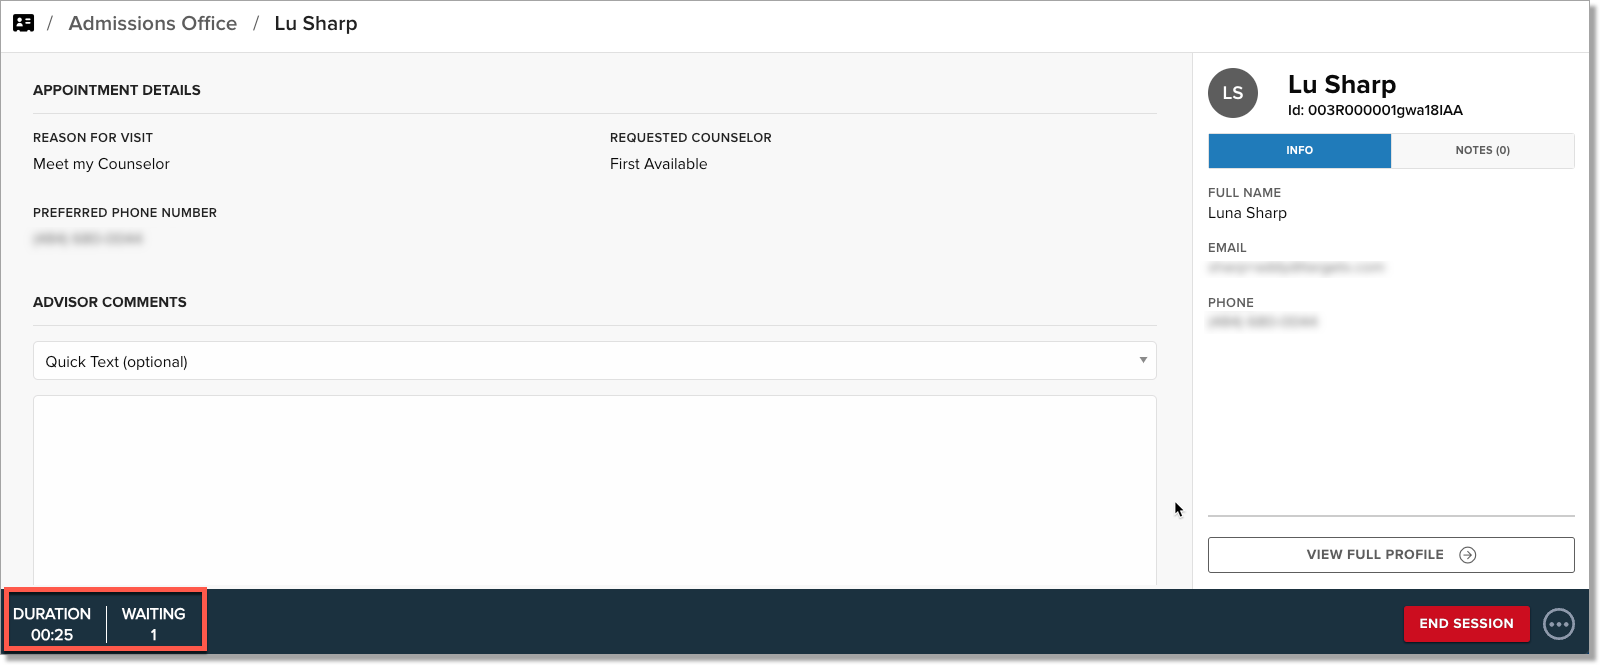
- Enter any Notes or use Quick Text to document your meeting.
- When your meeting is finished, Save your Notes and select End Session, or, if the student needs to meet with a different advisor, select the three dots icon and then select Return to Queue.
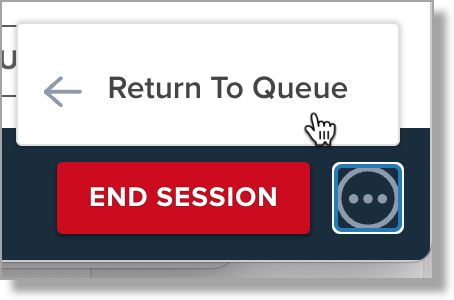
- If Return to Queue is selected, you can update or add information about the student, such as a reason or additional information:

- If additional students are waiting, you can select the Next Session button to proceed to the next student.
Adding Notes during the Engage Session
Notes are displayed in the right-side panel under the Notes tab with the Date and Advisor that created the note. Additionally, you can select or save notes as Quick Text. Notes entered here will be referenced in the Notes-related list.

You can Edit or Delete notes by clicking on the Notes tab in the right-side panel. These Notes can also be viewed on the Notes-related list on the Contact.
Managing Engage Group Sessions
You can add multiple students to a single Engage session, allowing you to facilitate group sessions. Select up to 200 students to be added to an Engage session from your meeting room; choose to Select All to add all the students from the queue or choose Pick Up for each student you wish to add to the session, then choose Add to Session. A count of the selected students will appear on the Add to Session button.
When you start the session, each student included will receive the Advisor Pickup SMS Message specified in Room Settings. Before the session begins, you can add additional participants by clicking the Add Another Participant button. You can choose to add a New student via the New tab:

Or select a student who has already checked in using the In Queue tab:

Adding Notes for Group Sessions
To add Notes for all the students in the session, after starting the Session, choose All in the Select a Student picklist and then add Quick Text or enter your notes in the text box. To add a note for only one student in the group, select that student from the Select a Student picklist before entering notes.
Returning a Group to the Queue
You can ‘return all’ to the queue or return a single contact. To return All students, choose Return to Queue from the main meeting page:

You’ll be asked to confirm that you want to return the group to the queue:

Managing walk-in appointments in your Appointment Calendar
If the Events package is installed, you will see your Appointment Calendar alongside your room queue in Engage. This allows you to run appointments in the same view as walk-in Engage meetings, take notes, and track the duration of appointments for the day.
- You can view everything from your Salesforce Calendar.
- Completed Engage advising sessions will display on the Engage Calendar but will not be clickable.
- Canceled events will not display on the Engage Calendar.
- Appointment availability and exception blocks will not be shown on the Engage Calendar.
- Calendar hours will display a full day (12 AM to 12 AM).

Editing the 'Meeting Reason' a student selected
You can't update the Meeting Reason while the student is in the queue or during the session, but the Activity record can be updated after the session is closed:
- Navigate to the Contacts (Student) tab.
- Click the student where you want to update the Meeting Reason.
- Select the Activity related list.
- Click Edit next to the Activity you wish to update.
- Update Related To to the new Meeting Reason.
- Scroll to the Additional Information section and update Engage Meeting Reason.
- Save your changes.
Reviewing an Engage meeting after it ends
- Navigate to Engage.
- Select the
 for the room where the meeting occurred.
 - Click the Completed tab.
- Click the Review button.
- You can add additional notes or edit existing notes as needed.
- Click Done Reviewing.
Viewing Engage Advising Sessions
Walk-in Advising Sessions are tracked in Activity History. The subject is listed as Walk-in Advising Session , and the Related To field will list the Meeting Reason selected during check-in to Engage.

Advisors can also view Engage Appointments on the Appointment Calendar:

Engage Statuses in Activity History
- Queued - The student is in the Queue but has not been picked up yet.
- Queued - Postponed - Not automatically assigned.
- Ready - Student has been ‘Picked Up’ by the Advisor.
- In Progress - Advising session has been started.
- Completed - Advising Session was started and ended.
- Canceled - Not automatically assigned.
- No Show - Student did not show up for Advising appointment, Advisor selected ‘No Show’.
- Returned to Queue - The meeting was started, but the student was returned to the Queue to meet with a different advisor.
Viewing Front Desk notes recorded in Engage
Advisors can view/edit the Front Desk Note from the Queue:

Once you pick up the Student, the Front Desk Note appears under Appointment Details:
