Travel Planner Overview
Travel Planner allows you to group travel events into a Trip. You can view Trip records, individually or in aggregate, by staff, location, and date. Directors or Deans can view all trips for a year and month by location and quickly identify who is where and for how long.
- Travel Planner integrates with TargetX Events and Appointment Scheduler.
- The TargetX Builder provides access to the Travel Planner, or you can navigate to the Travel Planner tab.
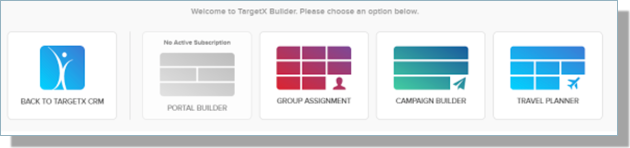
Once you are in the Travel Planner, the TargetX Builder icon will take you back to the TargetX Builder.
![]()
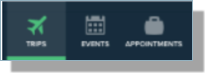
The bottom navigation bar provides links to additional information for building your Travel Plans.

- TargetX Builder will navigate back to the TargetX Builder interface.
- Trips navigate the user to the Trips list.
- Events navigate the user to the Organization Events Calendar.
- Appointments navigate the user to the Appointment Scheduler Calendar.
Trips list
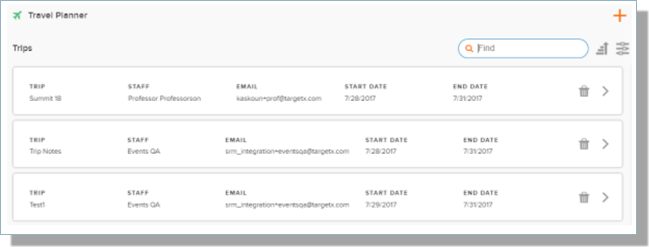
The Trips list enables you to view a list of upcoming trips. By default, the next 50 trips will display; additional trips will display upon scrolling to the bottom of the list.
The Trips list can be accessed by using the bottom navigation bar:
The following information will be displayed for each Trip in the list:
- Trip is the name associated with the Trip.
- Staff indicates the Staff member responsible for the Trip.
- Email is the email address for the Staff member.
- Start Date is the start date of the Trip.
- End Date is the end date of the Trip.
Selecting the > navigates you to detailed information about the Trip, such as Events, Trip Information, and Notes.
See Adding Events to a Trip.
Note: The list window includes 'infinite scroll' capabilities, allowing you to load additional records onto the page simply by scrolling a list.
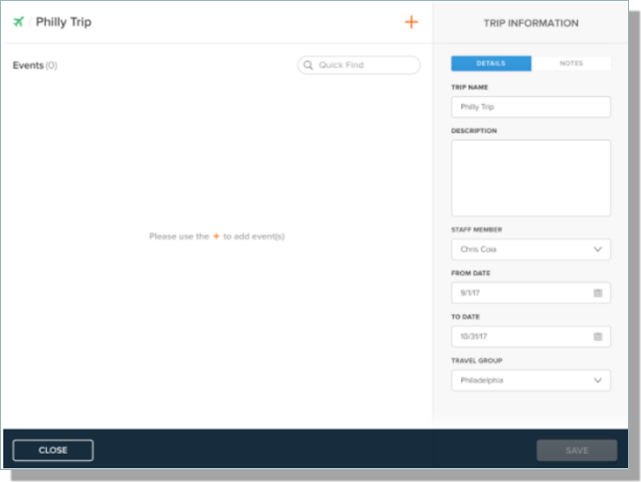
Trip Information Panel
The Trip Information panel will display when you select a trip from the Trip list view. Information such as Trip Name, Description, Staff, and Start/End Dates will display.
Event Information Panel
Selecting the icon will display the Event Information panel. Users can view information about the Event, such as Event Contact, Location, Date/Time Information, and Staff & Volunteers. You can toggle between Details and Notes by using the tabs in the panel:
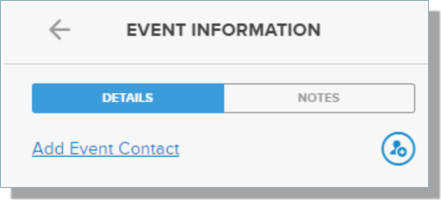
The Main Event Contact will be displayed or can be added from the Event Information window. The Event Contact is stored on the Organization Event record.
Searching
You can search lists by either the Trip Name or Staff.
Note: list windows include 'infinite scroll' capabilities, allowing you to load additional records onto the page simply by scrolling a list.
Sorting and Filtering
You can quickly access sorting and filtering options using the icons in the top right of the window:
Using the icon allows you to quickly switch from an Ascending sort to a Descending sort.
The Sort/Filter icon allows you to edit sort and filter options on the window. Selecting the icon displays the default sort (Name). Select the chevron [>] to expand more Sort options; Staff, Email, Trip Name, Start Date, and End Date.
To Filter, select the chevron [>] to expand filtering options: Trip Name or Staff. As you enter text, available options will display. Check the lists you wish to filter. There is no default filter.
Your selections will display at the bottom of the window, along with an option to Clear. Selecting Clear will remove ALL filters. You can remove individual selections by selecting the X:
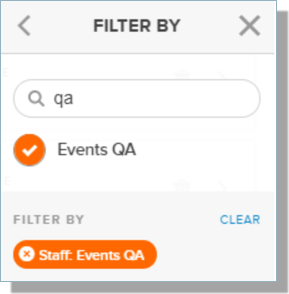
The list will update automatically as you make selections. A count of the number of filters applied will be displayed on the icon.
Note: Sorting and Filtering will apply to ALL data, not just the data visible in the window.
Building a Trip
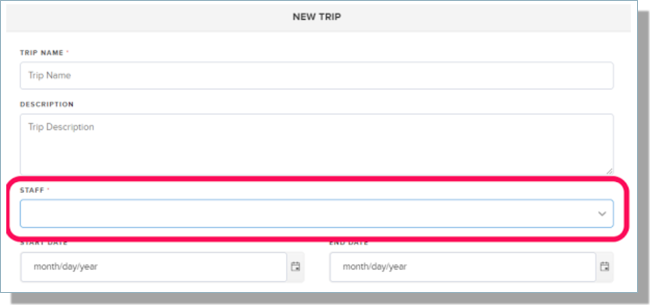
Create a new trip by selecting the + button on the top right. The following details are available:
- Trip Name
- Description
- Staff Name
- Date Range fields
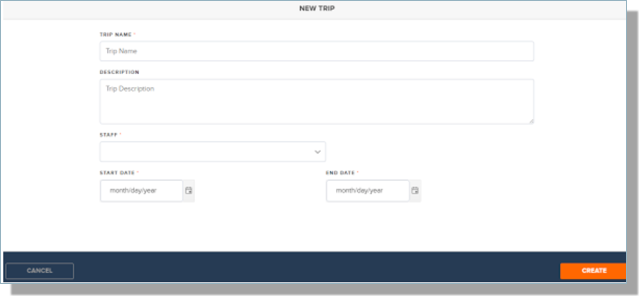
Once you select the Create Trip button, you can add Events or Notes to the Trip by selecting the + button on the top right.
Adding Events to a Trip
When you create a new Trip, you are directed to the Add Event(s) window. Events that fall into the Trip's Date Range will be available to add to the Trip. The Add Event(s) page is presented in a timeline format. Select the icon to view details about each Event. Select the
button to add the Event to your Trip. When you've finished selecting events, click the Add Event(s) button. Sort and filter options allow you to limit the list to meet your needs. After selecting all the Events for your Trip, select the Add Events button in the bottom right of the window to save the changes.
.png?revision=2)
Select the icon to view Event Information, such as:
- Contact
- Whether the Event is Confirmed
- Event Name
- Event Description
- When the Event occurs.
- Where the Event is located.
- Staff & Volunteers
Removing Events from a Trip
Select the appropriate record from the Trips list to remove Events from a Trip. In the Events window, select the icon to remove the Event from the Trip. This will NOT delete the Event from the TargetX CRM.
Trip Notes
Trip Notes allow you to add notes about the Trip. Notes can be viewed by selecting Trip Information and then selecting the Notes tab. Select the Add Trip Note button to add a new note. Multiple notes can be added/removed/edited as needed.
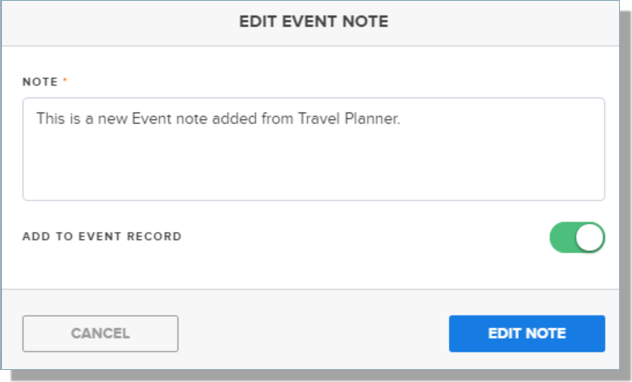
Event Notes allow you to add notes about a trip's events. Notes can be viewed by selecting an Event or clicking on Event Note in the Trip Information panel. Select the Add Event Note button to add a new note. Multiple notes can be added/removed/edited as needed.
- Trip notes apply to the entire Trip (and are viewable ONLY on the Trip).
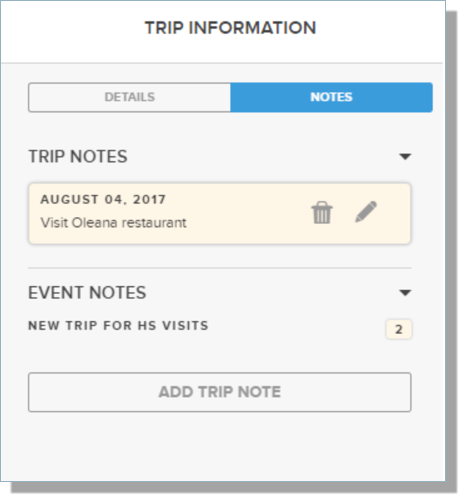
- Event Notes can either be specific to an Event that is part of a Trip or specific to an Event. If an Event note is entered as 'Add to Event Record,' then the note will display anytime the Event is added to a Trip. Event notes that are entered WITHOUT selecting 'Add to Event Record' will ONLY display on the Event for that specific Trip.
Note: Notes previously saved in the Event Note field on Event records will not display in Travel Planner.
Editing Trips
To edit a Trip, you must select the > from the Trip list. The Trip Information panel allows users to edit the Trip information such as Trip Name, Description, Staff, Email, and Date Range. Select Save to save your changes.
Deleting Trips
Users with the appropriate permissions can delete Trips from the Trips list by selecting the icon. Users are prompted to confirm before deleting the Trip and related Event itinerary. Note: When deleting a trip, the itinerary of events and all Trip and trip-related event notes will be deleted.
Custom Settings
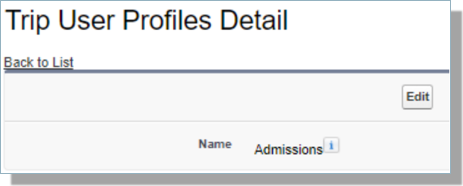
Trip User Profiles
The Trip User Profiles Custom Setting determines which users are available in Travel Planner.
- Navigate to Setup and search for Custom Settings.
- Select Manage next to Trip User Profiles.
- Select the New button.
- In the Name field, enter either the Profile Name or the Profile Salesforce Id for those who should be listed as Staff in Travel Planner.
Note: The Profile Name MUST match exactly to display in the Staff picklist.