Using Custom CSS in your Online Application
DISCLAIMER: This CSS tag is not supported or maintained by TargetX, and is simply meant as an example of how you may choose to use CSS within our products. Some or all of the customizations these tags provide may change or no longer apply to your instance at any time. If at any time the CSS impedes expected functionality in the TargetX product, our recommendation will be for you to remove the CSS to regain functionality.
Online Application: CSS Examples
You can customize your Community Theme with CSS code by taking the following steps:
- Navigate to the Community Themes tab.
- Select to Edit the Theme you want to update.
- In the Custom CSS field, you can paste some, or all, of the following examples.
- Save your changes.
Note: You can choose/change the color references in these examples by searching for a website that displays the Hex number and color. For example: http://www.color-hex.com/. You can also Copy colors from an existing logo or image by using free tools, such as ColorPick Eyedropper (available as an Add-On to Chrome).
/* Updating the hero image - this is what displays for the Community login page */
.targetx-dashboard-hero {
background-image: url("https://yourdomain.com/hero.png"");
}


/* Top left corner logo image- this is what displays for the Community login page  */
.targetx-header-university-icon {
background-image: url("https://yourdomain.com/logo.png"");
}
If you do not want the Hero image or Logo image to display, you MUST set the above code to indicate NONE. For example:
/* DO NOT DISPLAY hero image */
.targetx-dashboard-hero {
background-image: none;
}

/* DO NOT DISPLAY Top left corner logo image */
.targetx-header-university-icon {
background-image: none;
}
/* Header color */
.targetx-header {
    color: #66000 !important;
}
/* Standard button color */
.targetx-button {
  background-color: #660000 !important;
  box-shadow: 0 2px 0 red;
}
/* Changing the style of the “required” fields */
.targetx-input-label.targetx-required:before {
    font-family: "Times";
    display: inline-block;
    font-weight: normal;
    font-style: normal;
    text-decoration: inherit;
    content: "\27A5";
    position: absolute;
    font-size: 5px;
    left: -10px;
    top: -4px;
    vertical-align: middle;
    color: #585e69;
    font-size: 25px;
    left: -31px;
    color: #d81118;
}
/* Change the style of a section header that has required fields */
.targetx-section-header .targetx-required:before {
  font-family: "targetx-icons";
  display: inline-block;
  font-weight: normal;
  font-style: normal;
  text-decoration: inherit;
  content: "\27A5";
  position: absolute;
  font-size: 21px;
  left: -27px;
  top: -5px;
  -webkit-transform: translateY(-2px);
  transform: translateY(-2px);
  vertical-align: middle;
  color: #585e69;
  color: rgb(216, 17, 24);
}
/* Hiding the University Name and Logo from overlapping with the hero image  */

div.targetx-dashboard-hero-info {
display:none;
}

/* Align the text for radio buttons */

.radio .outer {
    margin-right: 10px;
}

.targetx-option-label {
    display: flex;
    padding-left: 0 !important;
}

label.radio {
    margin-bottom: 15px;
}
/*Submit Success logo - The logo is in the middle of the page just above the "thank you...This is the text that recommenders see after successful submission of a recommendation. */

.targetx-submit-success .targetx-submit-success-logo {

background-image: url("https://yourdomain.com/site_label/resource/static_resource_13_digit_numerical_value/static_resource_title");
background-repeat: no-repeat;
width: 70px;
height: 70px;
}
Recommended Image Dimensions
targetx-dashboard-hero = 1440px x 400px
targetx-header-university-icon = 57px high x <user defined>
Configuring the Hero Image to resize for mobile
- Navigate to the Community Theme tab.
- Select the Theme for your Online Application.
- In the Custom CSS field, enter the following:
figure.portal-hero { background-size: cover !important; background-repeat: no-repeat !important; background-position: center !important; } - Save your changes.
Hiding the 'Application Process Name' in the application
In Applicant Dashboard...
- Navigate to the Community Theme tab.
- In the Custom CSS field, enter the following:
.app-process-name{display:none;}
Applies to:
In Portal...
- Navigate to the TargetX Builder tab.
- Select the Portal Builder option.
- Locate and select to Edit the Portal where you wish to include CSS overrides.
- Select the Layout tab and insert a new Section.
- Click on the new Section and click on Video under the Add Widget heading.
- Click into the Embed Code field and enter your CSS override code, beginning and ending with <style>.
<style>
.app-process-name

{display:none;}


</style>
-
Save and Publish your changes.
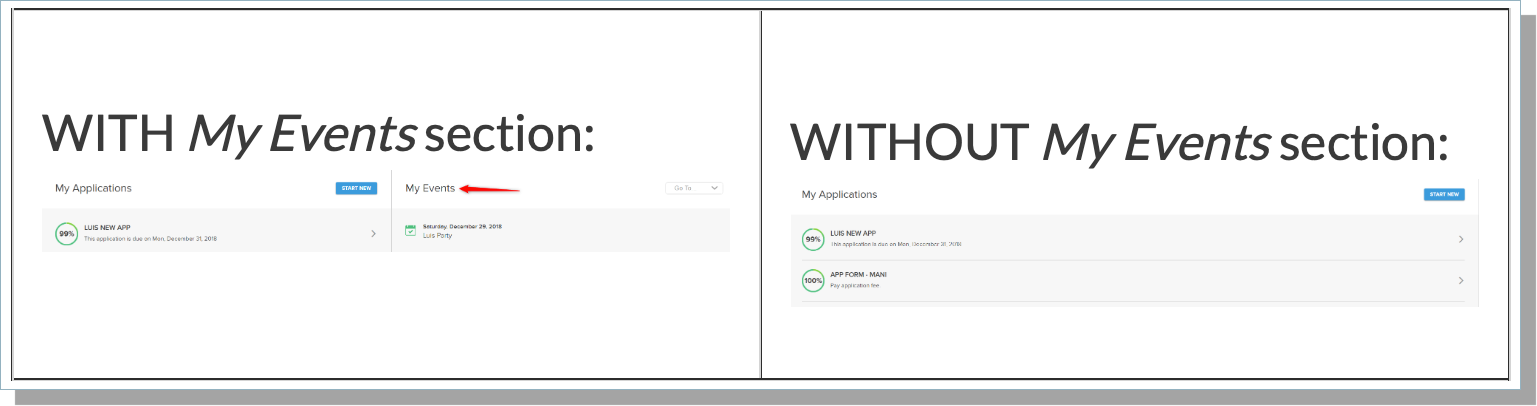
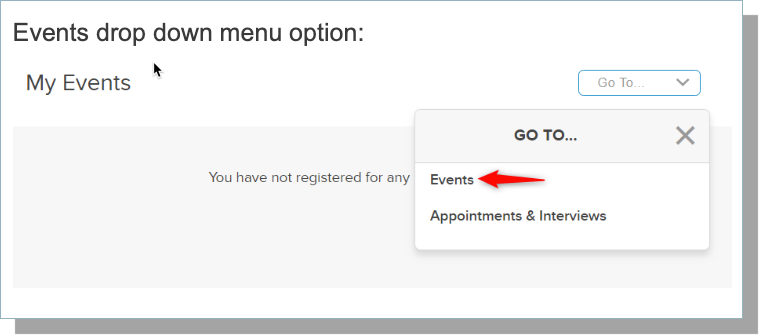
Hiding the Events column in Applicant Dashboard
- Confirm Communities 1.9 or higher is installed.
- Navigate to the Community Theme tab.
- In the Custom CSS field, enter the following:
- For Applicant Dashboard version 2006.3 or higher you must use the code listed here.
.my-events{display:none;}
.menu-item.events-nav-link {
display: none;
}
.menu-item.appts-nav-link {
display: none;
}
.my-events{display:none;}
-
This will hide the entire section titled My Events, thus disabling access to Events and Appointments from the dashboard.
.menu-item.appts-nav-link{
display: none;
}
-
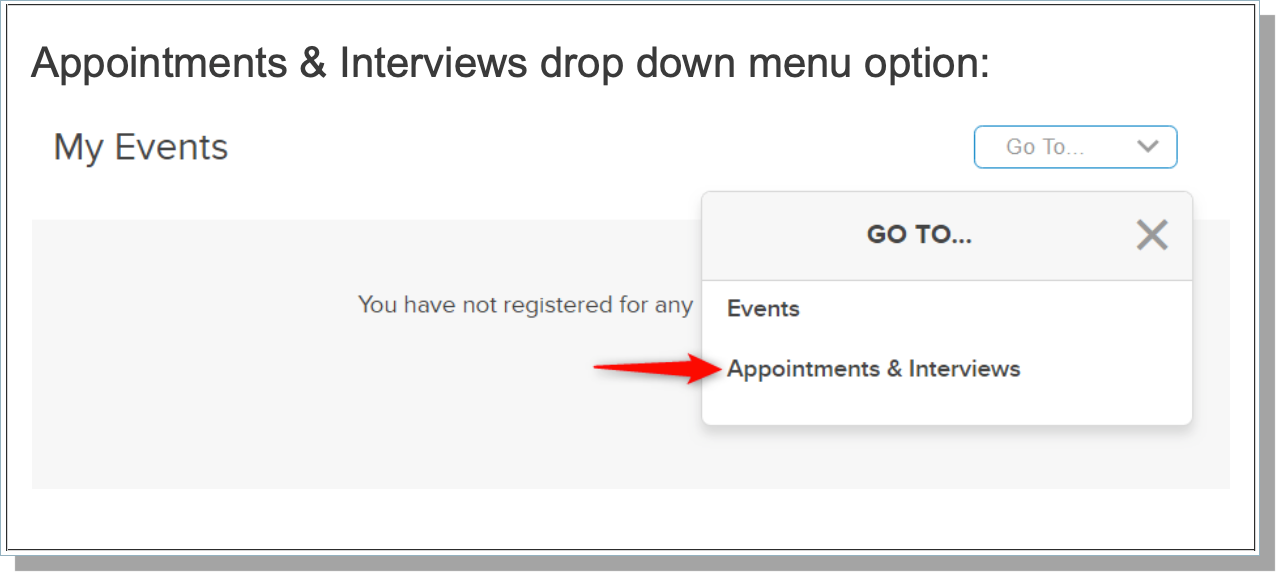
This will hide Appointments & Interviews from the drop down menu.
.menu-item.events-nav-link {
display: none;
}
-
This will hide Events from the drop down menu.
- Save your changes.
For Applicant Dashboard version 2006.3 or higher you must use the code below:
.go-to-events { display: none; }

.go-to-appointments { display: none; }
If you want to hide the entire My Events section, you need to add the following CSS:
/* This hides the MyEvents section from the Applicant Dashboard */

.portal-block--borderless {
display: none;
}
This hides the Appointment Scheduler link in Applicant Dashboard:
    .go-to-appointments { display: none; }
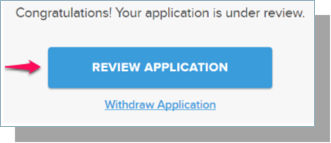
Hiding the option to 'Review Application' in the application
- Navigate to the Community Theme tab.
- In the Custom CSS field, enter the following:
.review-app{display:none;}
Applies to:
In Portal... 
- Navigate to the TargetX Builder tab.
- Select the Portal Builder option.
- Locate and select Edit the Portal where you wish to include CSS overrides.
- Select the Layout tab and insert a new Section.
- Click the new Section and click on Video under the Add Widget heading.
- Click the Embed Code field and enter your CSS override code, beginning and ending with <style>.
<style>
.review-app

{display:none;}


</style>
-
Save and Publish your changes.
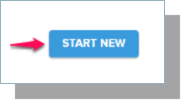
Hiding the 'Start New' application button in the application
If you want to hide the button that allows students to start a New application, follow these steps:
In Applicant Dashboard...
- Navigate to the Community Theme tab.
-
In the Custom CSS field, enter the following:
.new-app{display:none;}
Applies to:
In Portal...
-
Navigate to the TargetX Builder tab.
-
Select the Portal Builder option.
-
Locate and select to Edit the Portal where you wish to include CSS overrides.
-
Select the Layout tab and insert a new Section.
-
Click on the new Section and click on the App advanced widget.
-
In the Content tab, use the toggle to turn OFF 'Show "Start New Application" button':
-
Save your changes.
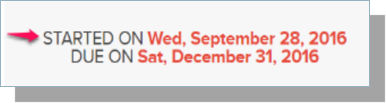
Hiding the 'Started On' or 'Due On' fields in the application
You can hide the 'Started On' or 'Due On' fields by adding them to the Custom CSS.
In Applicant Dashboard...
- Navigate to the Community Theme tab.
-
In the Custom CSS field, enter the following:
.started-on{display:none;}

-OR-

.due-on{display:none;}
Applies to:
In Portal...
-
Navigate to the TargetX Builder tab.
-
Select the Portal Builder option.
-
Locate and select to Edit the Portal where you wish to include CSS overrides.
-
Select the Layout tab and insert a new Section.
-
Click on the new Section and click on the App advanced widget.
-
In the Content tab, use the toggle to turn OFF "Show 'Deadline' Date"
-
In the Content tab, use the toggle to turn OFF "Show 'Started On' Date"
-
Save and Publish your changes.
Preventing the text on your Key Questions page from overlapping
- Navigate to your Community Themes tab.
- Click on the record for your Online Application Theme and Edit.
- In the Custom CSS field, add the following code:
h1.targetx-application-form-title.ng-binding {

padding-bottom: inherit;

}
- Save your changes.
Replacing the title or text for ‘No Applications Started’ messages in the application
In the Applicant Dashboard...
The applicant Dashboard supports using custom CSS to change the 'No Applications Started' text in the application.
Example 1: In this example, we will change the Title (circled in Red) by appending 'My' to the start.
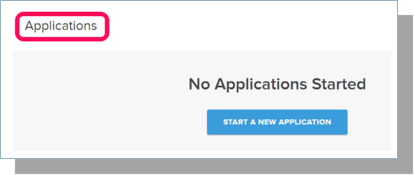
- Navigate to the Community Theme tab.
- In the Custom CSS field, enter the following:
.no-applications-title:before {
content: "My ";
}
Example 2: In this example, we will replace the Text (circled in red below) :
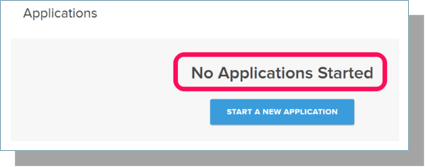
- Navigate to the Community Theme tab.
- In the Custom CSS field, enter the following (replace the highlighted section with your own text):
.no-applications-text {
text-indent: -9999px;
line-height: 0; /* Collapse the original line */
}
.no-applications-text::after {
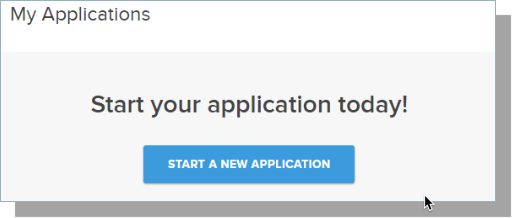
content: "Start your application today!";
text-indent: 0;
display: block;
line-height: initial;
} /* New content replaces original line height */
Results: