Setting up Salesforce Files for Portal Builder
Portal supports the use of Salesforce Image Files. In Lightning Experience, Salesforce Files unifies all your users' image files into a single system for easier management and collaboration. For additional information on Salesforce Files, see the Salesforce Help & Training article Salesforce Files and the TargetX article Using widgets in your Portal.
Step 1: Install the latest Base package
Step 2: Update System Permissions for Portal Users
Users that will be working with Image Files for Portal will need the following System Permissions:
- Access Libraries
- Lightning Experience User
- Enable Chatter*
*If you have the Profile-Based Chatter roll-out and Chatter is enabled in your Org, you must enable the Enable Chatter system permission. If you do NOT have Chatter
enabled in your Org OR you do NOT have the Profile-Based Chatter roll-out, this setting is unnecessary.
- Navigate to Setup and search for Profiles.
- Click the Profile for users that create/edit Portals.
- Click System Permissions.
- Click Edit.
- Check the boxes for Access Libraries.
- Check the box for Enable Chatter.*
- Check the box for Lightning Experience User.
- Save your changes.
Step 3: Update Object Permissions for Portal Users
Users that will be working with Image Files for Portal will need the following Object Permissions:
- Navigate to Setup and search for Profiles.
- Click the Profile for users that create/edit Portals.
- Click Object Settings.
- Click Edit.
- Locate the Files object.
- Click Edit.
- Set the Tab Settings to Default On.
- Save your changes.
Step 4: Assign a Role to Portal Users
For any user to be able to see the TargetX Builder - Portal Images library, the user must be assigned to a Role. If the user doesn't have a role assigned, the libraries will not be visible:
- Navigate to Setup and search for Roles.
- Click Assign next to the name of the desired role.
- Make a selection from the dropdown list to show the Available Users.
- Select a user on the left, and click Add to assign the user to this role.
- Click Save.
Step 5: Enable Salesforce CRM Content
- If you intend to use Image Files for Portal, you must enable Salesforce CRM Content.
- Navigate to Setup and search for Salesforce CRM Content.
- Click the checkbox for Enable Salesforce CRM Content. You don’t need to make any other changes to the settings in this window.
- Save your changes.
Note: If you get an error that ‘There are not enough content licenses to assign to all existing users’, uncheck the checkbox for Auto assign feature licenses to existing and new users and retry Save.
Step 6: Update User records for File Library Managers
Any user needing to manage Image File Libraries permission definitions must have Salesforce CRM Content User enabled on their user record. Library Permission definitions can only be accessed via Classic Salesforce mode under Setup > Content Permissions.
This allows the user to access:
- Libraries page (Classic and Lightning) - access to this page is only required to manage the Libraries themselves, not to upload Files.
- Content Permissions page (only available in Classic) - Users only need to access this if they want to manage Library Permissions (i.e., add, edit, delete, and modify the library permission definitions themselves; this page is NOT for assigning users to libraries).
- Navigate to Setup and search for Users.
- Click Edit next to the User that needs access as a File Library Manager.
- Check the box for Salesforce CRM Content User.
- Save your changes.
- Repeat for any users that need access as a File Library Manager.
Step 7: Grant Access to File Libraries
The TargetX Base package install script creates TargetX Library Administrator and TargetX Library Author File Library permissions you can assign to users.
- TargetX Library Author is for users uploading images for use with Portal.
- TargetX Library Administrator is for users that need to manage the library itself.
Users updating Portals with Salesforce Image Files will need access to the Salesforce File Library TargetX Builder - Portal Images. *DO NOT DELETE THE TARGETX BUILDER LIBRARY*
Note: The User that installs the Base packages will be given access to the File Libraries as TargetX Library Administrator.
- Make sure you are using Salesforce Lightning.
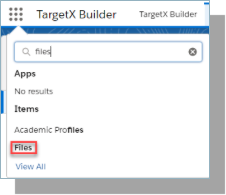
- From the App Picker, search for Files.
- Click Libraries.
- Click the TargetX Builder - Portal Images library.
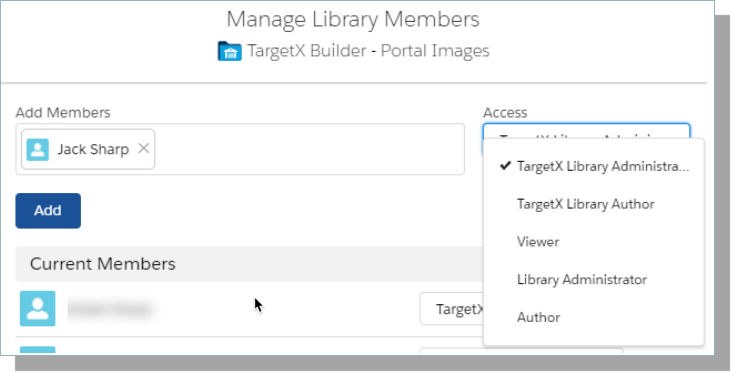
- Click the Manage Members button.
- Add Public Groups or individual Contacts and select the appropriate Access.
- Click Add.
- Repeat for each Group/Contact that needs access.