Creating Automations
Getting Started for Managing Your Applicant Pool
Automations Overview
WebAdMIT's Automation feature allows you to automatically move applicants into your Local Statuses based on List Manager criteria you set. You can then use the Local Statuses's automatic email and Decision Codes features to automatically email and update applicant accounts. You can review all automations in the Automation Manager feature in WebAdMIT.
The automation feature simplifies your workflow so that you can perform fewer manual tasks in managing your applicant pool.
Note that while your automation configurations are included in Transfer Settings, they will be disabled in the new cycle. You can reactivate them as needed.
Tips Before You Begin
Before building automations, you'll want to do a few things:
- Review in advance how your lists are built and map how applicants funnel through lists. Reviewing your current workflows will help you plan which automations may benefit your team.
- Decide the order you want applicants to move through automations. This will be helpful as applicants may meet several of your lists at the same time.
- Confirm that you have the applicable programs included across Local Status, list, and email templates. For example, if your list only includes applicants in Program A, and your Local Status can only be used for applicants in Program B, the automation will not work as expected.
- Consider building and testing your automations in the WebAdMIT sandbox environment first. This gives you a safe, protected environment to run workflows in. Then, once you're satisfied with how the automations are built, you can recreate them in the production environment.
If you're interested in creating automations based on a CAS application status, note the following:
- You can only create automations for the application statuses that appear in the List Manager. For example, while you may be able to view In Progress applicants, if you cannot create lists based on the In Progress application status, then you cannot create an automation around it.
- Conversely, if you can create lists based on the In Progress application status, you may want to exclude those applicants (or their In Progress designations if they're applying to multiple programs at your organization), since you'll most likely only want to use automations to process submitted applicants.
How Automations Are Triggered
Once you set up an automation, it'll automatically start working. You don't need to run a list to trigger the automation, and running a list won't trigger it. If needed, you can run automations on demand.
Additionally, an automation will be triggered only once for an applicant's designation. For example, consider this scenario:
- Aaron Applicant applied to Program A, and they appeared in a list that triggers an automation. Aaron will be moved through the automation workflow.
- If Aaron re-appears in the list a second time for Program A, they will not be moved through the automation workflow again.
- However, if Aaron also applied to Program B and appears in the same list with the automation, they will be moved through the automation workflow for Program B.
Gaining Access to This Feature
The Automation Manager is available under the Management panel and access to this tool is controlled through Work Groups. You must have the Automation Manager permission to create and edit automations. While other users can view the number of automations on the Local Status Manager and List Manager pages (if granted access), only users with this permission can view specific automations and their details.
Configuring an Automation
You can create automations for only the field lists you can view. Additionally, you must have all automation workflow components created in advance (e.g., Local Statuses, email templates, lists, etc.).
- Using the Menu Bar, open the Reports & Exports panel, then click List Manager.
- Click the calendar icon for the field list you want to create an automation for. Note that you cannot create automations for composite lists at this time.
- Click the green plus sign to add a new automation.
- Select the automation type. Currently, only Local Status automations are available.
- Select the Local Status you want to move applicants into from this list. Once you select this, any Decision Codes and email templates tied to the Local Status will appear.
- Select if you want to automatically send any attached email templates when the automation is run.
- Select which programs you want to use this automation for.
- Click Add Local Status.
- Click Submit Changes.

Example Scenarios
Consider these example scenarios for workflows that can save you time and effort. When building workflows that use multiple WebAdMIT features, we recommend using consistent naming conventions to map functionality across the system more easily (e.g., the same or similar template name for your Local Statuses, Email Templates, Lists, etc.).
Scenario 1: Finding recently submitted applicants and sending them a welcome email
You can set that when an applicant applies to your program, they automatically move into a Recently Submitted Local Status. Then, using the Local Status feature, you can configure the Local Status to automatically send an email template that includes a welcome message and key details about your program and requirements.
Click to view details on how to build this workflow.
First, create an Email Template for your welcome email and include key details about your program and requirements.
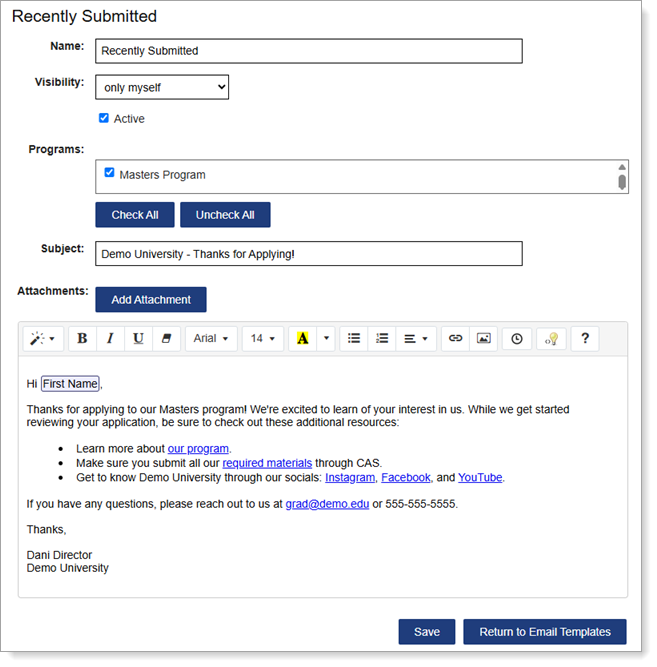
Next, build a Local Status that has the above email template linked to it.
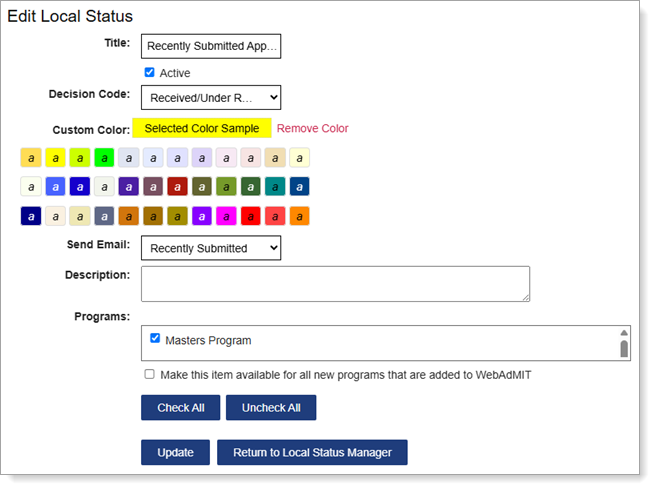
Then, build a Field List that searches for applicants who have applied to your program. While you can do this in a few ways, here we're focusing on any applicant who has paid for and submitted to your program, regardless of when in the cycle.

Finally, build your Automation.

Scenario 2: Organizing and emailing newly Verified applicants
Building off of Scenario 1 above, a next step you could take is then finding from your recently submitted applicants who have received your welcome email, those applicants who are now Verified and ready to enter your review process.
Note that you can adapt this process if your CAS's final application status is Complete, or if you track additional program requirements through the Requirements feature.
Click to view details on how to build this workflow.
First, create an Email Template to notify the Verified applicants that you'll be reviewing their application.

Next, build a Local Status that has the above email template linked to it.

Then, build a Field List that searches for applicants who are in your Recently Submitted Applicants Local Status and the Verified application status. This ensures that you have already sent these applicants a welcome email via the automation workflow in scenario 1, and now they'll receive the next ready-to-review email notification.

Finally, build your Automation.

Scenario 3: Identifying potentially fraudulent accounts
While there are various indicators for identifying potentially fraudulent accounts, in this example, we're focusing on inconsistencies in an applicant's data. We recommend that your admissions team evaluate fraudulent account indicators you have noticed and adapt this example to your needs. Overall, you'll want to establish a workflow to identify potentially fraudulent applicants earlier in your review process, before you begin a more formal review with them.
In this example, you can build a field list to identify applicants whose Permanent Mailing Address State does not equal their State of Legal Residence. Next, you can automatically move those applicants into a Potentially Fraudulent Accounts to Review Local Status. Then, your team can review these applicants periodically and reach out to them to confirm if they're a real applicant.
Click to view details on how to build this workflow.
First, build a Local Status to group potentially fraudulent accounts together.

Then, build a Field List that searches for applicants whose Permanent Mailing Address State does not equal their State of Legal Residence.

Finally, build your Automation. You can then review these applicants periodically and reach out as needed to confirm if they're a real applicant.

Managing Automations
All automations associated with lists and Local Statuses are listed in the Automation Manager, List Manager, and Local Status Manager pages.
You can manage automations in the Automation Manager.
- Using the Menu Bar, open the Management panel, then click Automation Manager.
- Use the filter options to search for automations.
- Click the pencil icon to view the automations.

Alternatively, you can manage automations in the List Manager.
- Using the Menu Bar, open the Reports & Exports panel, then click List Manager.
- Click the calendar icon.
Adding a New Automation
Use the green plus sign to add a new automation for this list.
Editing Automations
Use the pencil icon to edit an existing automation. Note that you can only edit automations for lists that you can view.
Running Automations On Demand
From the Automation Manager or List Manager page, click the eye icon, and then click the Run Now button to immediately run an automation. This is useful when setting up an automation for the first time or testing it to make sure it works as you expect.
Note that when you click Run Now, WebAdMIT will identify all your applicant's current designations and apply the Local Status automation change linked to the list. Local Statuses will not be changed if the automation has already been run for that applicant's designation or if the Local Status is not scoped to that applicant's designation.
Disabling and Enabling Automations
Use the minus icon to disable and enable automations individually or in batch, and then click Submit Changes. Any disabled automations will be highlighted in red.
Deleting Automations
Use the trash icon to delete automations individually or in batch, and then click Submit Changes.
You can view previously deleted automations by clicking the Show Deleted checkbox.
Setting Automation Orders
You can view automation orders under the Order column and within the automation/list.
If there are multiple automations on the same list:
You can order them by editing the automation or list, then clicking and dragging. List order is from left to right.
If an applicant meets the criteria for several lists with automations:
You'll need to decide in advance the automation order (i.e., which automations an applicant should be processed through first). Once you decide this, you can then set the automation order simply by clicking and dragging your lists in the List Manager into your desired order.
Important Note: because the List Manager page is shared by all users within your organization, other users who may not have the ability to create automations can still change automation orders by re-ordering the lists they have access to in the List Manager. Because of this, you may want to consider these steps:
- Notify all users at your organization not to change the order of lists on the List Manager page.
- Only build automations for lists that are visible to a select group of users and who understand that changing list orders will change automation orders.
Reviewing Automation Logs
You can view automation logs in the Automation Manager, List Manager, and Applicant Details page.
From the Automation Manager or List Manager page, click the eye icon. The last 50 applicants processed by the automation will be listed under the Logs section.

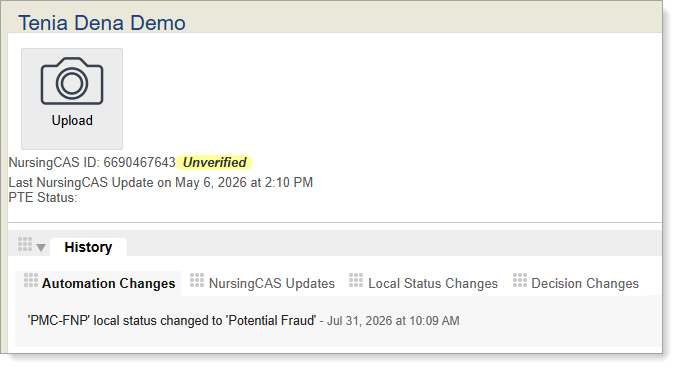
Alternatively, from the Applicant Details page, navigate to the History panel, then view the Automation Changes subpanel.