Work Groups Guide
Why use Work Groups?
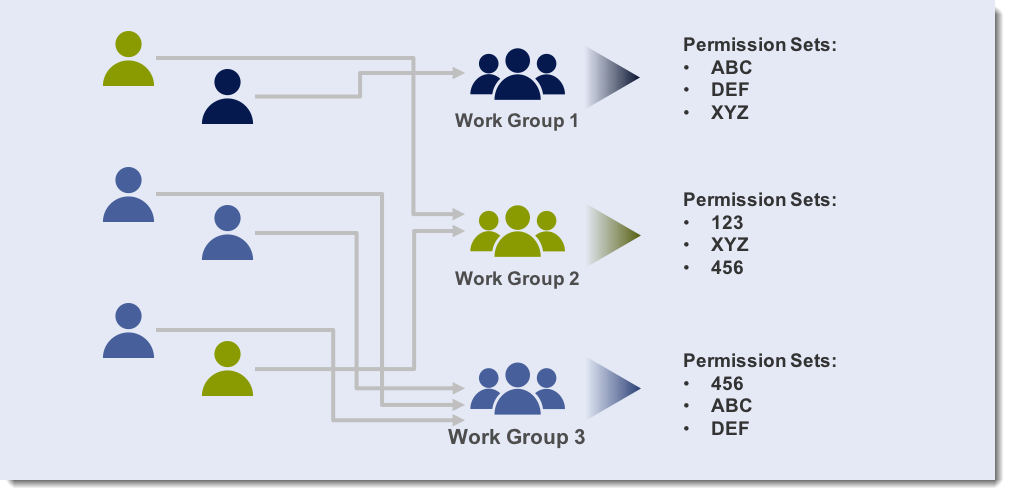
Work Groups allow you to manage permissions for a group of users instead of separately managing permissions for each individual user. For example, you can establish the permissions for all your reviewers in a single Work Group.
Work Groups are divided into what a user can do in WebAdMIT (Permission Sets), what a user can see on an applicant’s page in WebAdMIT (Panels and Sub-Panels Enabled for Viewing), and for some CASs, what reports a user can run. Based on what the user’s abilities need to be in WebAdMIT, some or all of these sections of the Work Group template may need to be completed.
A WebAdMIT Administrators Work Group is available by default and provides users with full administrative access. If you want to limit a user's access to WebAdMIT, review the example Work Groups below; you can use these as a template when building your own Work Groups. Be sure to review how to create Work Groups and user accounts first.
What's impacted when I limit a user's access through Work Groups?
If you restrict access to a permission set, then a user cannot access a feature's management tool and/or perform updates on an application.
- Click here to view a summary of the permission sets available in WebAdMIT.
Additionally, if you restrict a user from viewing a panel of data, they cannot see the restricted information on the Applicant Details Page or full application PDF. They may be able to view the restricted information in other places in WebAdMIT, depending on their Work Group configurations and access to features. As a best practice, we recommend that you thoroughly test current and new Work Group templates to ensure the user has the correct access (e.g., sit side-by-side with a user to compare the Work Group template you built and their view and permissions in WebAdMIT).
Be sure to review How the CAS Application Sections Link to WebAdMIT for a more thorough understanding of where CAS application information appears in panels and subpanels.
Example Work Groups
You can customize permissions and Work Groups to fit your needs. The examples below show how you might configure a Work Group and how the resulting applicant pages would appear to its members.

Example 1: Faculty Reviewers/Interviewers
Purpose
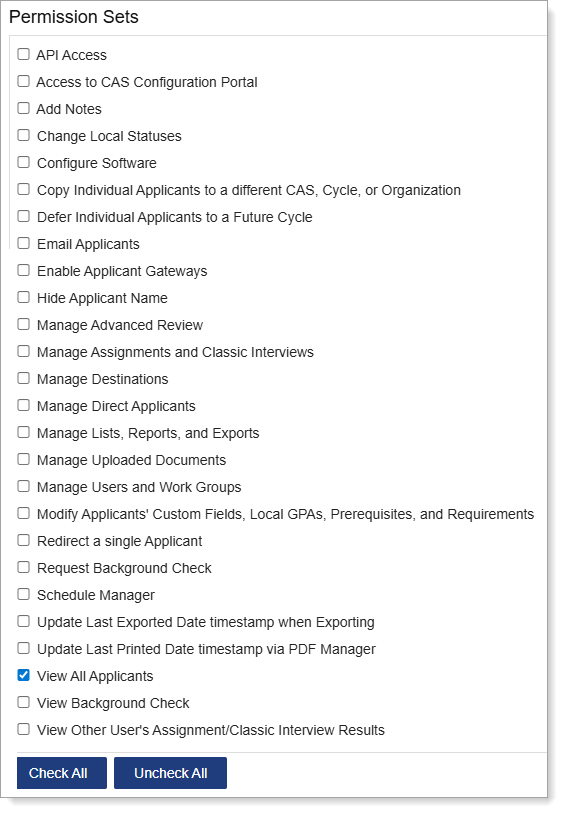
For users who will be reviewing applicants and/or conducting Interviews. In this example, they don’t need any administrative functionality through permission sets and only need access to select panels (e.g., Assignments, Education, Evaluations, Experiences, etc.).
Permissions Selected

Panels Selected

Resulting Applicant Details Page

Resulting Full Application PDF

Example 2: Faculty Reviewers/Interviewers without Race/Ethnicity Data
Purpose
For users who will be reviewing applicants and/or conducting Interviews and should not view applicant race or ethnicity data due to program, university, state, or federal mandates. In this example, they don’t need any administrative functionality through permission sets and only need access to select panels (e.g., Assignments, Education, Evaluations, Experiences, etc.).
Permissions Selected

Panels Selected
*Note that the Personal Information Race and Ethnicity subpanel is not selected. For some CASs, race and ethnicity data may be collected in a CAS Custom Question. If that is the case, then do not select the corresponding panel/subpanel under CAS Custom Questions. Contact a member of your account team to learn how your CAS collects this data.

Resulting Applicant Details Page (note that the Race and Ethnicity subpanel does not appear under the Personal Information panel)

Resulting Full Application PDF (note that the Race/Ethnicity section does not appear under the Birth Information section)

Example 3: Faculty Reviewers Using a Blind Review Process
Purpose
For users who will be reviewing applicants via a blind review process. In this example, they don’t need any administrative functionality through permission sets and only need access to select panels (e.g., Assignments, Education, Evaluations, Experiences, etc.).
Permissions Selected
Note that the Hide Applicant Names permission does not hide the applicant's name in the full application PDF, reports, or the applicant's email address, where their full name may be listed. You may want to remove access to these sections when conducting blind reviews.

Panels Selected

Resulting Applicant Details Page

Resulting Full Application PDF
The Hide Applicant Names permission does not hide the applicant's name in the full application PDF. You may want to remove access to this feature when conducting blind reviews.
Example 4: IT Staff
Purpose
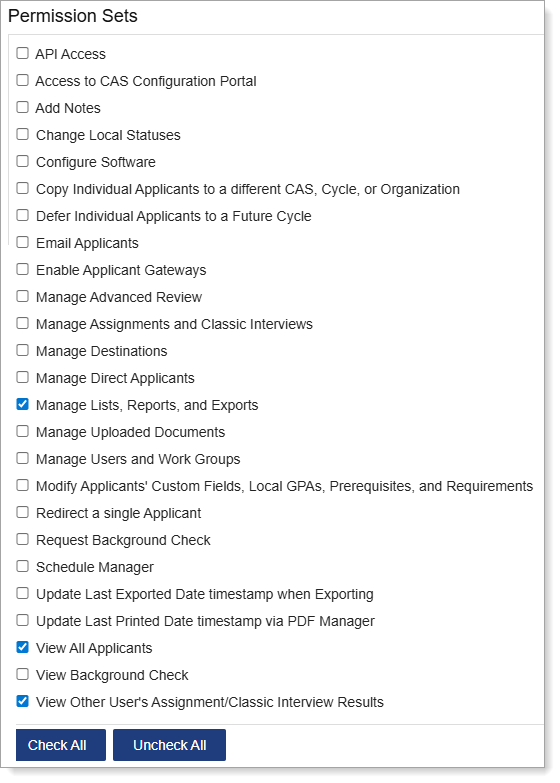
For users who will be working with applicant lists and configuring exports. They only need access to the data that will be exported.
Permissions Selected

Panels Selected

Resulting Applicant Details Page

