Quick Start Guide for Reviewers and Interviewers
Overview
Your institution's admissions team uses WebAdMIT to streamline their admissions review process. This page provides key information you need to get up and running so you can review applicants as instructed by your admissions team.
Introduction to WebAdMIT
Before jumping into WebAdMIT, we recommend you complete the on-demand Centralized Application Service: Your Admissions Management Solution course, accessible in Liaison Academy. This course provides an introduction to the two primary components of a centralized application system (CAS):
- The application itself, and
- WebAdMIT, the application management system.
Additionally, as you read through the support material on this page, you may come across unfamiliar terms. Review our Glossary, as needed.
Getting Started with the Essentials
Create a WebAdMIT Account
To obtain a WebAdMIT account, contact the primary user at your institution. Once the primary user creates your account, you'll receive an email with directions on how to log in to WebAdMIT and create a password.
Access an Existing Account
Reset Your Password
Navigating the Dashboard
Depending on how your institution's WebAdMIT administrator configured the system, your Dashboard may not contain all of the elements outlined below.
Video Overview
Dashboard Areas
After logging in to your WebAdMIT account, you land on the Dashboard, which includes an overview of your applications, their statuses, and access to WebAdMIT's various tools. There are five main areas of the Dashboard:

- Page Header: displays your name and school, as well as:
- CAS Logo: click the link to return to the Dashboard.
- Dashboard Link: provides quick access to the Dashboard.
- Account Link: provides access to your account information; here, you can manage your contact information and password.
- Logout Link: logs you out of your current session.
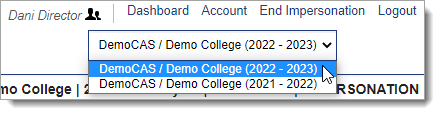
- Cycle Switcher: where applicable, a drop-down appears, allowing you to adjust your view to a different CAS or cycle.
- Splash Message: displays messages from Liaison and does not appear unless there is at least one posted message.
- Menu Bar: contains the tools you use to search, manage, and analyze your applicant pool and provides access to support and training resources. Management and configuration functions are available for select users based on their permissions.
- Applicant Channels: provides a snapshot of recent and upcoming activities, including:
- Transfer Settings from Previous Setup: where applicable, this panel allows you to transfer items from the previous cycle to the current cycle. This is generally done at the beginning of a new cycle.
- Notes from CAS: displays notes left on applicants' accounts by the customer service team. These are usually limited to reasons why an applicant was placed in the Undelivered application status (e.g., the applicant did not report coursework correctly) or On Hold application status (e.g., the applicant withdrew their application). This panel only appears once you have an applicant with a note.
- Review Assignments: displays any Assignments assigned to you, and only appears if you have incomplete Assignments.
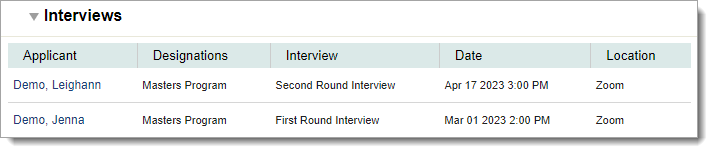
- Interviews: displays any Interviews assigned to you, and only appears if you have incomplete Interview assignments.
- Recently Submitted Designations: displays applicants who have recently designated a program at your institution and submitted their application.
- Recently Updated Applicants: displays the most recent changes occurring in WebAdMIT, including changes to contact information, new letters of evaluation, new test scores, etc.
- Recent Status Changes: displays the most recent Local Status changes made by your admissions staff.
- Status Channels: provides a numeric count of applications at each stage in your admissions process, including:
- Designations by Local Status: displays the number of applicants you’ve assigned to each Local Status.
- Designations by Decision: displays the number of applicants assigned to a Decision Code.
- Designations by Application Status: displays the number of applicants in each Application Status.
- Designations by Academic Update: displays the number of applicants in each Academic Update status.
Note that the Status Channels count designations, not applicants. If an applicant applies to more than one program (designation) at your institution, then each of their designations is counted. For example, if an applicant applied to both programs A and B, then they are counted twice (once for each program).
Some of the panels that appear on the Dashboard are affected by your Work Group permissions. However, most panels appear for all users, and new panels cannot be added. Additionally, panels cannot be reordered. If you do not want to view a panel's contents, you can minimize the panel by clicking the arrow icon. WebAdMIT will remember if you prefer to keep a panel open or closed. The Notes from CAS panel will always be open when you navigate to the Dashboard so that you are aware of any recent notes. You can minimize it as needed.
Searching for Applicants
If your institution's WebAdMIT administrator granted you access to the applicant pool, you may need to search and filter by specific criteria.
- Using the Menu Bar, open the Applicants panel, then click Search.
- If filters are hidden, click Show Filters to display them.
- Enter your criteria. In some drop-downs, you can search by Any Value and None. Note that the following fields correspond with data on the Applicant Details page:
- Last Name, First Name, CAS ID, and Application Last Changed On fields correspond with data in the Applicant Header.
- State/Province, Email Address, and Preferred Phone Number fields correspond with data in the Contact Information panel, Current Address subpanel.
- Applicant Specific Deadline, Start Term, Application Status, Local Status, Decision Code, Designation Submitted Date, and Designation fields correspond with data in the Designation panel.
- Reviewer corresponds with data in the Assignments panel.
- Click Search to view applicants or Reset Criteria to clear your filters.

Viewing and Sorting Search Results
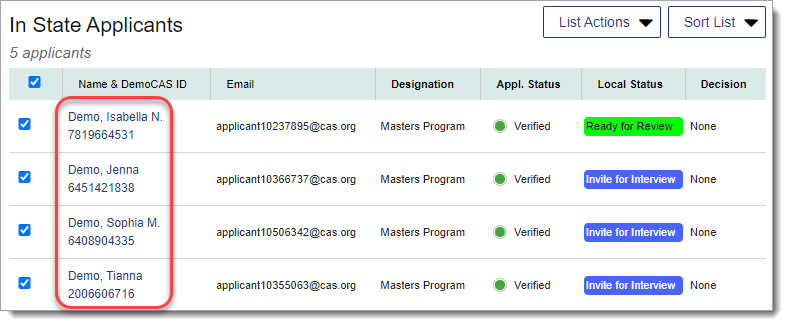
Only applicants you have permission to view will appear in your search results. Once your search results appear, you can:
- Click Sort Results to sort your results by name, email address, or ID number.
- Click on your desired applicant's name to view their Applicant Details page.

Viewing Application Information
Note: information on the Applicant Details page appears in categorized, collapsible panels. Depending on how your institution's WebAdMIT administrator configured the system, you may not have access to all of the panels described here.
Video Overview
Finding the Applicant Details Page
The information entered into the application by the applicant is viewable on the Applicant Details page. From any search or list, click the applicant’s name to view the Applicant Details page.
Completing Your Assignments
Your WebAdMIT administrator may assign applications to you for review.
Video Overview
Completing the Assignment
Once applicants have been assigned to you for review, you can view them from the Review Assignments panel on the Dashboard.
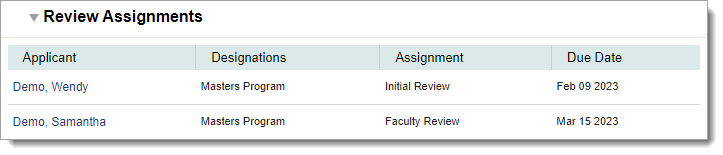
Clicking an applicant's name takes you to their Applicant Details page, where the Assignment results can be submitted.
- Navigate to the Applicant Details page.
- Under the Assignments panel, click Submit Results.
- Enter scores and comments, where applicable. If scores are enabled, the individual question score is required. Depending on the Assignment's configuration, overall scores are calculated by a sum or average of the question scores, or they can be entered independently by the reviewer.
- Enter overall comments and overall remarks, where applicable.
- Click Complete assignment to submit your responses or Save without Completing to save your input for future edits.

Assignment Notifications
When you have at least one applicant assigned to you, you'll receive periodic email notifications. There are two notification types, daily and weekly, that can be enabled in your Email Notifications settings.
- Daily Assignment Emails: when you select this type of notification, you receive an email the day after an Assignment is created for you. For example, if on Tuesday morning you receive an Assignment, then a notification of this Assignment is sent on Wednesday. Note that this email only includes Assignments that you have not yet completed.
- Weekly Assignment Emails: when you select this type of notification, you receive an email each Monday morning that lists all Assignments you have not yet completed. These emails discontinue once you have completed your Assignments.
Example of Weekly Assignment Email:
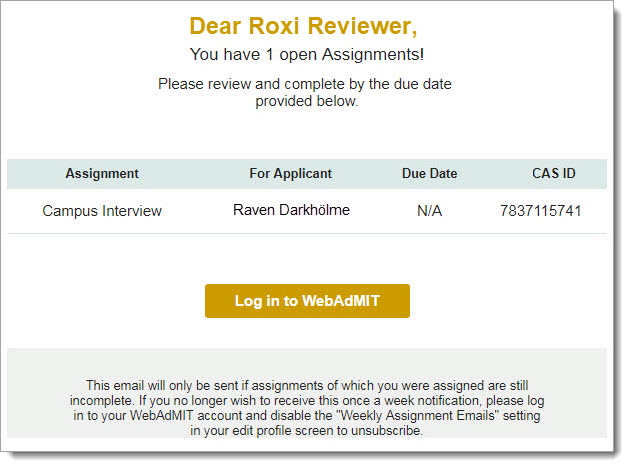
The Log in to WebAdMIT button included in the email directs users back to WebAdMIT's main site. If you're in a CAS using Single Sign On (SSO), you may need to log in using your CAS-specific URL instead. We recommend bookmarking your appropriate URL.
You can adjust email notifications for yourself, or if you're in the WebAdMIT Administrators Work Group, you can adjust these settings for other users from the Admissions Users page. To adjust your email notification settings:
- Click Account at the top right of WebAdMIT, then click Edit My Account.
- At the bottom of the My Account page, click Email Notifications.
- Select your desired notification settings.
- Click Submit to save your changes or Cancel to discard your changes.

Completing Your Interviews
Your WebAdMIT administrator may ask you to input Interview results into WebAdMIT.
Video Overview
Completing the Interview
Once applicants have been assigned to you to interview, you can view them from the Interviews panel on the Dashboard.
Clicking an applicant's name takes you to their Applicant Details page, where the Interview results can be submitted.
- Navigate to the Applicant Details page.
- Under the Interviews panel, click Submit Results.
- Enter scores and comments, where applicable. If scores are enabled, the individual question score is required. Depending on the Interview's configuration, overall scores are calculated by a sum or average of the question scores, or they can be entered independently by the interviewer.
- Enter overall comments and overall remarks, where applicable.
- Click Complete interview to submit your responses or Save without Completing to save your input for future edits.